

Prerequisites
Before starting, ensure you have:- Dataset formatted according to the Encoder training requirements
Supported Model Architectures
Simplismart supports training for the following encoder-only transformer architectures:- BERT (Bidirectional Encoder Representations from Transformers)
- RoBERTa (Robustly Optimized BERT Pretraining Approach)
- DeBERTa (Decoding-enhanced BERT with Disentangled Attention)
- DistilBERT (Distilled version of BERT)
Dataset Preparation
Your dataset must be in JSONL format, where each line contains the input text and its corresponding label for text classification. Example JSONL Entry:messages– Array containing the input text for classification. Each message has aroleandcontent.role– Indicates the message source. Use"user"for encoder model training.content– The text sequence to be classified (e.g., product review, customer query, email content).label– Integer representing the target class (e.g.,0for negative sentiment,1for positive sentiment).
Example JSONL File
Here’s a complete example for sentiment analysis (binary classification with 2 labels):Label Guidelines:
- Labels must be integers starting from
0 - For binary classification: use
0and1 - For multi-class: use
0,1,2, etc. (e.g., 5 classes = labels 0-4) - Ensure all labels in your dataset are represented in the training data
Creating a Training Job
To create a new training job, navigate toMy Trainings > LLM/VLM Model > Add a Training Job
1
Configure Basic Settings
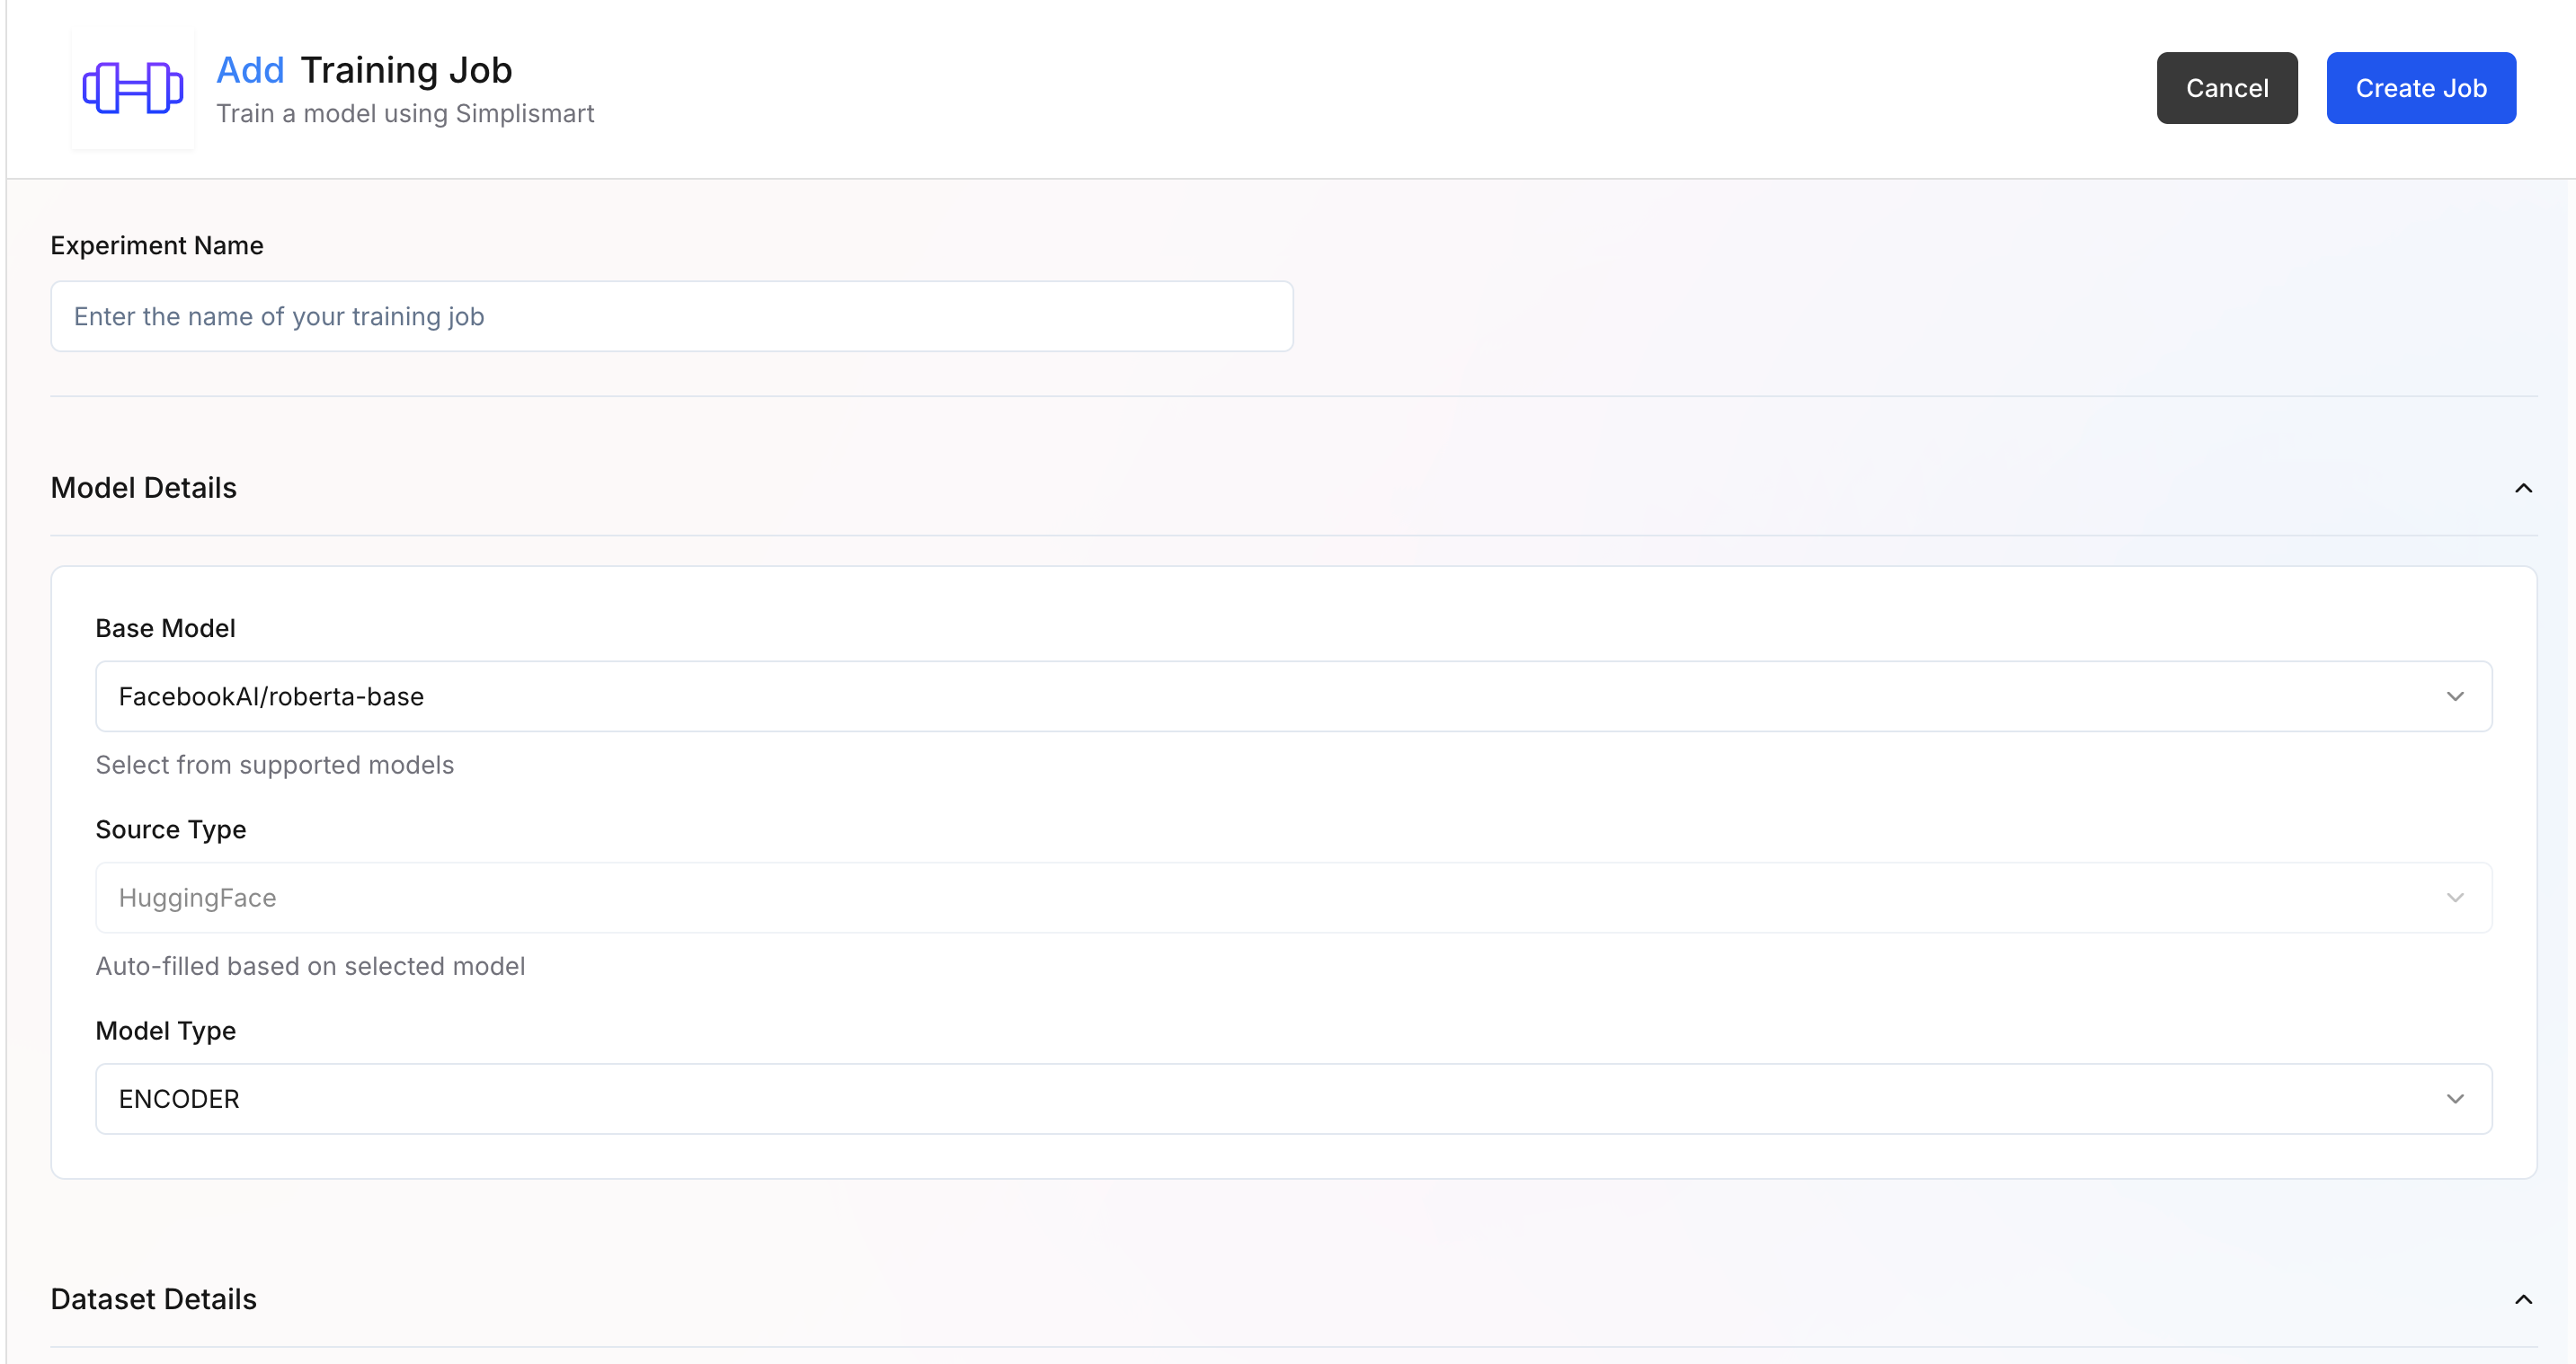
- Experiment Name: Enter a descriptive name for your training experiment
- Model Details:
- Base Model – Select the base model you want to fine-tune. Supported models (e.g.,
FacebookAI/roberta-base) are available in the dropdown. - Source Type – Automatically filled based on the selected model source (e.g.,
Hugging Face). - Model Type – Defines the architecture type for training. (here
Encoder)
- Base Model – Select the base model you want to fine-tune. Supported models (e.g.,
When the base model is selected, the rest of the parameters get updated automatically with recommended defaults for that model and training type.
2
Dataset Details
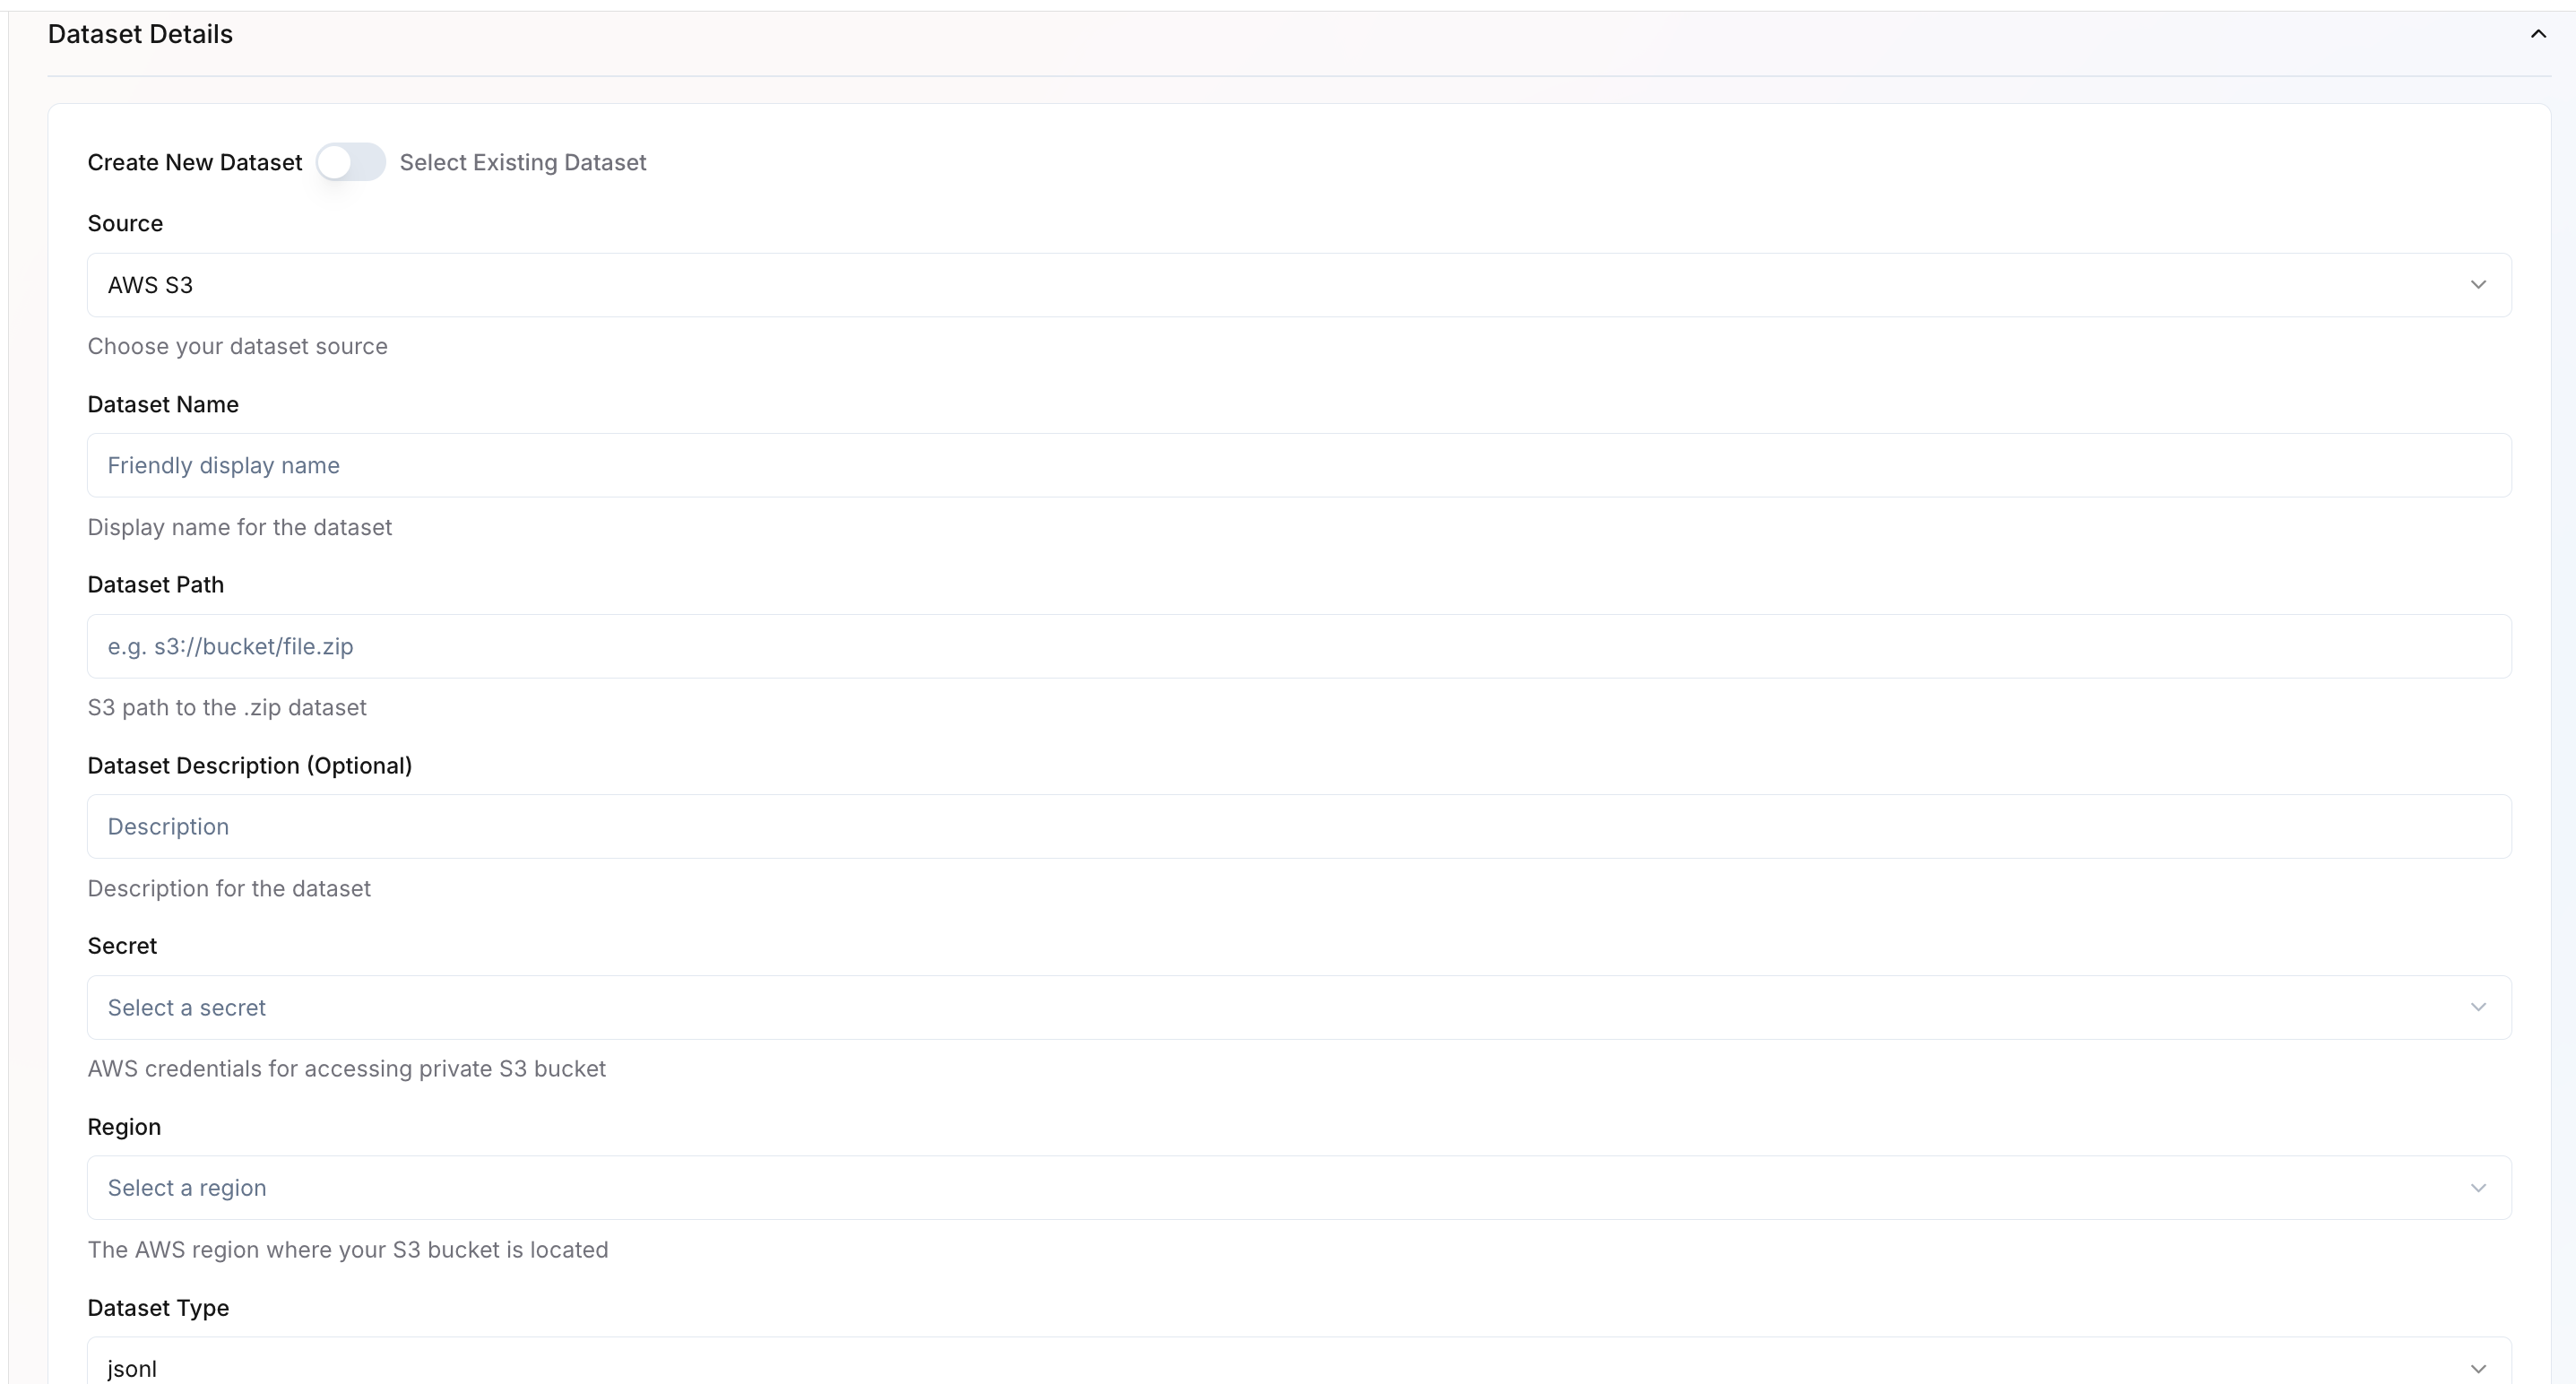 You can either create a new dataset or select an existing one.Create New Dataset
- Source – Choose the dataset source (e.g., AWS S3, GCP).
- Dataset Name – Provide a friendly name for your dataset.
- Dataset Path – Specify the full path to your dataset (e.g.,
s3://bucket/file.jsonl). - Dataset Description – Optional field for describing your dataset.
- Secret – If AWS/GCP source, select the credential secret required to access private buckets. Learn how to configure cloud credentials.
- Region – If AWS/GCP source, choose the region where your bucket is located.
- Dataset Type – Specify the data format, such as JSONL.
- In the Dataset Details section, select Use Existing Dataset.
- A dropdown will appear listing all datasets available under your organization.
- Choose the dataset you want to attach to this training job.
- Once selected, key information such as Dataset Name, Source, Path, and Region will auto-populate based on the saved configuration.
- Review the prefilled values to ensure the dataset is still valid and accessible.
- After selection, proceed to configure Dataset Configuration parameters.
3
Dataset Configuration
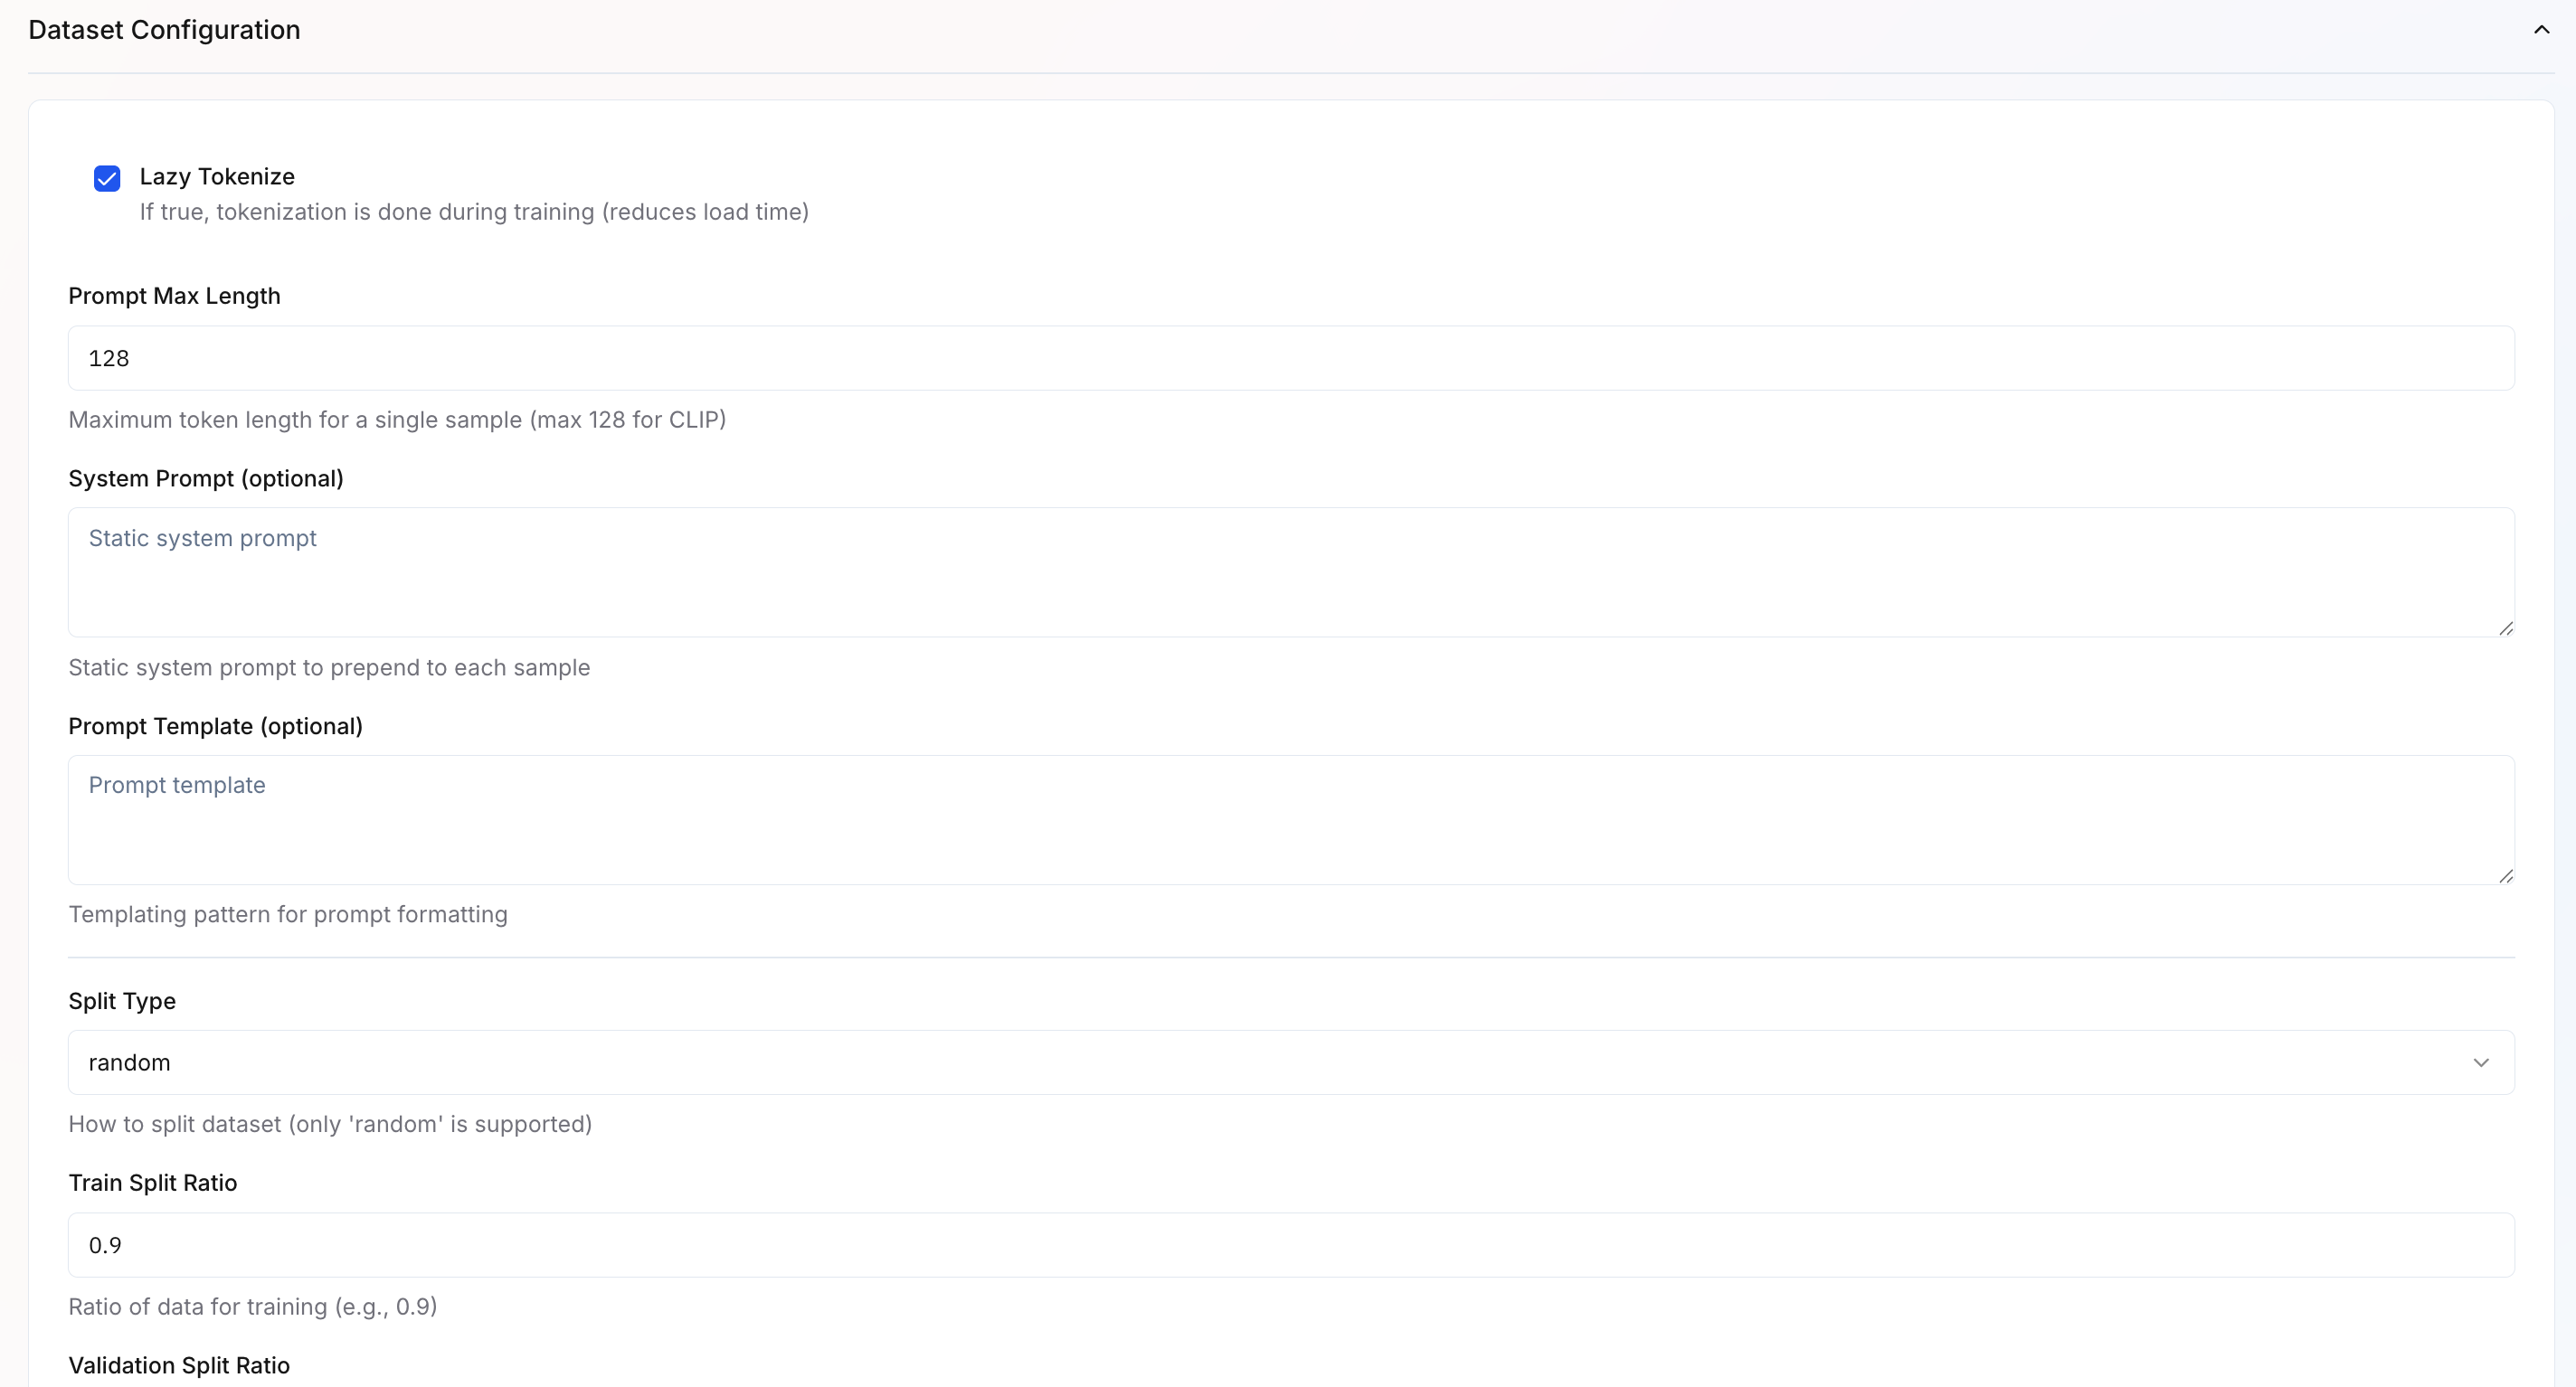
- Lazy Tokenize – Tokenizes text during training rather than upfront, reducing memory usage and initial load time.
- System Prompt – Optional instruction prepended to each input sequence (e.g., “Classify the sentiment of the following text:”).
- Prompt Template – Template for formatting inputs consistently (supports variables like
{content}). - Split Type – Method for dividing data into train/validation sets. Currently supports
randomsplitting. - Train Split Ratio – Proportion of data used for training (default:
0.9or 90%). - Validation Split Ratio – Proportion reserved for validation to monitor overfitting (default:
0.1or 10%).
4
Infrastructure Configuration
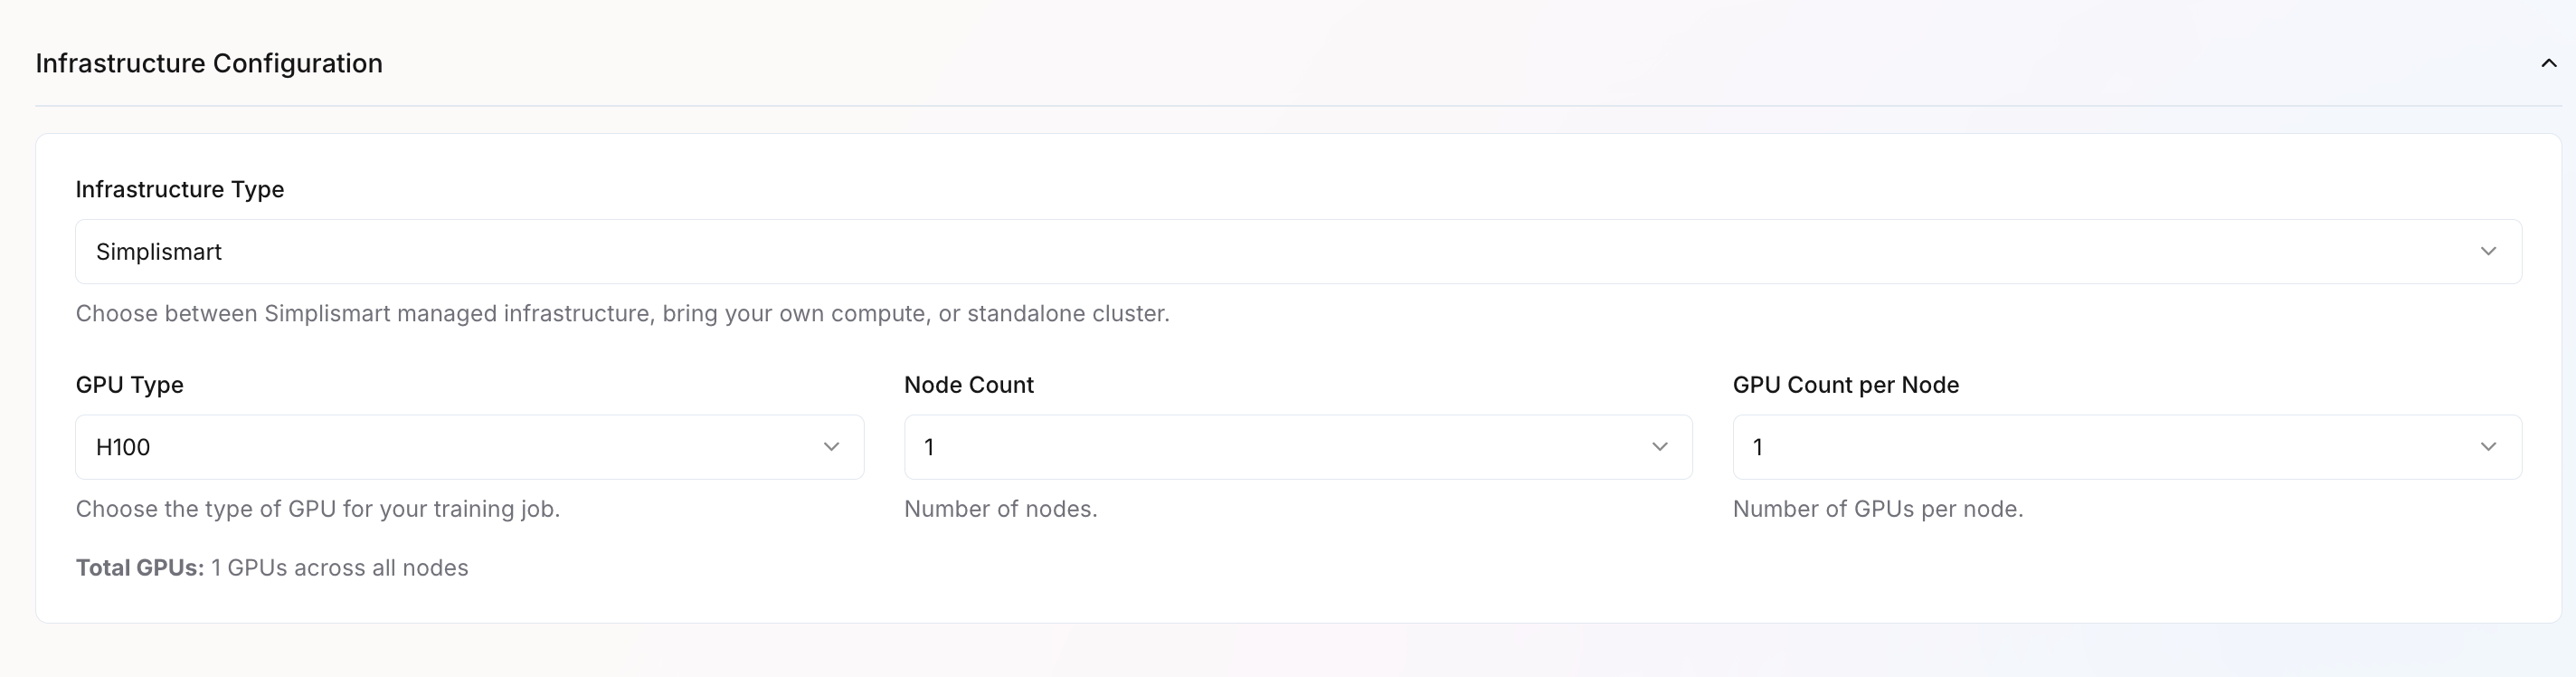
- Infrastructure Type – Choose where to run training:
- Simplismart Cloud – Fully managed infrastructure
- Bring Your Own Compute – Use your own cloud resources
- Imported Cluster – Use a pre-configured standalone cluster
- GPU Type – Select GPU hardware based on your performance needs
- Node Count – Number of machines to use
- GPU Count per Node – GPUs per machine
5
Set Training Parameters
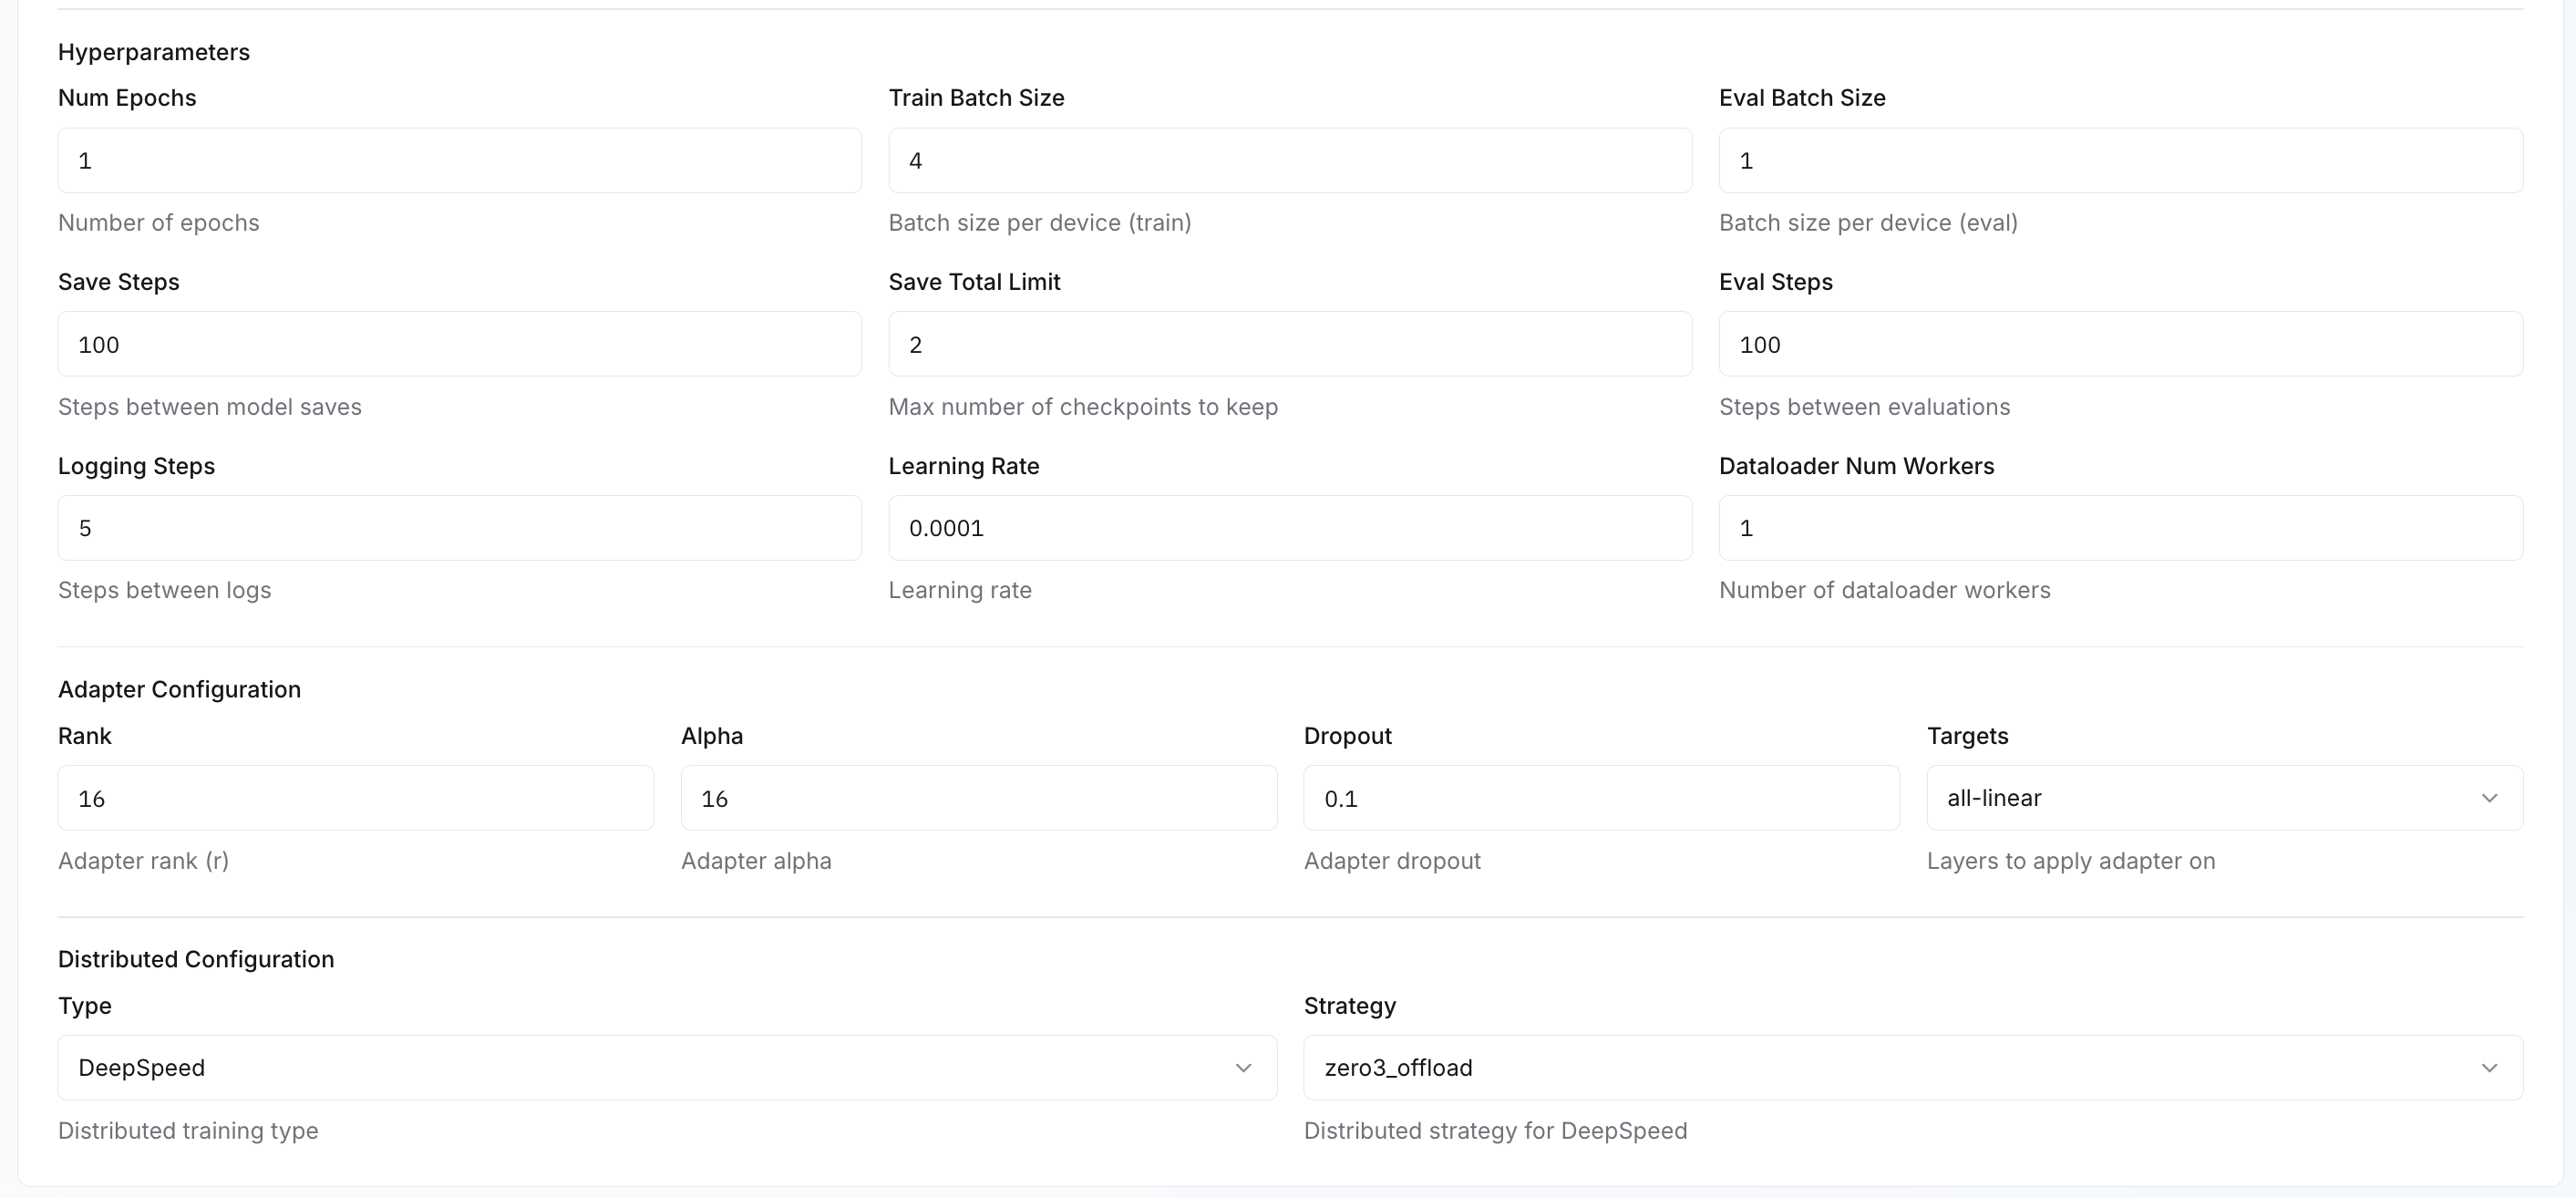
Configure your training parameters based on your use case. The configuration is organized into several sections: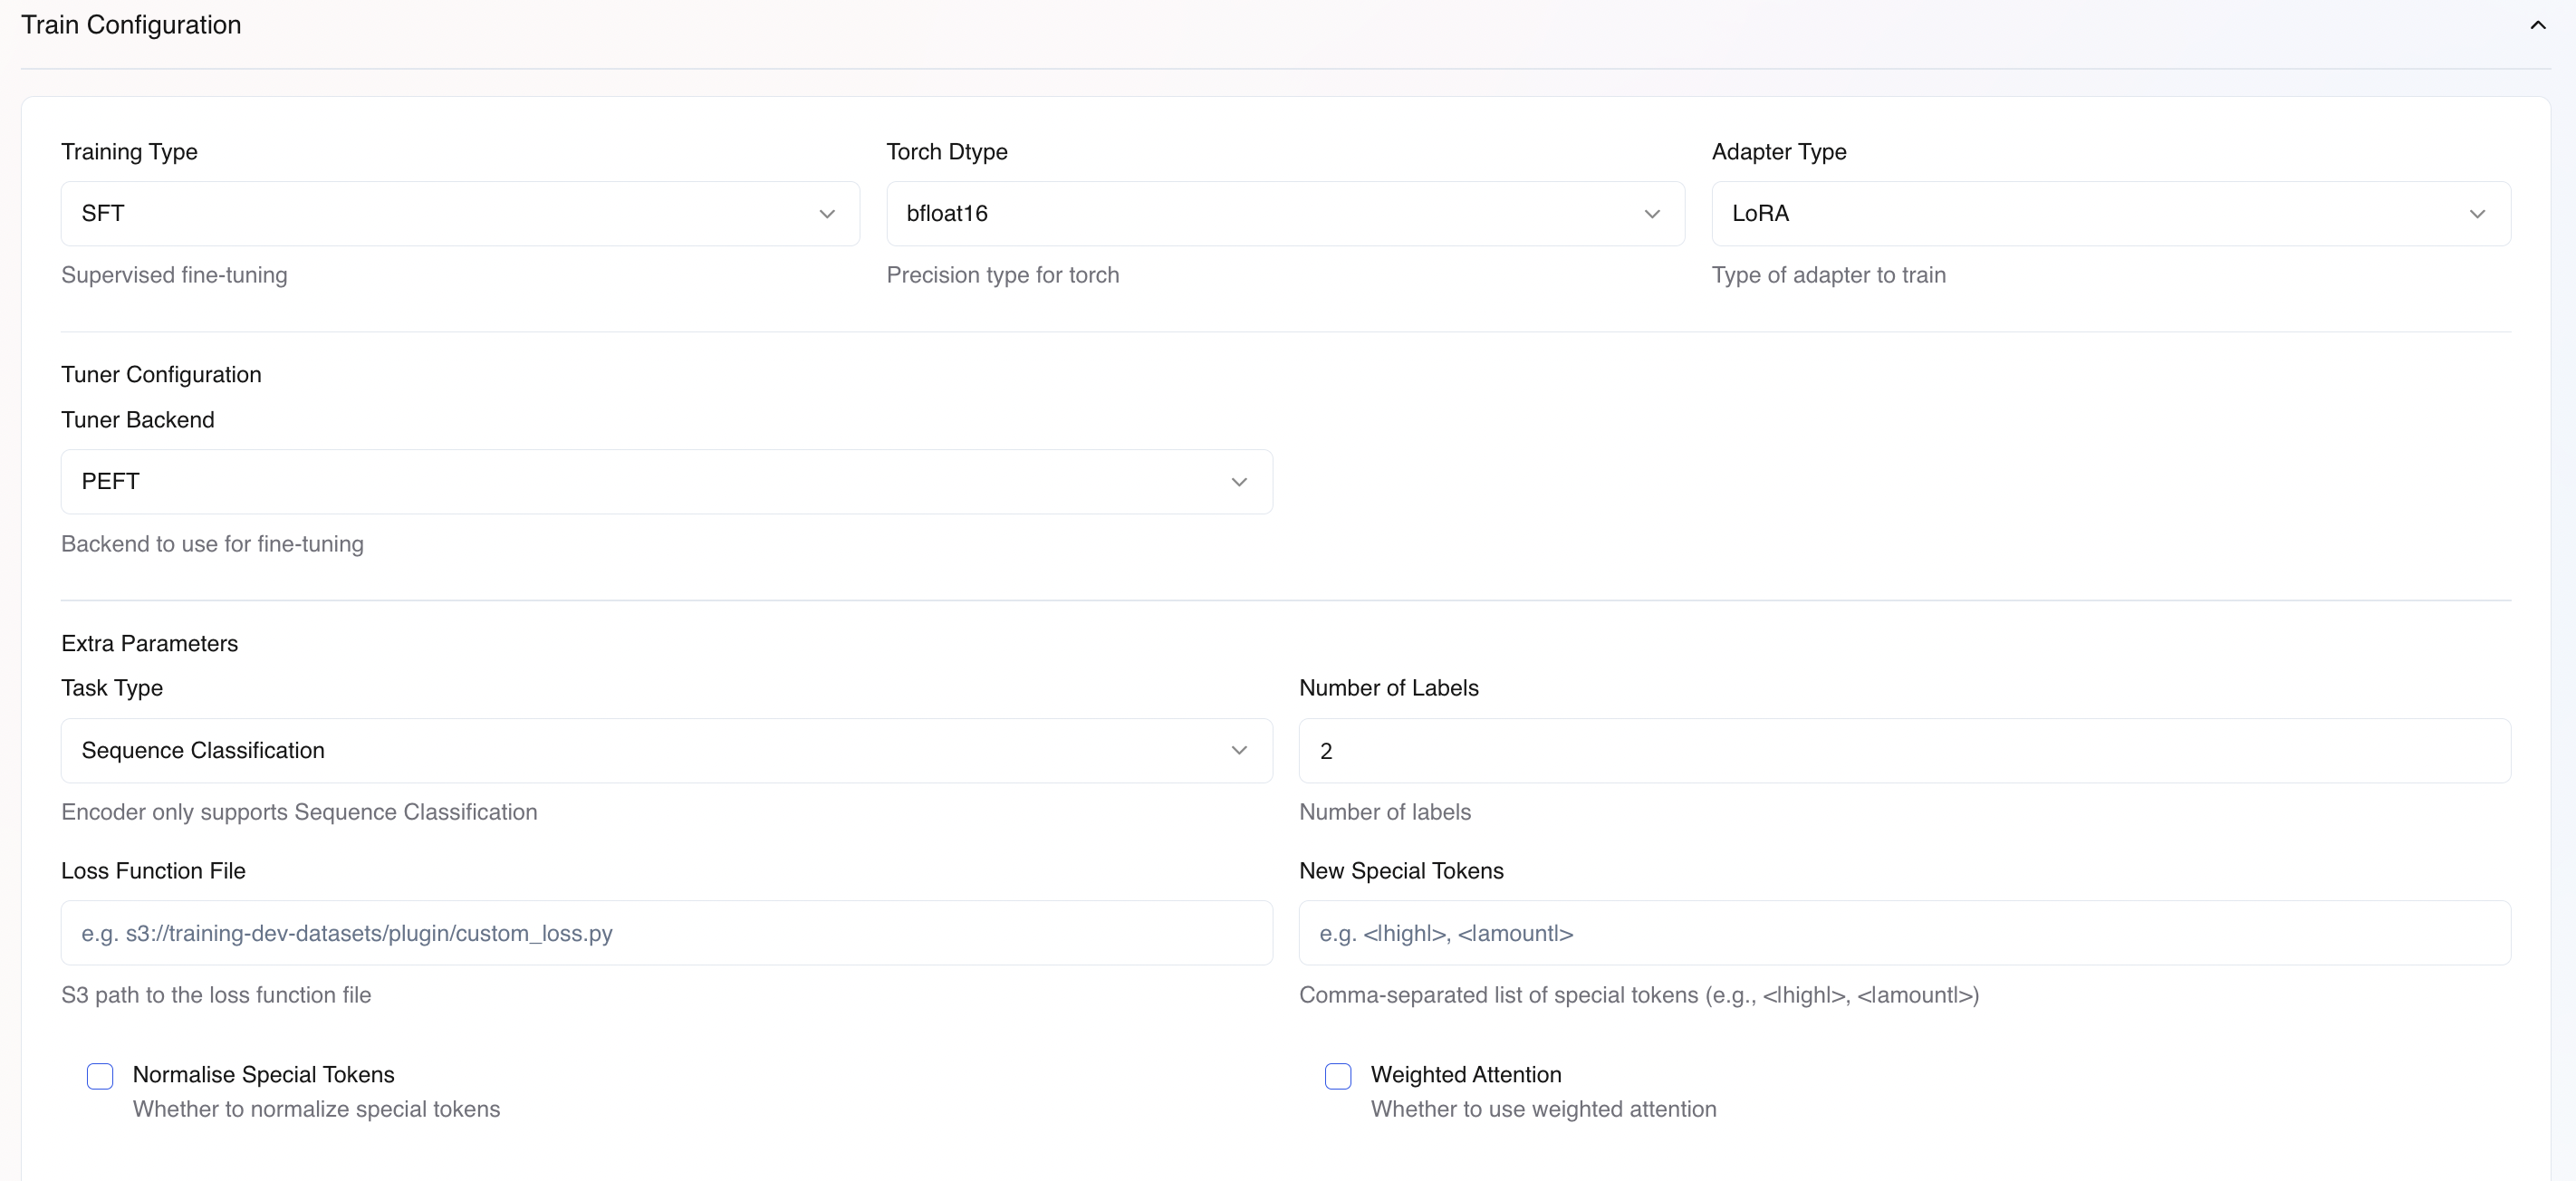
Basic Training Configuration
Tuner Configuration
Extra Parameters
Special Token Initialization:Normalisation of embedding is only performed when
Normalize Special Tokens is True.When using compound special tokens (e.g., <|high_amount|>), their embeddings can be initialized from constituent tokens (<|high|> and <|amount|>) by taking the normalized mean of the constituent embeddings. This helps the model understand the semantic relationship between tokens.Example:If you add tokens <|high|>, <|amount|>, and <|high_amount|>, the embedding for <|high_amount|> will be:embedding(<|high_amount|>) = (embedding(<|high|>) + embedding(<|amount|>)) / 2The custom loss function must expose a variable named
loss_fn_adapter (a Callable) with the signature shown above. The function receives model outputs, labels, and optionally the number of items in batch, and must return a scalar loss tensor.Hyperparameters
Adapter Configuration
Configure fine-tuning parameters based on your selected Adapter Type (LoRA or Full). Different parameters apply depending on your choice. Learn more about adapter configuration.Distributed Configuration
Configures multi-GPU or multi-node training for large-scale training.6
Create and Monitor Training
- Review all settings carefully
- Click
Create Jobto start training - Monitor training progress in the
My Trainings>Your Training Job>Metricstab.
Deployment and Inference
Once training completes successfully, you can compile and deploy your Encoder model for inference.During model compilation, if your usecase is text-classification please add a field under
extra_params adding "task": "text-classification".Sharing below, a sample Pipeline Configuration for your reference. By default, it takes fill-mask as a task.Text Classification Example
Fill Mask Example
You can refer to the HuggingFace page of the respective model for more information about the<MASK>token.