Initiate New Deployment
From the main menu, select the Deployments tab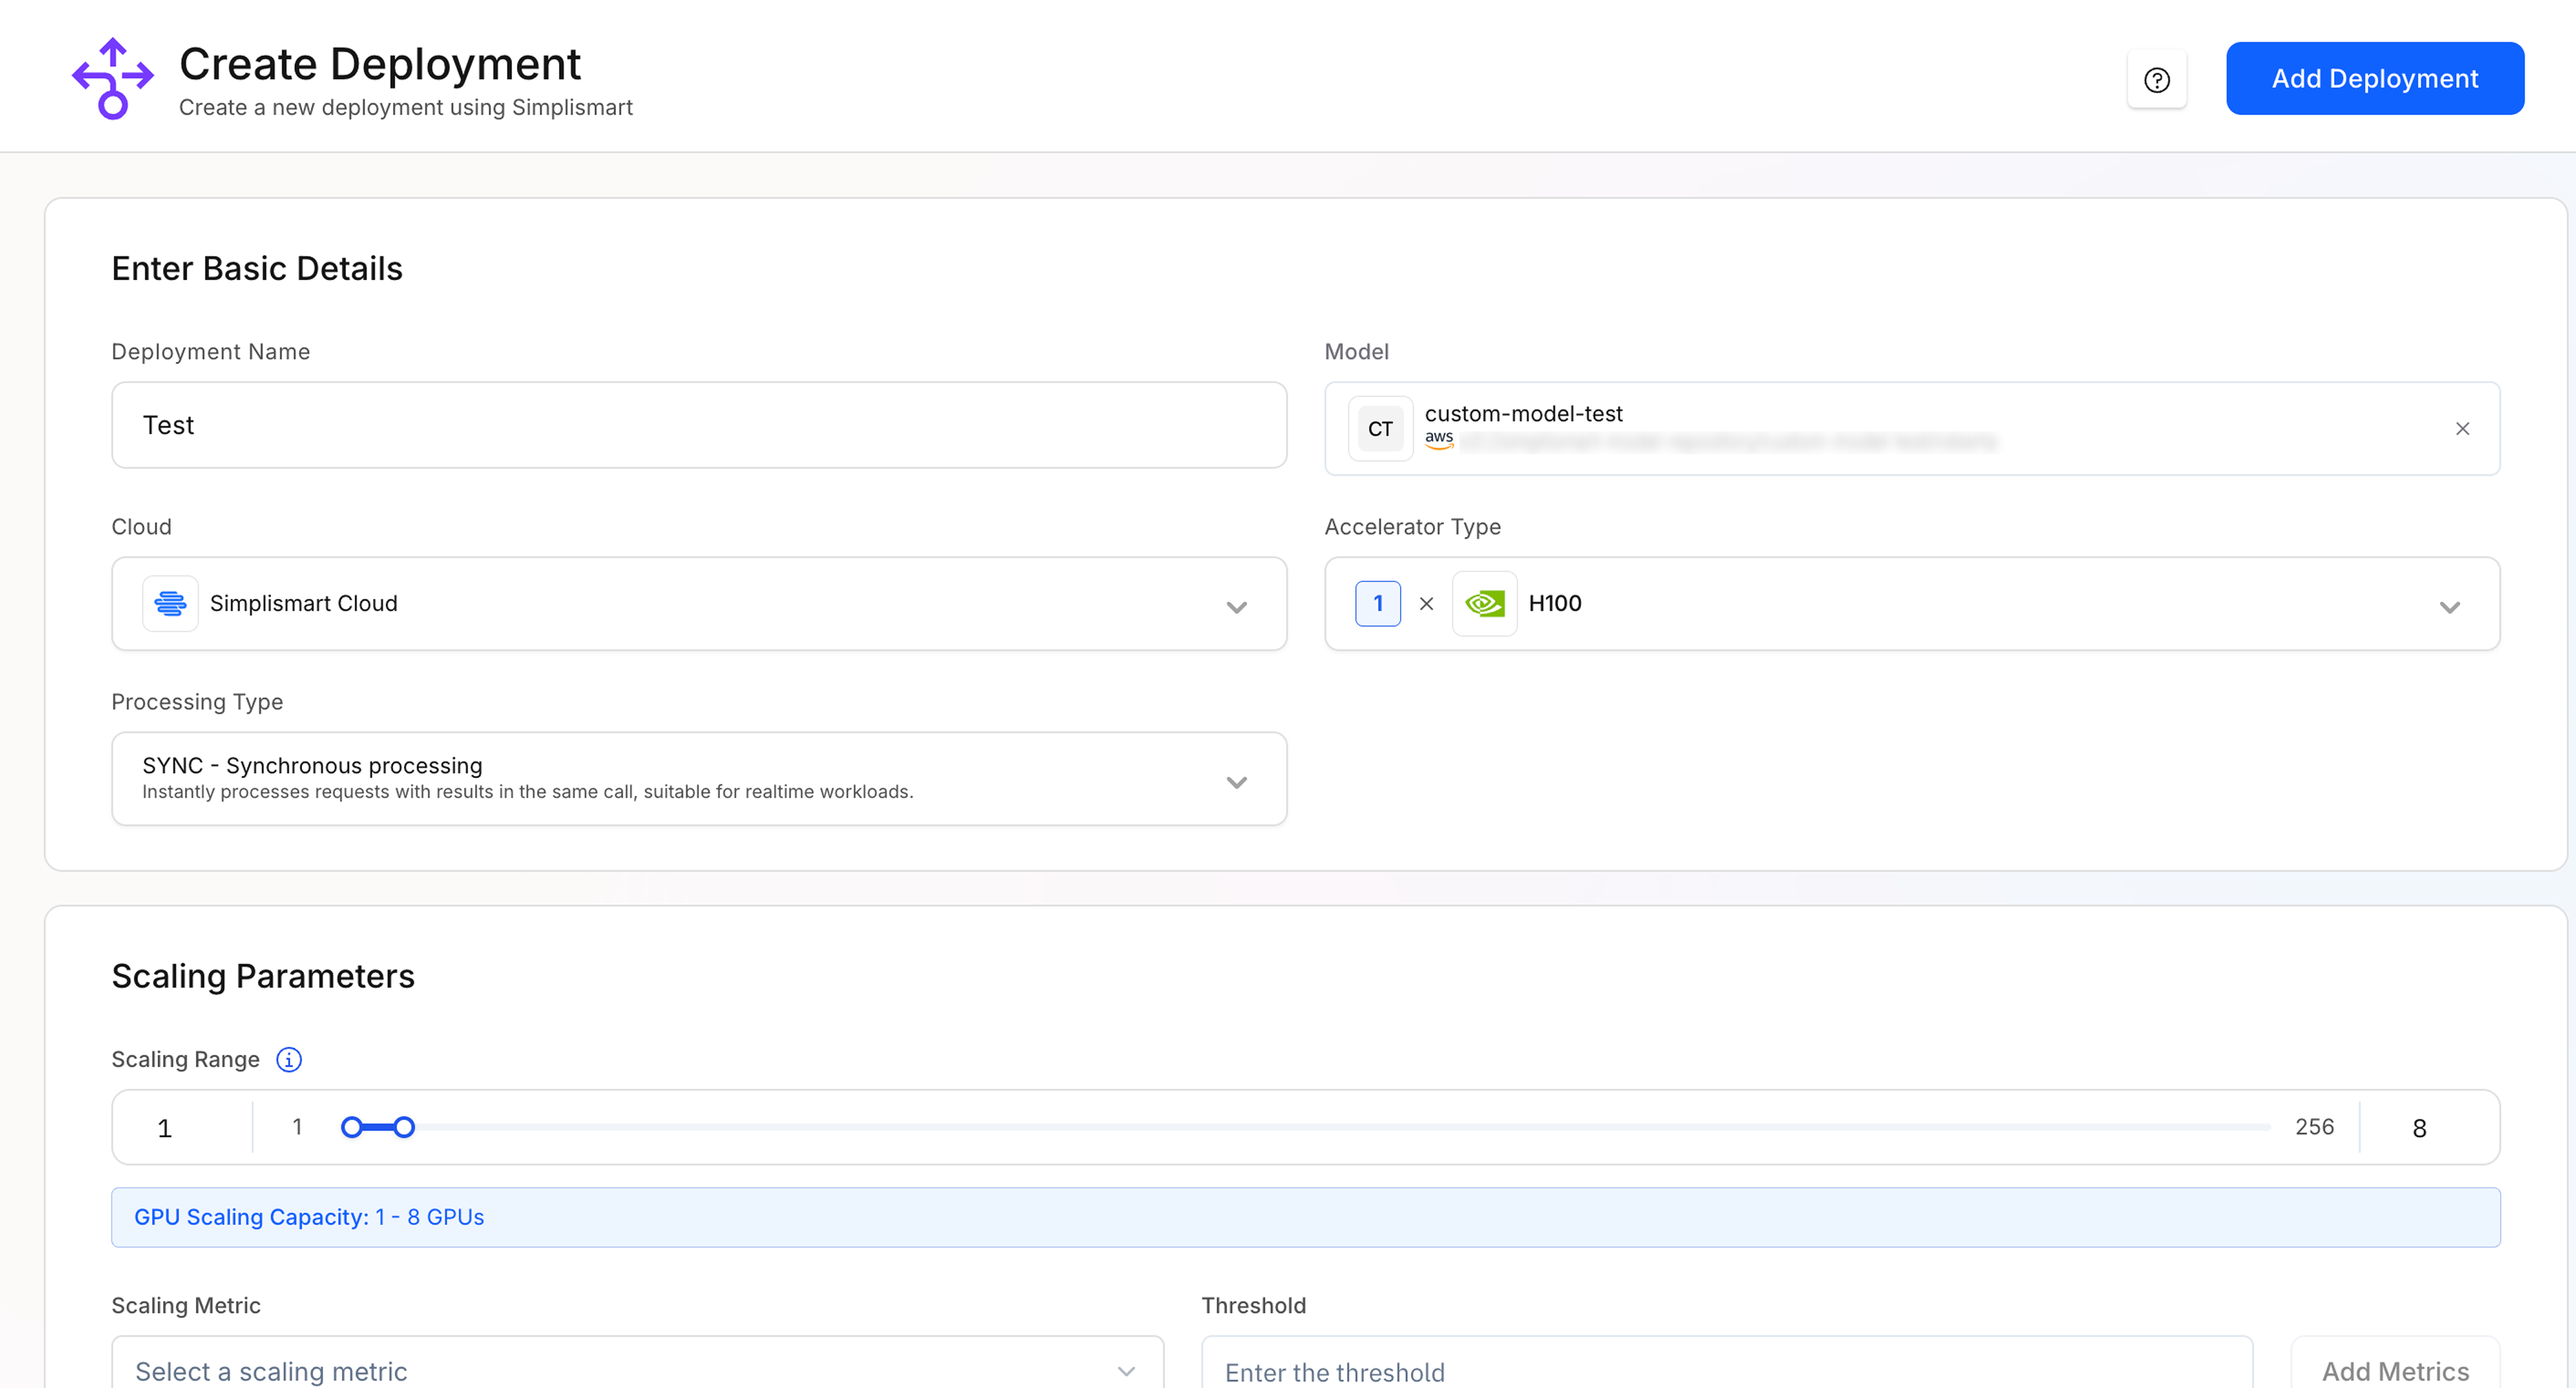
- Click on the Create button to start a new deployment
- Enter Deployment Name: Provide a unique name for your deployment.
- Select Model: If not pre-selected, choose the custom model you want to deploy from the dropdown. You can also add a new model in the Models section.
- Select Cloud: Select Simplismart Cloud to deploy as a Dedicated Endpoint. Choose BYOC to deploy the model on your cluster.
-
Processing Type: Choose how you want requests to be handled:
SyncAsync
For async mode, note the following changes-
- In Processing Type, select
Async. - Resource and scaling configurations remain similar.
- An additional scaling parameter is available:
- Queue Length:
Set the number of messages (requests) per pod.
This helps scale based on the request queue per pod, depending on how many concurrent requests your model can handle.
- Queue Length:
Dedicated Deployment
Choose Accelerator
Choose the desired accelerators type, based on your model size and SLA requirements.
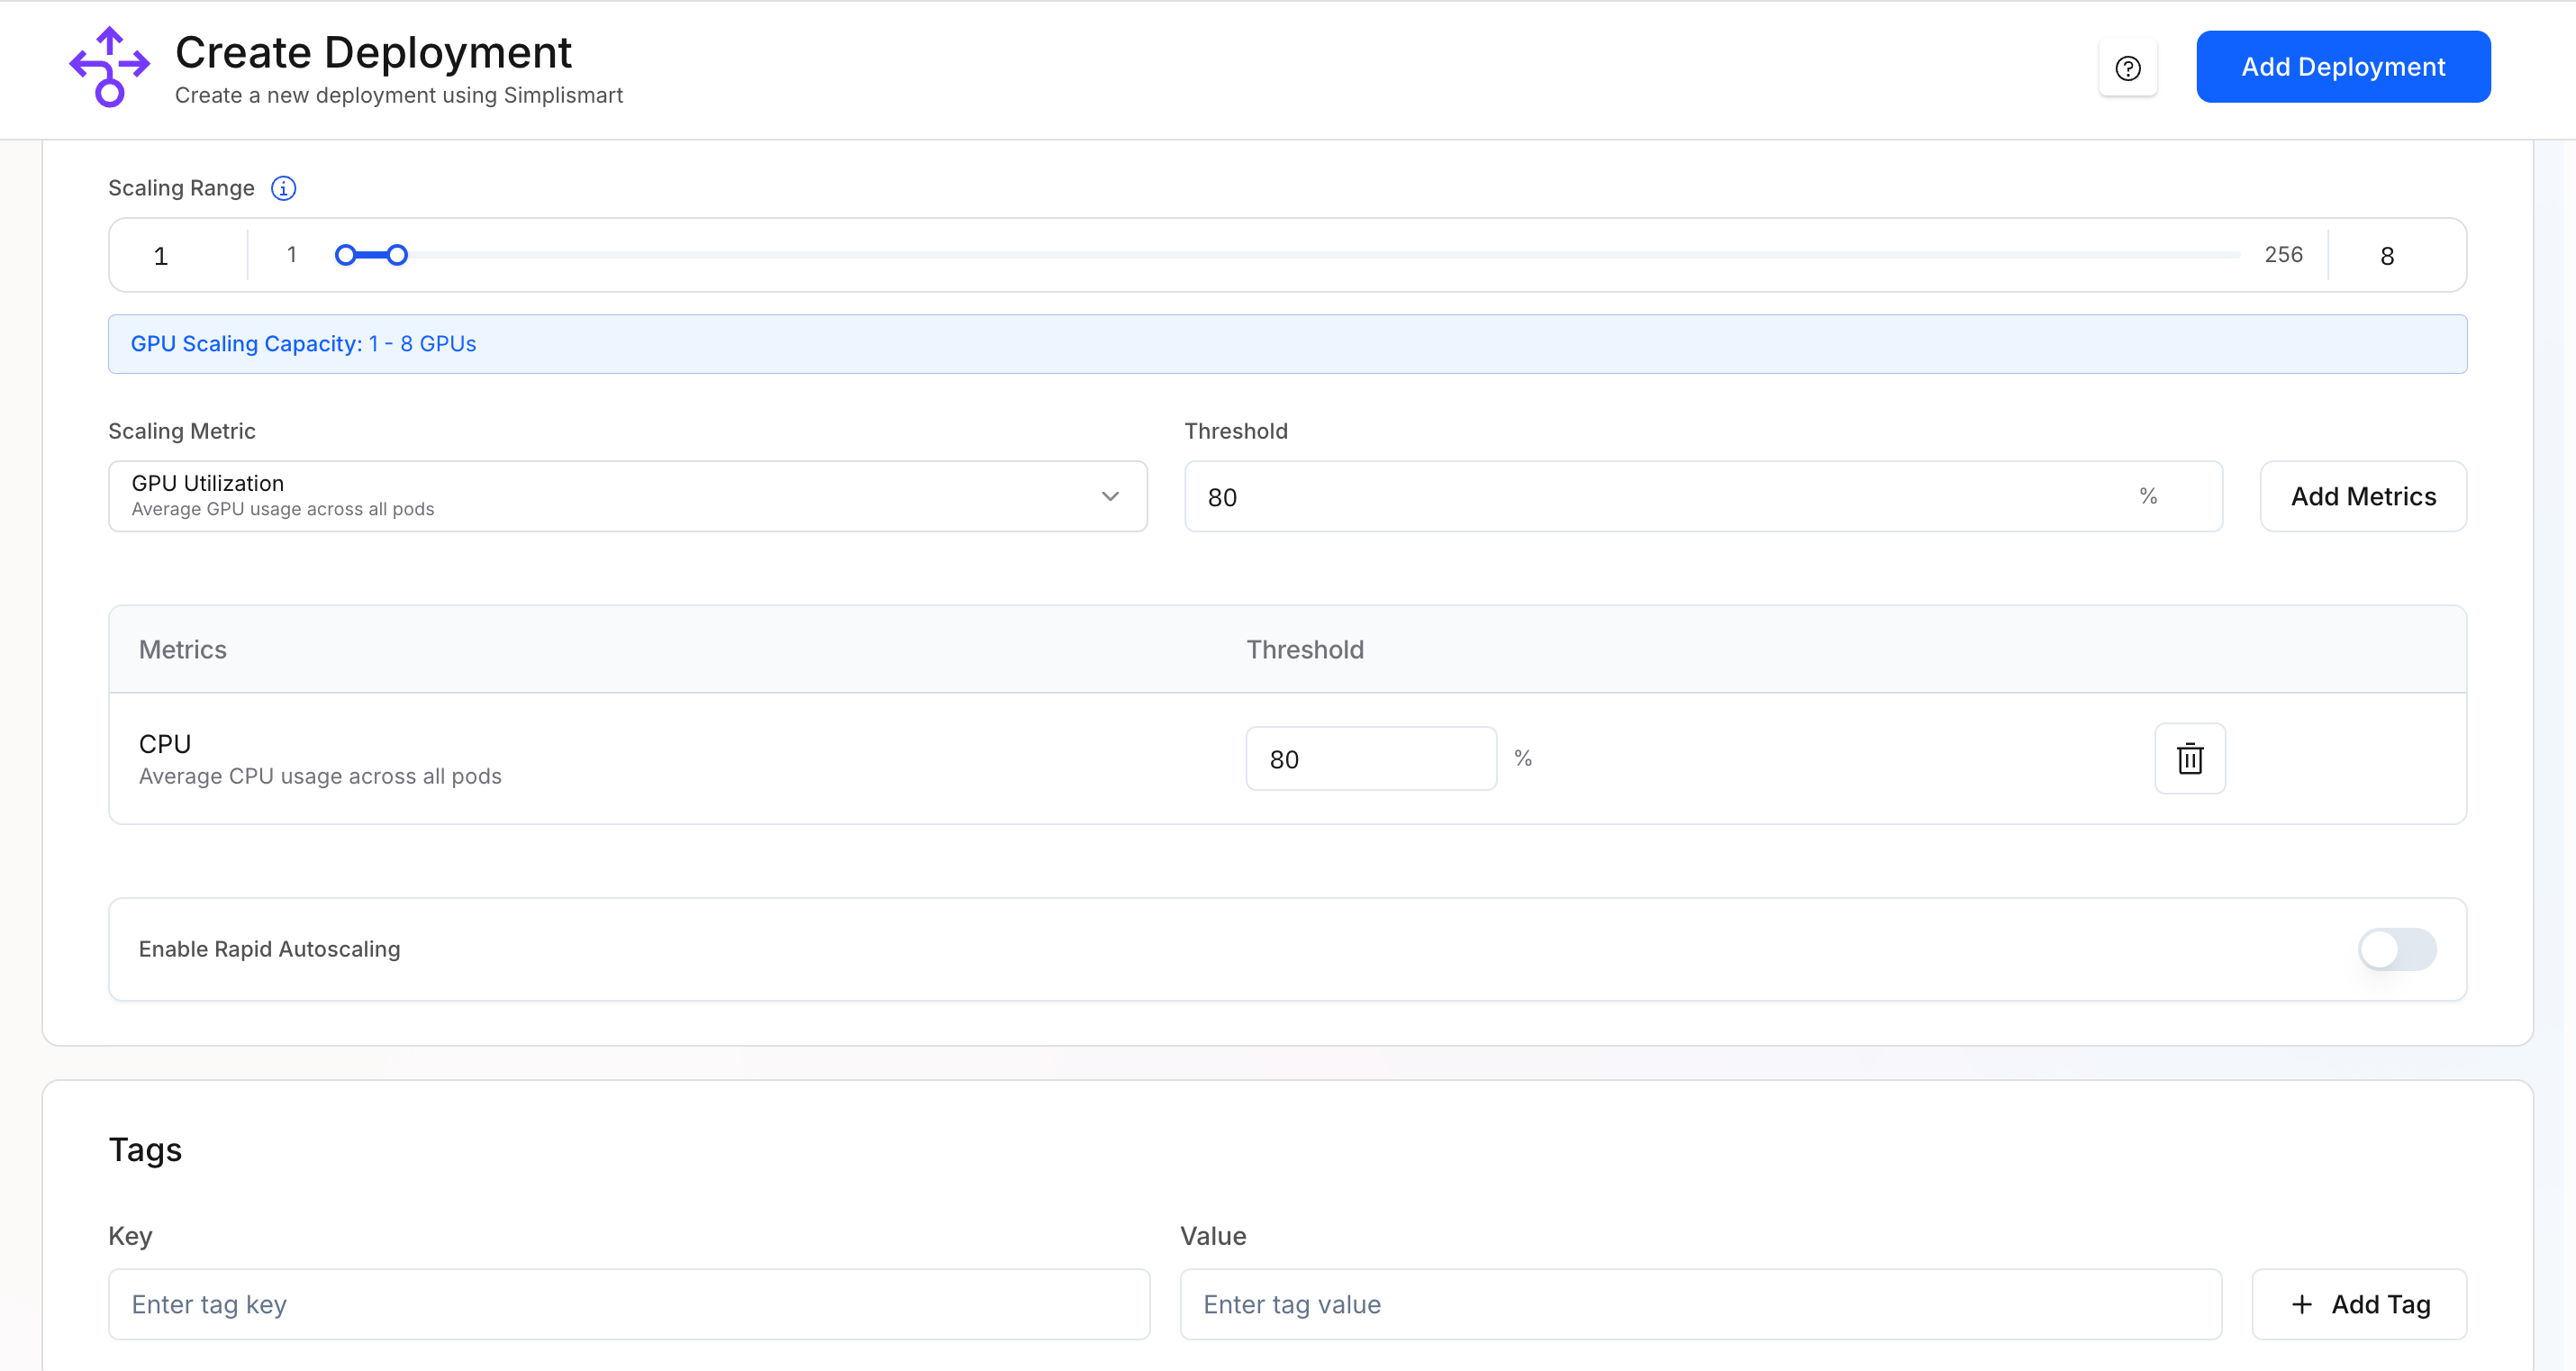
Add Scaling Metrics
- Specify the scaling metrics that will be used to auto-scale your deployment.
- Set the threshold values for each metric to trigger scaling actions.
- You can choose multiple scaling metrics based on your load patterns.
Deploy
- Click on the Deploy Model button to initiate the deployment process.
- Check the right part of the screen to see the creation status of your deployment.
- Monitor the deployment status to know when the model is ready for usage.
- The status will show
deployedonce done. Your model is now ready for use.
BYOC Deployment
For BYOC deployments it’s mandatory to have a linked cloud account and an active cluster with the required resources.
Cloud Details
Select the cluster and the required node group based on the model.Cluster: Select the target cluster.Node Group: Select the node group based on the GPU type and compute specs required by your model (e.g., A100, H100, T4).This ensures compatibility and optimal resource allocation during deployment.
Resource Details
Choose the appropriate CPU and memory resources based on the selected node group.
Configure Resource RequirementsSet resource limits for your deployment:CPU Request & Limit
- CPU Request: Minimum guaranteed CPU for the container.
- CPU Limit: Maximum CPU the container can use. Throttled if exceeded.
- Memory Request: Minimum guaranteed memory.
- Memory Limit: Maximum memory allowed. Exceeding it results in termination (OOM error).
Add Scaling Metrics
- Specify the scaling metrics that will be used to auto-scale your deployment.
- Set the threshold values for each metric to trigger scaling actions.
- You can choose multiple scaling metrics based on your load patterns.
Deploy
- Click on the Deploy Model button to initiate the deployment process.
- Check the right part of the screen to see the creation status of your deployment.
- Monitor the deployment status to know when the model is ready for usage.
- The status will show
deployedonce done. Your model is now ready for use.