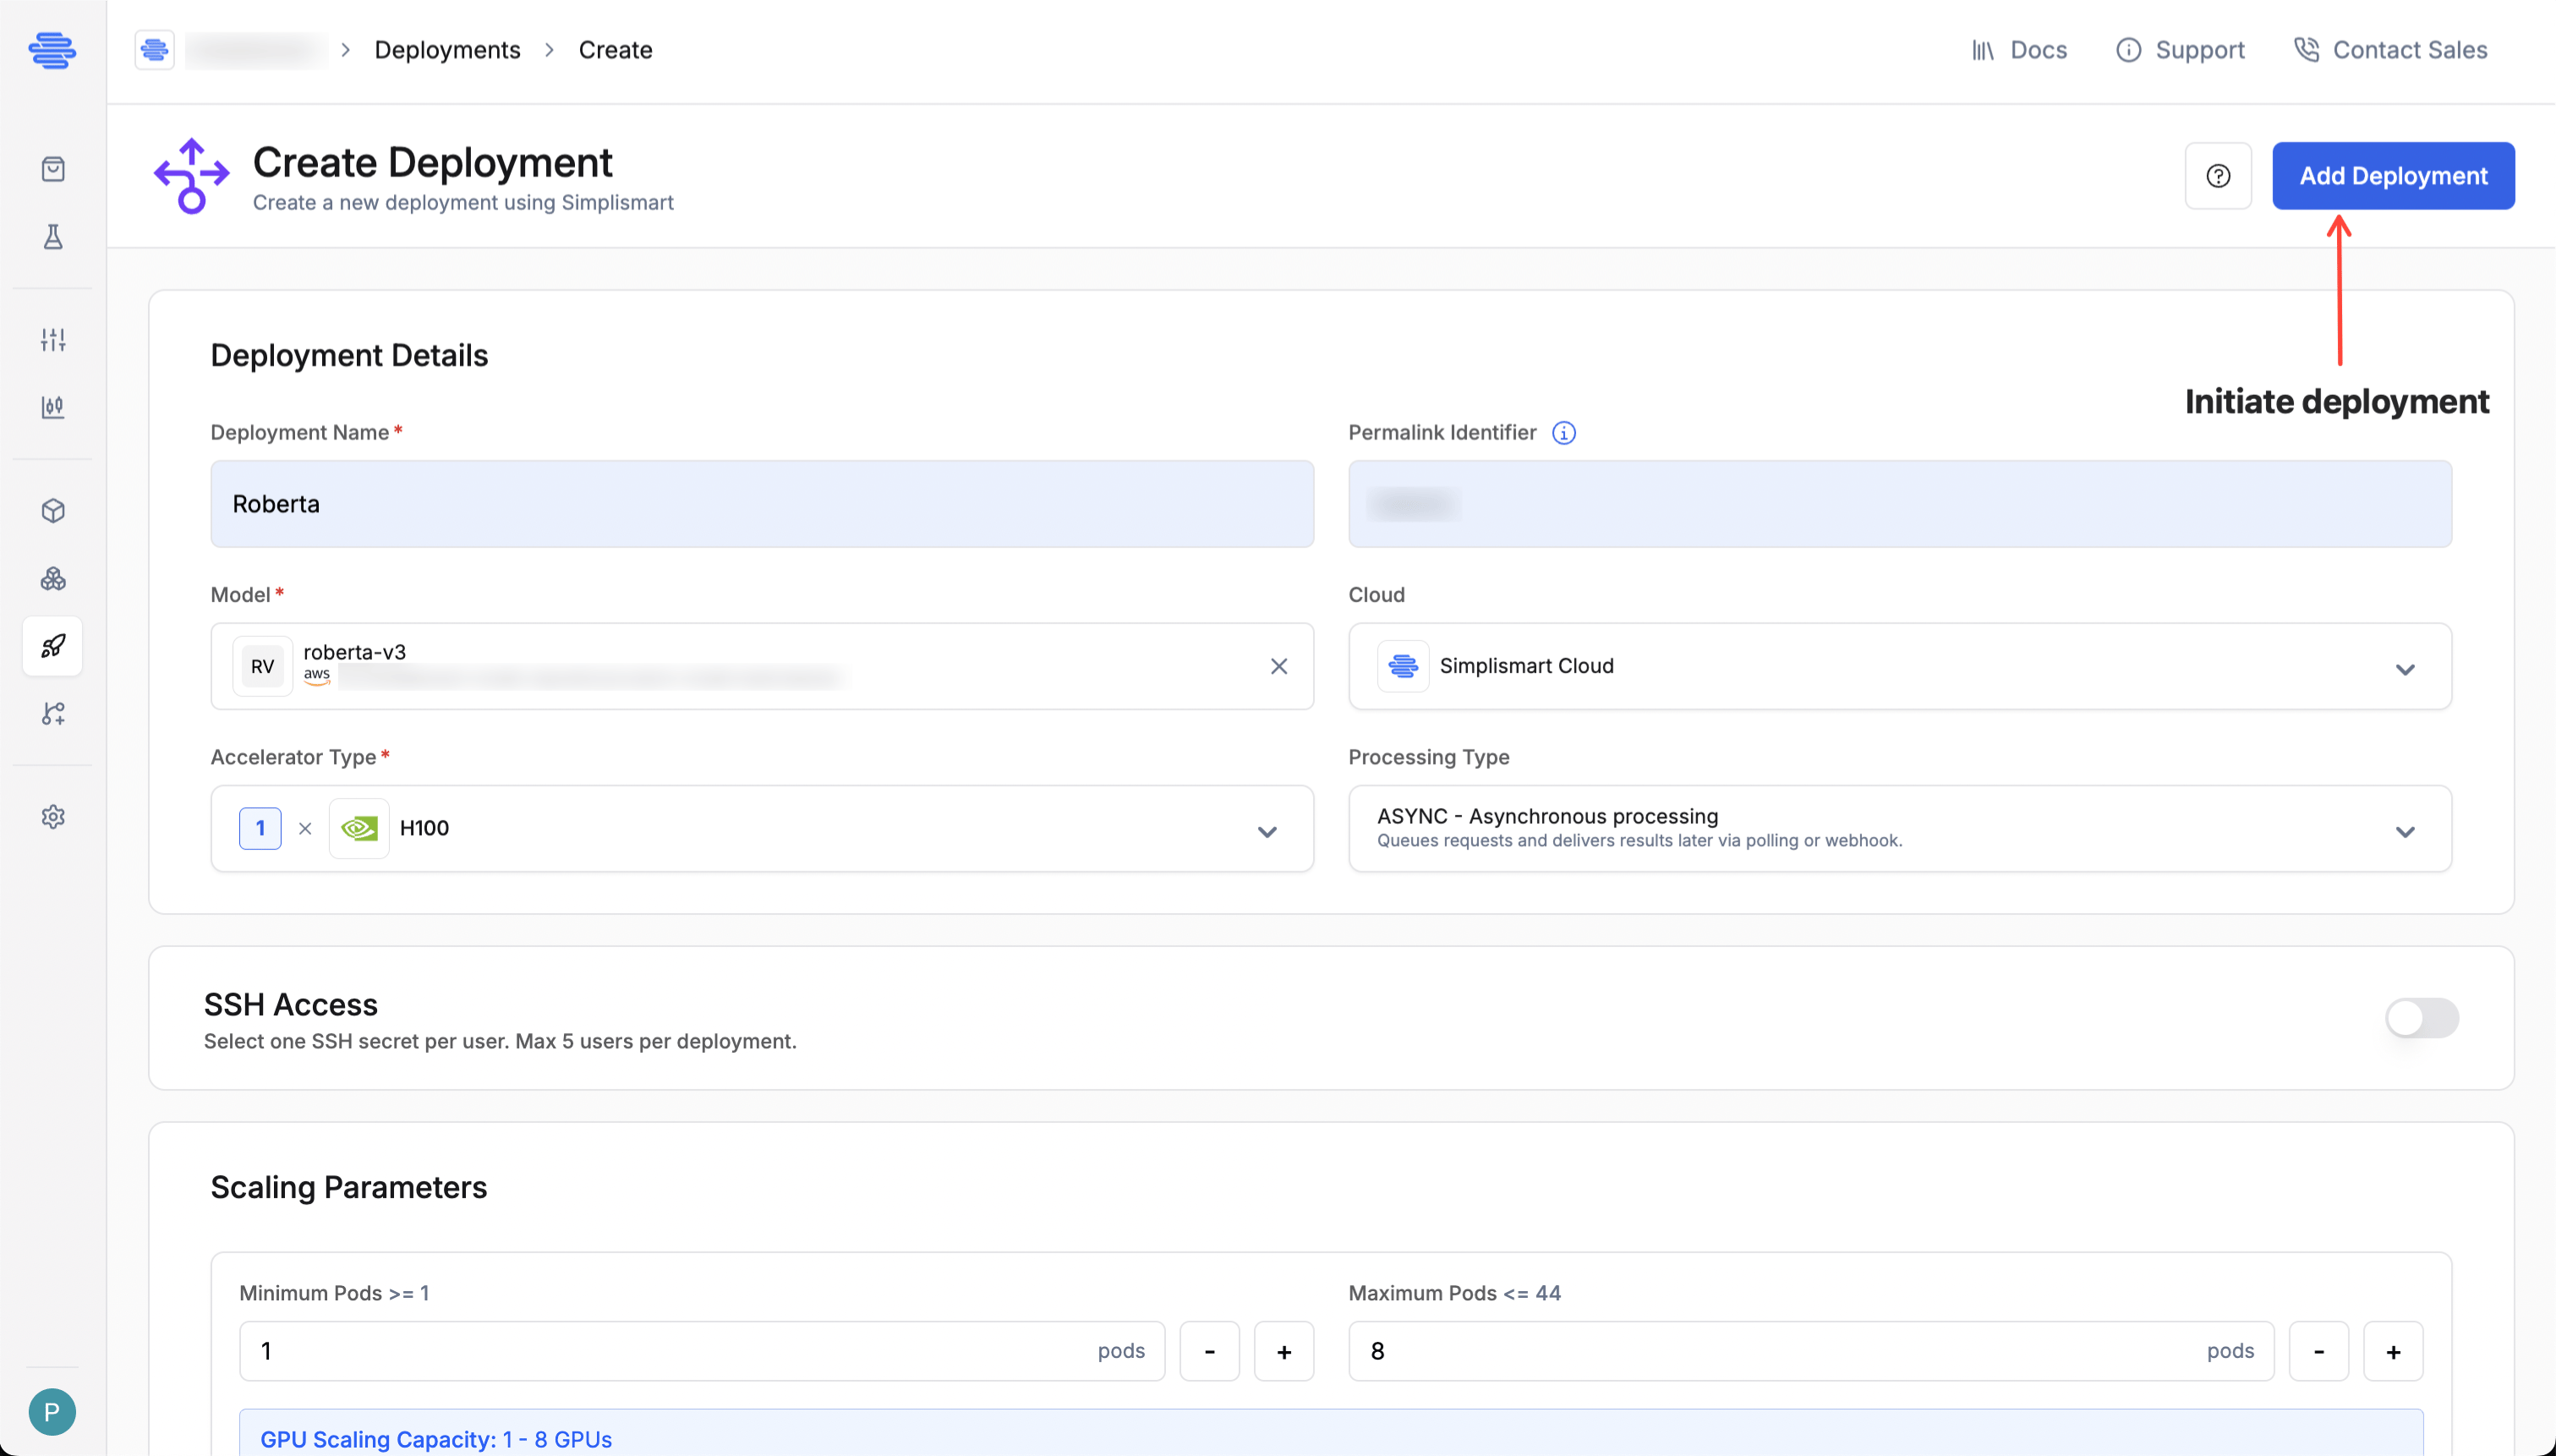
Before deploying, confirm your imported cluster is active and has the required node groups available. See Import Kubernetes Cluster for setup instructions.
- Deployment Name: Provide a unique name for your deployment.
- Model: Choose the model you want to deploy from the dropdown.
- Cloud: Select Simplismart Cloud to deploy as a Dedicated Endpoint, or BYOC to deploy on your own cluster.
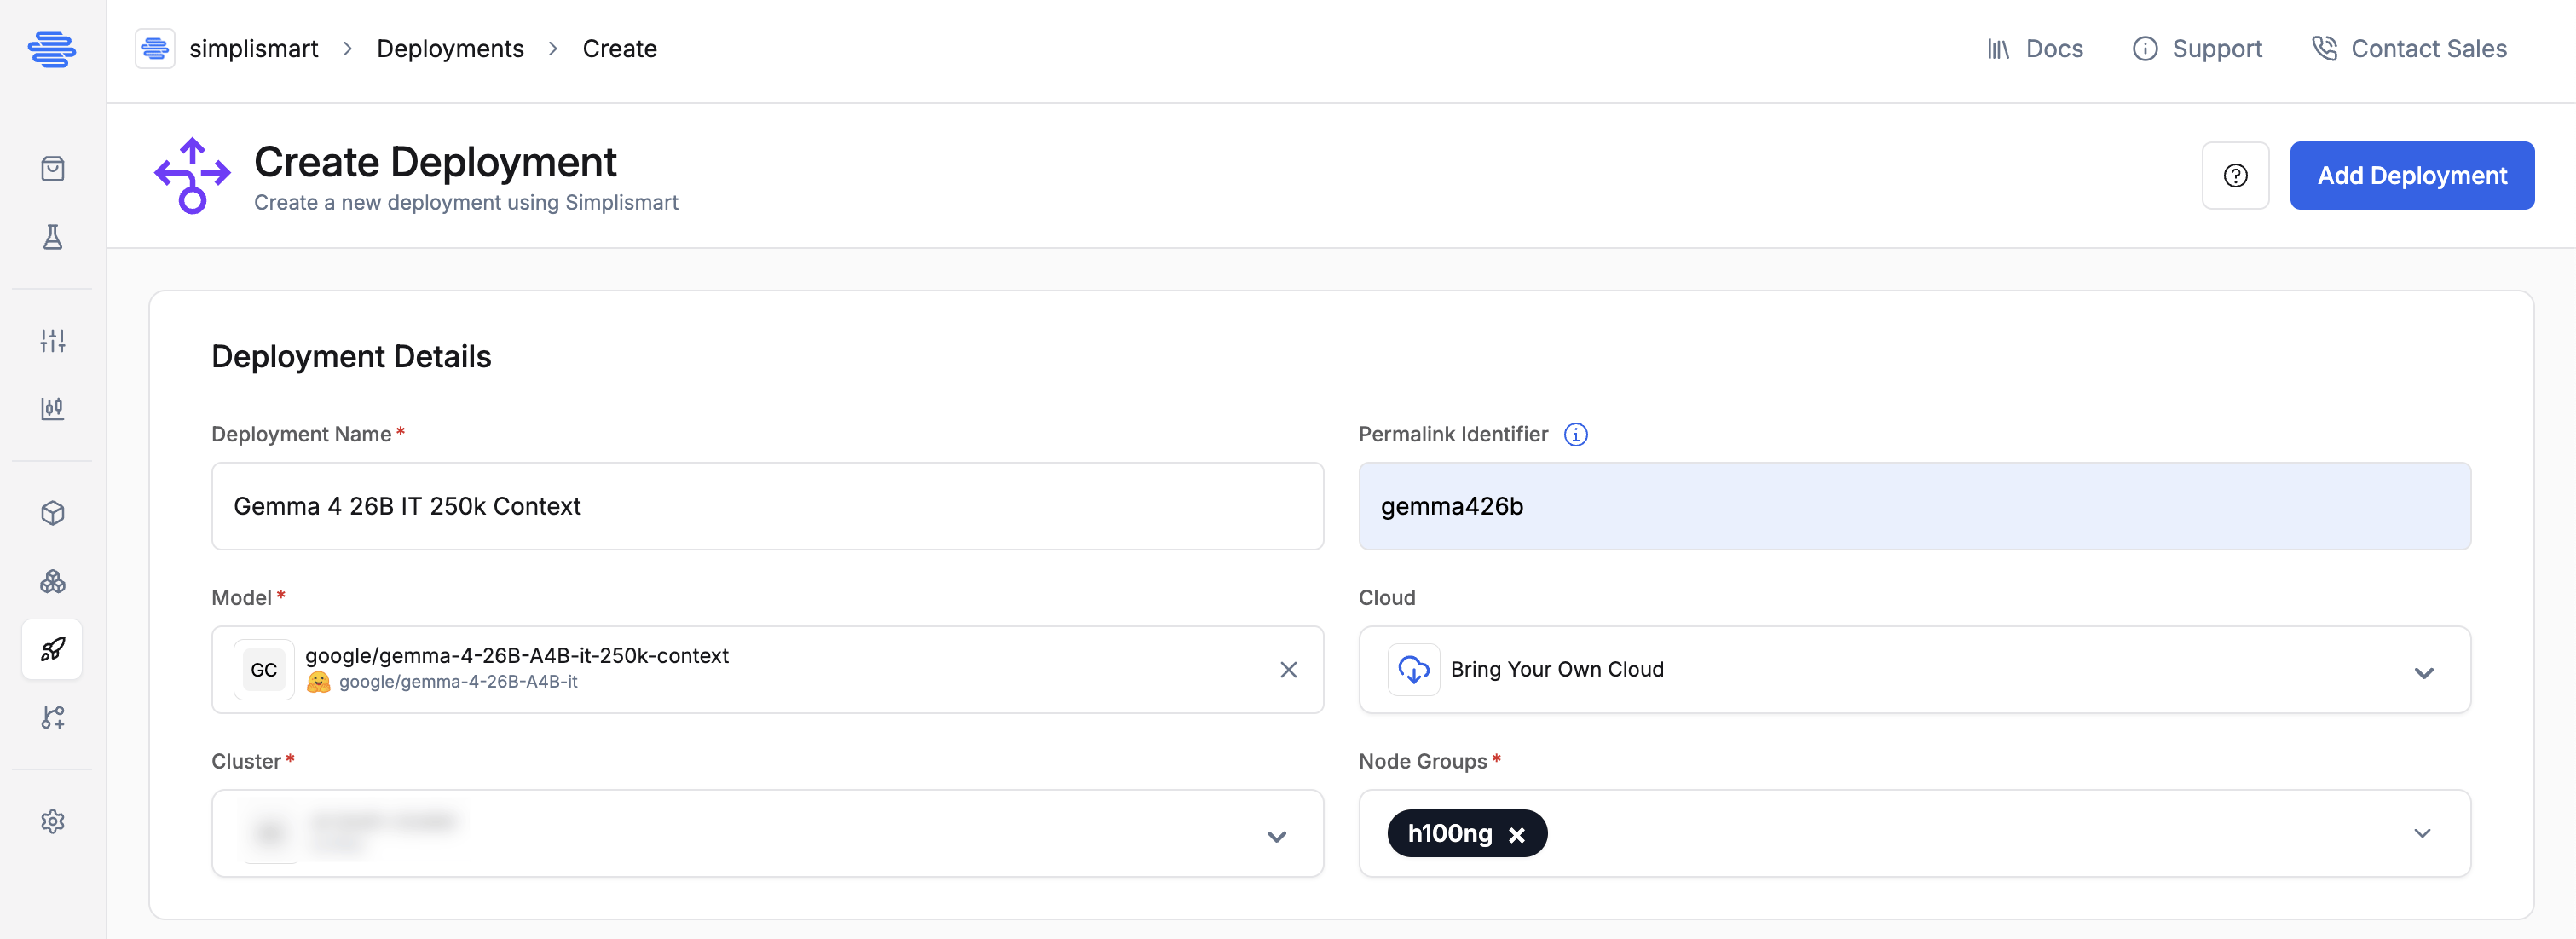
Cloud Details
For BYOC deployments it is mandatory to have a linked cloud account and an active cluster with the required resources.
- Cluster: Select the target cluster.
- Node Group: Select the node group based on the GPU type and compute specs required by your model (e.g., A100, H100, T4).

- CPU Request: Minimum guaranteed CPU for the container.
- CPU Limit: Maximum CPU the container can use. Throttled if exceeded.
- Memory Request: Minimum guaranteed memory.
- Memory Limit: Maximum memory allowed. Exceeding it results in termination (OOM error).
SSH Access
SSH access lets you connect directly to a running container in your deployment, which is useful for debugging, inspecting logs, or running ad-hoc commands without rebuilding and redeploying.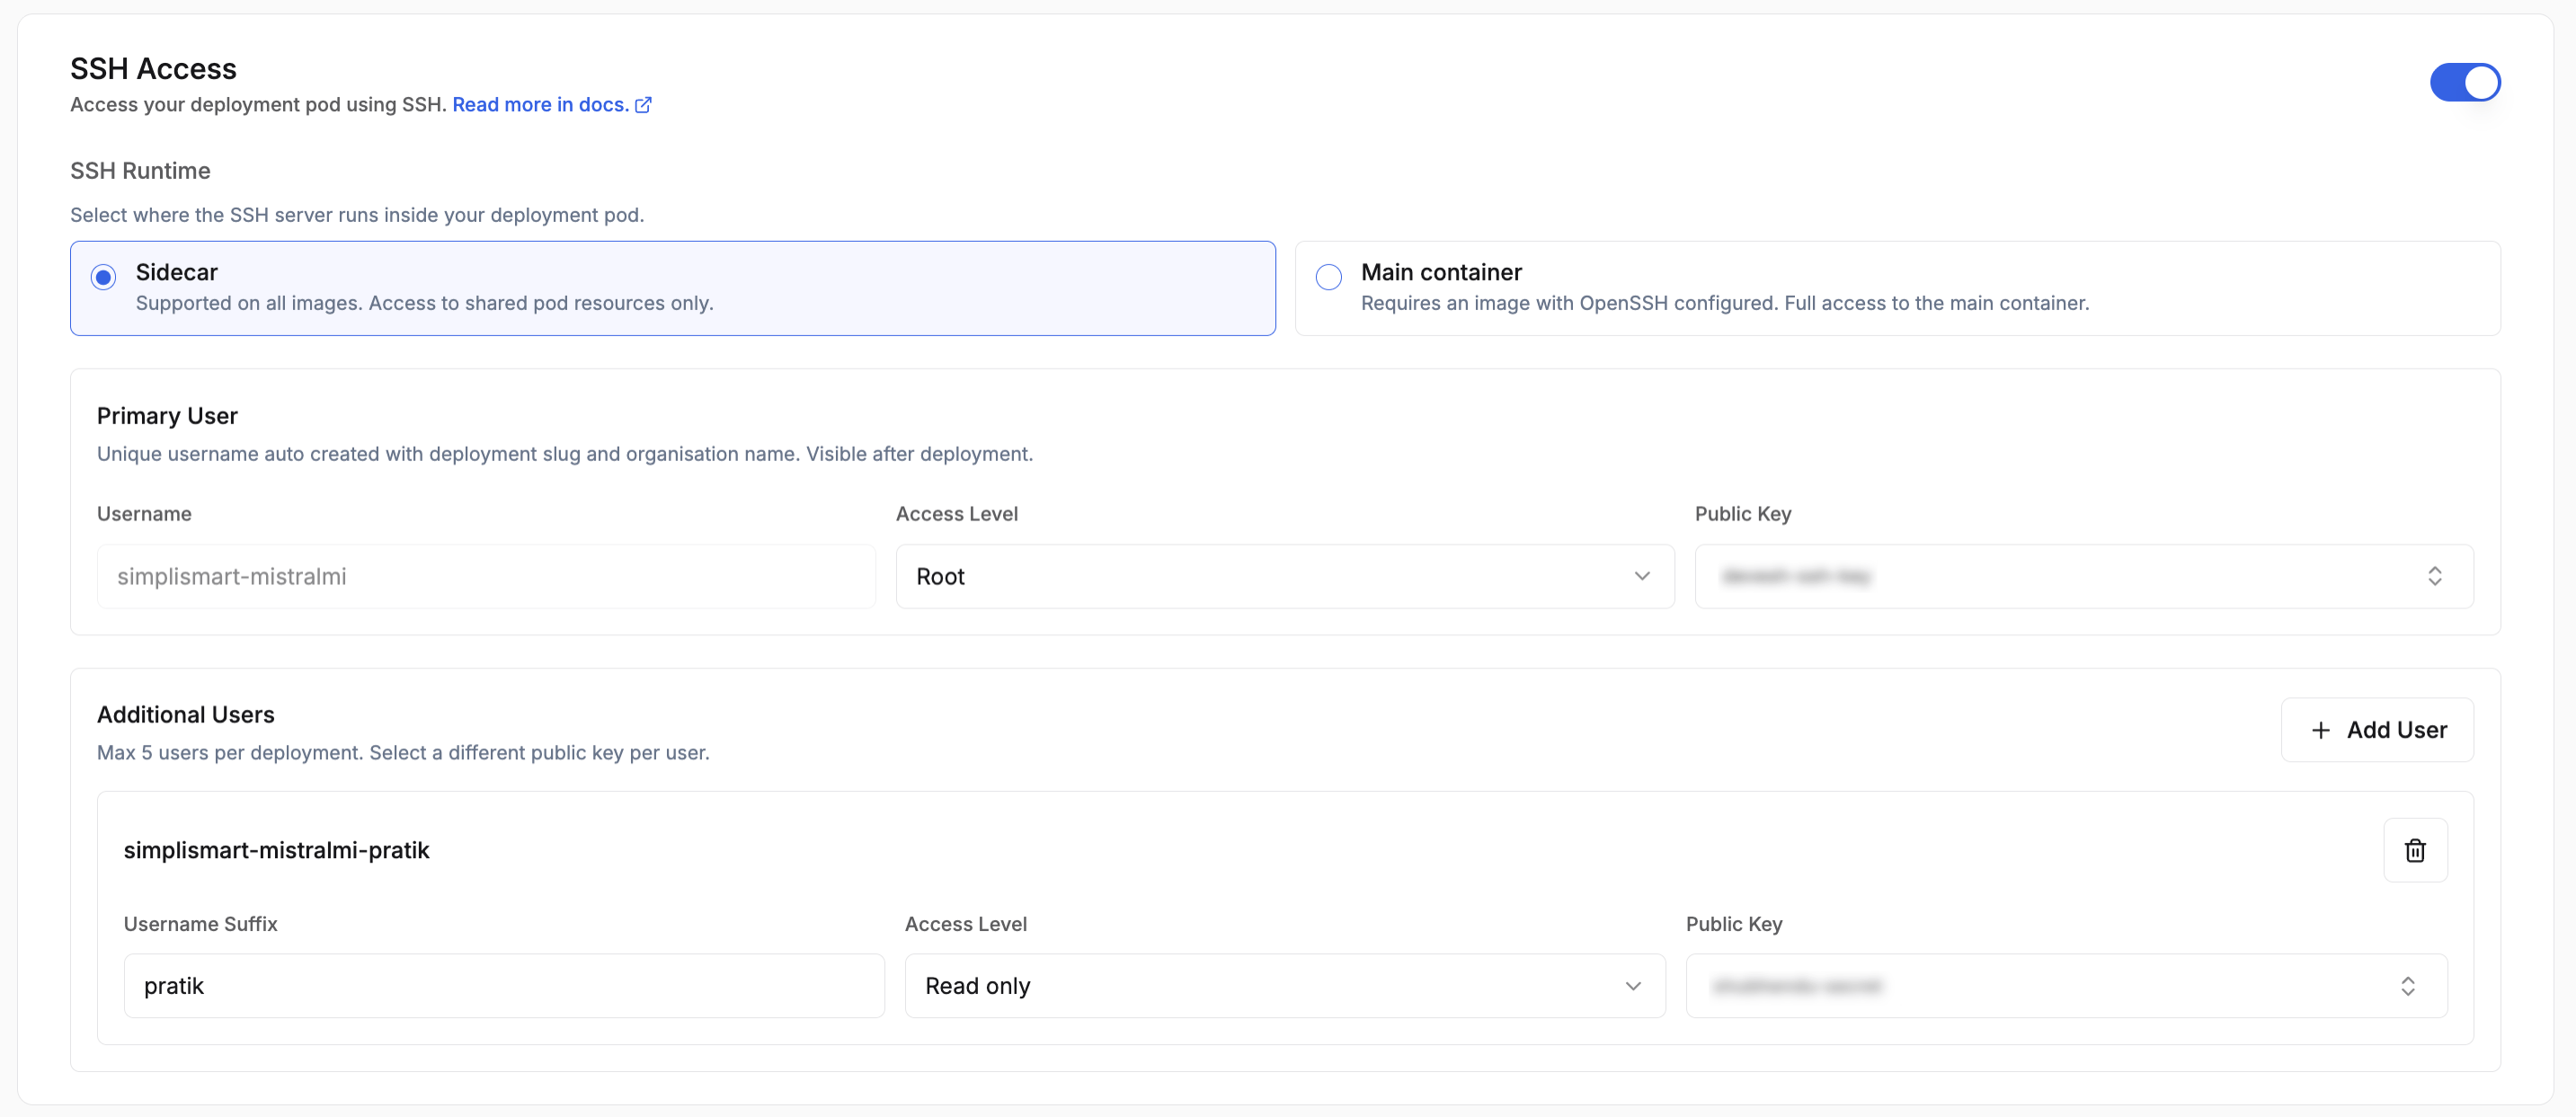
Scaling Parameters
Define how your deployment scales based on demand: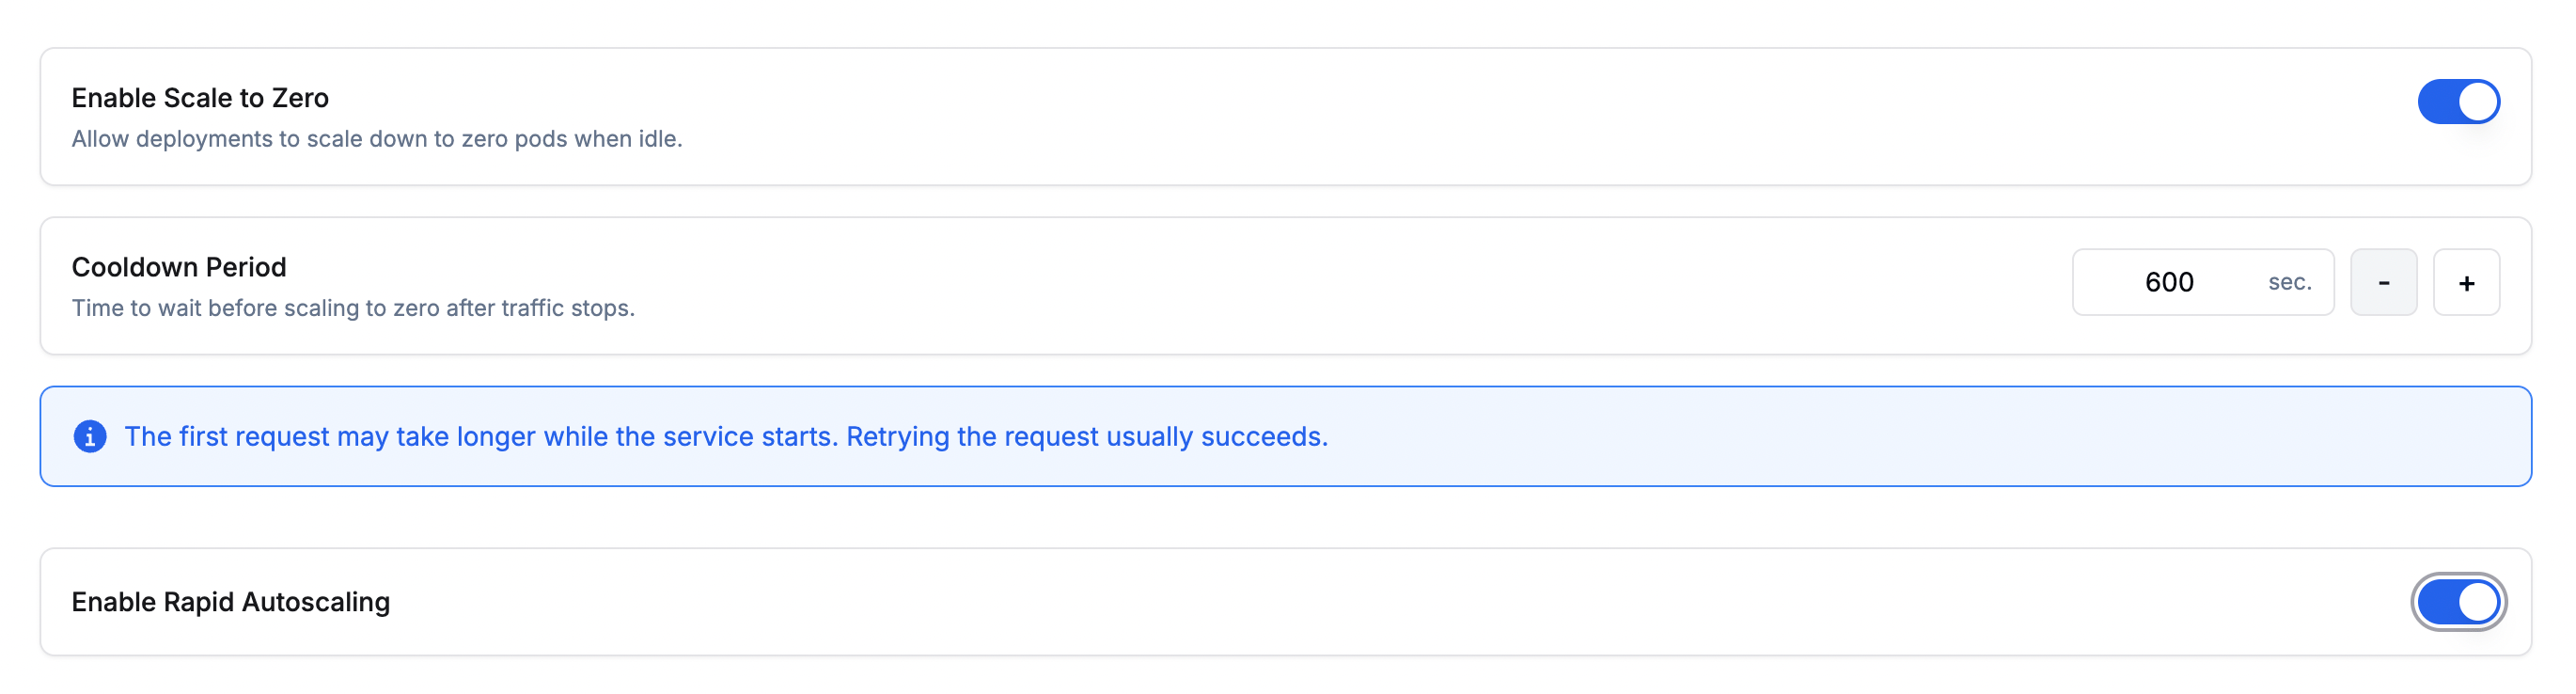
- Range: Minimum and maximum number of instances. The limits are governed by your account quota.
- Scaling Metric: The metric used to trigger scaling. Choose from:
- Memory Usage: Average memory usage across all pods.
- Latency: Response time per request.
- Throughput: Number of requests processed per second.
- Concurrency: Number of concurrent requests being processed.
Available scaling metrics may vary depending on the model type.
-
Threshold: The metric value that triggers a scaling event for both scale-out and scale-in (e.g. scale out at 80% memory, scale in when it drops back below the threshold).
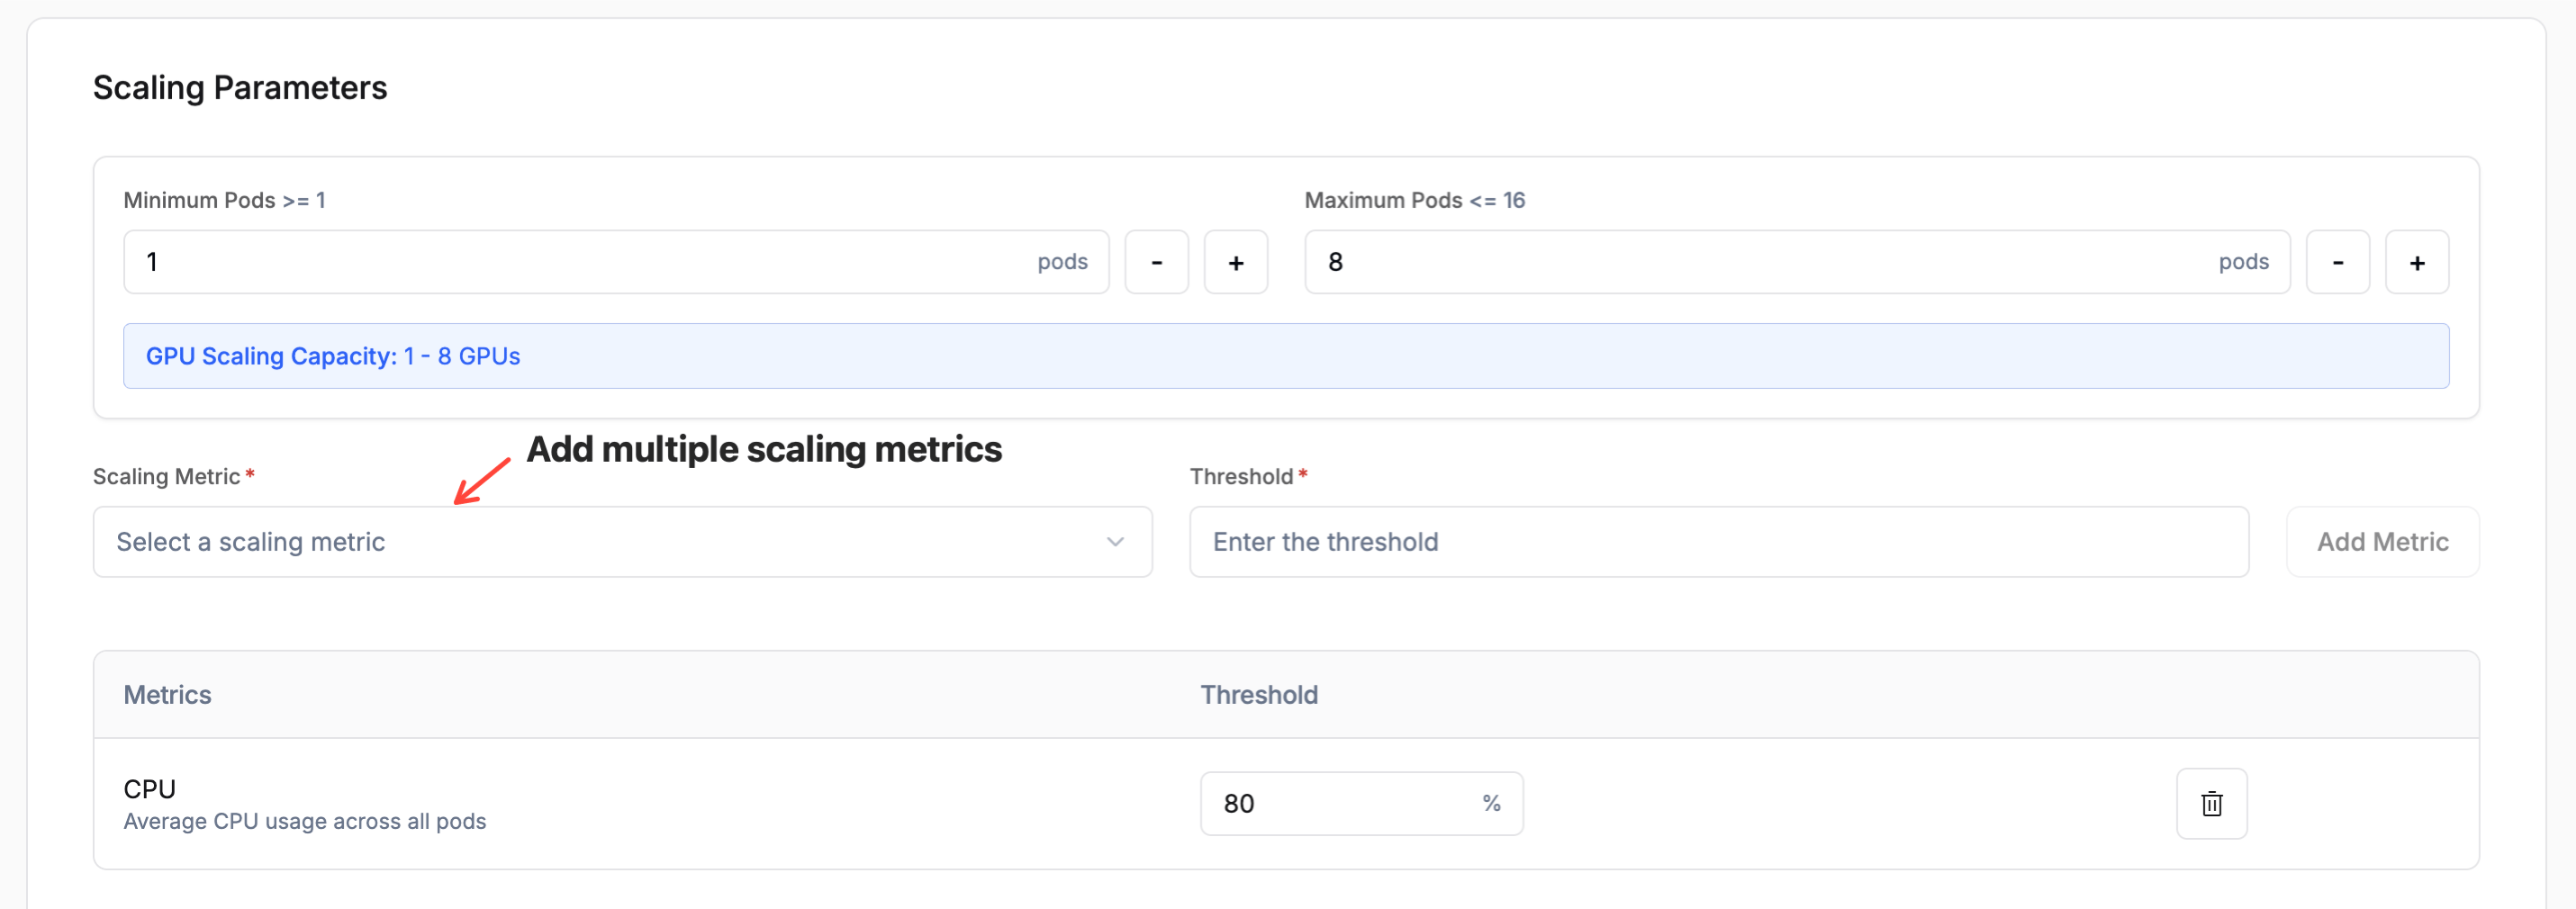
- Enable Scale to Zero: Scales the deployment down to zero instances when there is no incoming traffic, reducing idle costs. When traffic resumes, the deployment scales back up automatically.
- Cooldown Period: The amount of time (in seconds) to wait after traffic stops before scaling down to zero. A longer cooldown avoids premature scale-downs during brief traffic lulls.
Rapid Autoscaling is available on Simplismart Cloud (Dedicated) deployments only. To enable it, contact support@simplismart.tech.
Schedule-Based Autoscaling
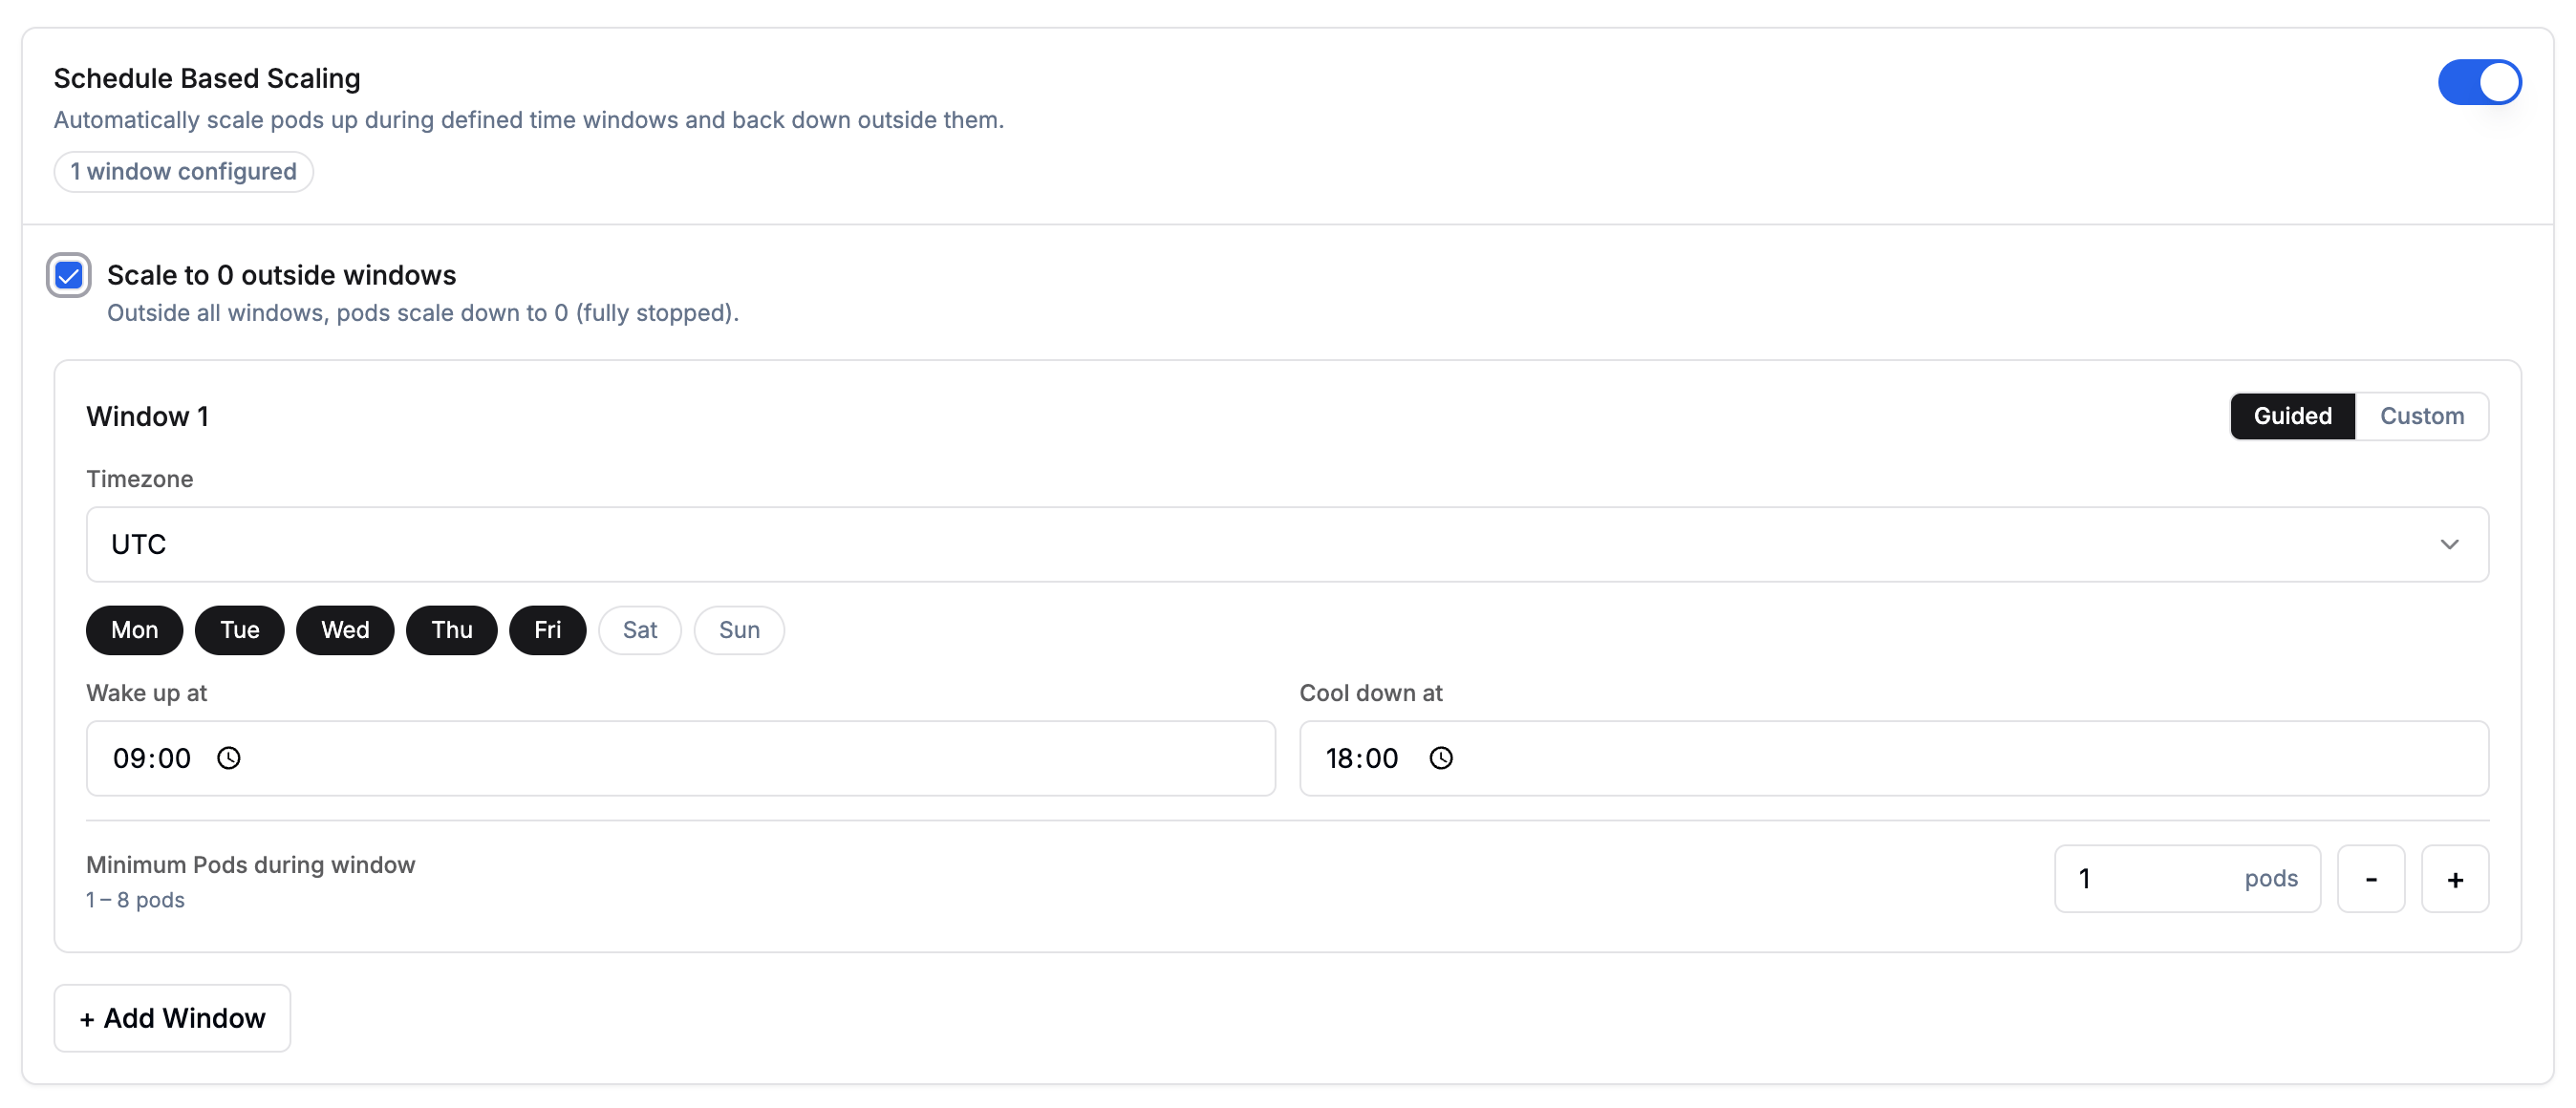
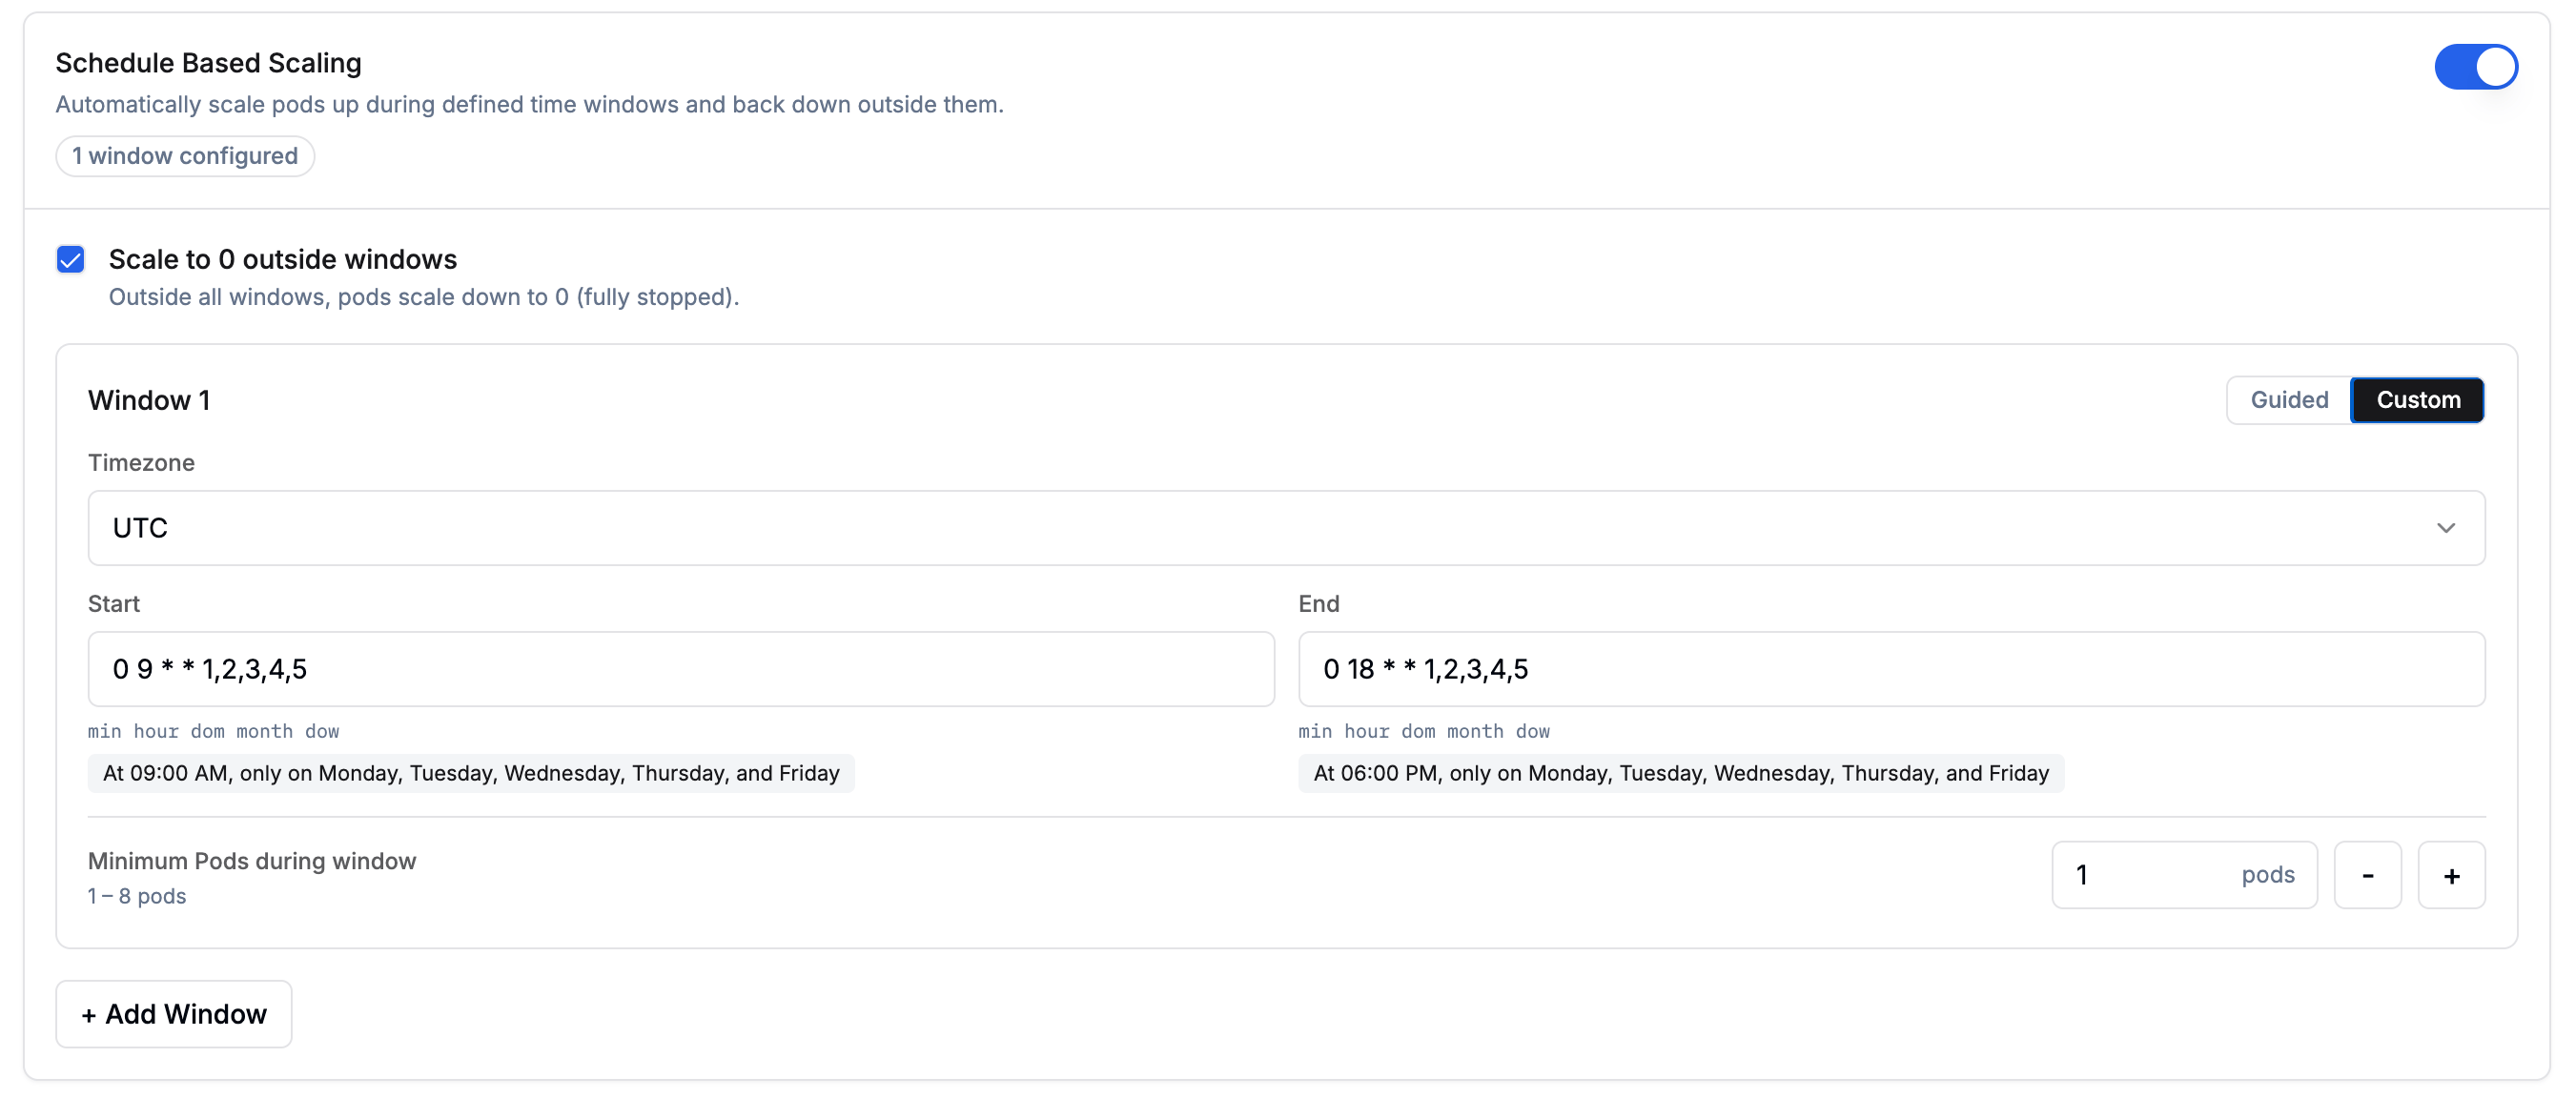
Enable Schedule Based Scaling when you know your traffic pattern in advance. For example, if most of your load arrives on weekdays during office hours, you can define time windows for those periods and let the deployment scale to zero, or fall back to a lower replica count, outside them.Scale to 0 outside windowsChoose what happens outside your configured windows:
Pick Disabled if the endpoint must accept requests outside windows.Configuring windowsEach window defines a time range during which a guaranteed minimum number of pods is maintained. Click + Add Window to add more windows. When multiple rules are active (schedule windows, overlapping windows, standard scaling), whichever produces the higher pod count wins at any given time. The cool-down period is fixed at 5 minutes and cannot be modified.Each window can be configured using either the Guided visual picker or Custom cron expressions:
- Guided
- Custom
Use the visual picker to configure your schedule:
- Timezone: the timezone for interpreting wake-up and cool-down times.
- Days: select one or more days of the week (Mon–Sun).
- Wake up at: the time at which pods scale up to the configured minimum.
- Cool down at: the time at which pods begin scaling down.
-
Minimum Pods during window: number of pods guaranteed during the window (1–8).
Autoscaling Policy
Fine-tune how aggressively your deployment scales up and down by configuring policies and stabilization windows for each direction. This controls the rate of pod changes once the scaling metrics cross their configured thresholds.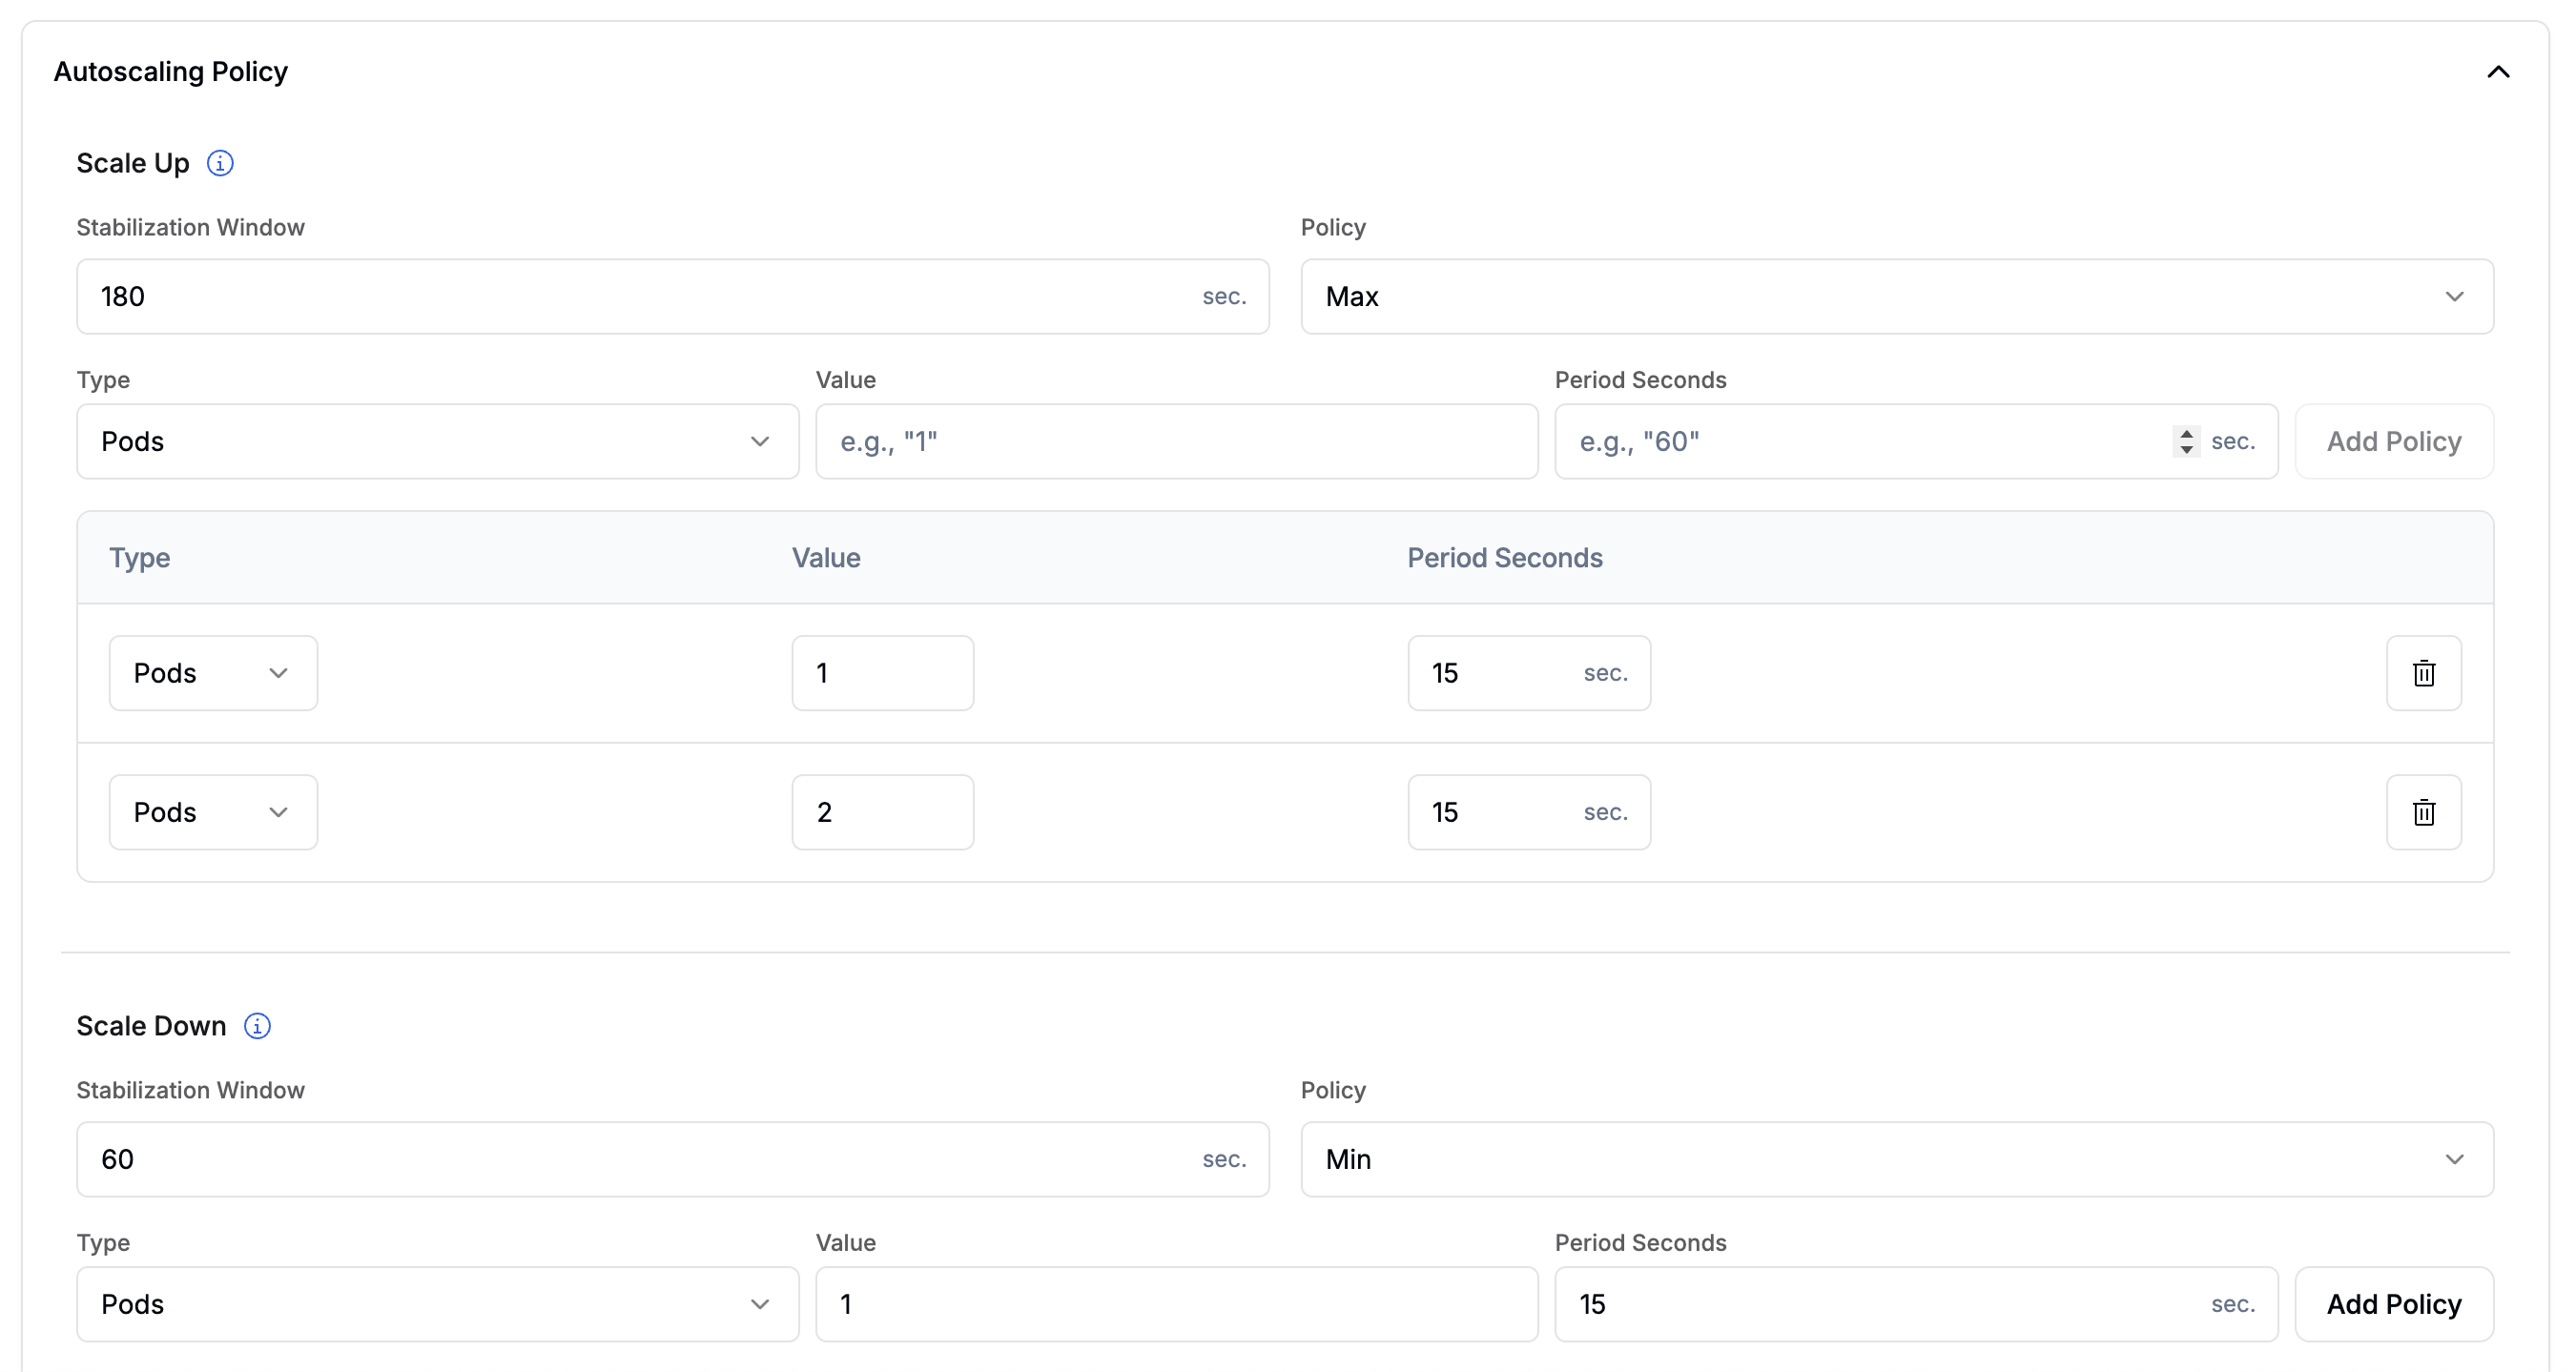
- Stabilization Window: the look-back period (in seconds) used to smooth out scaling decisions. Default:
60s. Range: 0–3600 s. - Select Policy: when multiple policies are configured, determines which one wins:
- Max (default): picks the policy that allows the most pods to be added.
- Min: picks the policy that allows the fewest pods to be added.
- Disabled: disables scale-up entirely.
- Policies: one or more rate-limiting rules. Click Add Policy to configure:
- Type:
Pods(fixed number per period) orPercent(percentage of current count, max 100). - Value: the number of pods or percentage to add per period.
- Period Seconds: the duration of each evaluation window (1–1800 s).
- Type:
When multiple policies are active, Select Policy = Max picks the policy that allows the largest increase.
- Stabilization Window: the look-back period (in seconds) before pods are removed. Default:
180s. Range: 0–3600 s. - Select Policy: when multiple policies are configured, determines which one wins:
- Min (default): picks the policy that removes the fewest pods.
- Max: picks the policy that removes the most pods.
- Disabled: disables scale-down entirely.
- Policies: same fields as Scale Up.
When multiple policies are active, Select Policy = Min picks the policy that removes the fewest pods. This ensures scale-down is gradual even if metrics drop sharply.
Autoscaling Policy is an advanced configuration. If left unconfigured, standard min/max replica scaling based on the configured scaling metrics applies without rate limiting.
Tags
Add key-value tags to organize and filter your deployments. Tags are useful for tracking environment, team, or cost-center metadata.
- Click + Add Tag to add a new key-value pair.
-
Tags can be used to filter deployments on the Deployments page.