ECD models are particularly effective for tabular data and feature engineering tasks, using the TabNet architecture for superior performance on structured datasets.
Prerequisites
Before starting, ensure you have:- A Simplismart account with access to the Training Suite
- A publicly accessible dataset URL
- Your training configuration prepared (configuration schema)
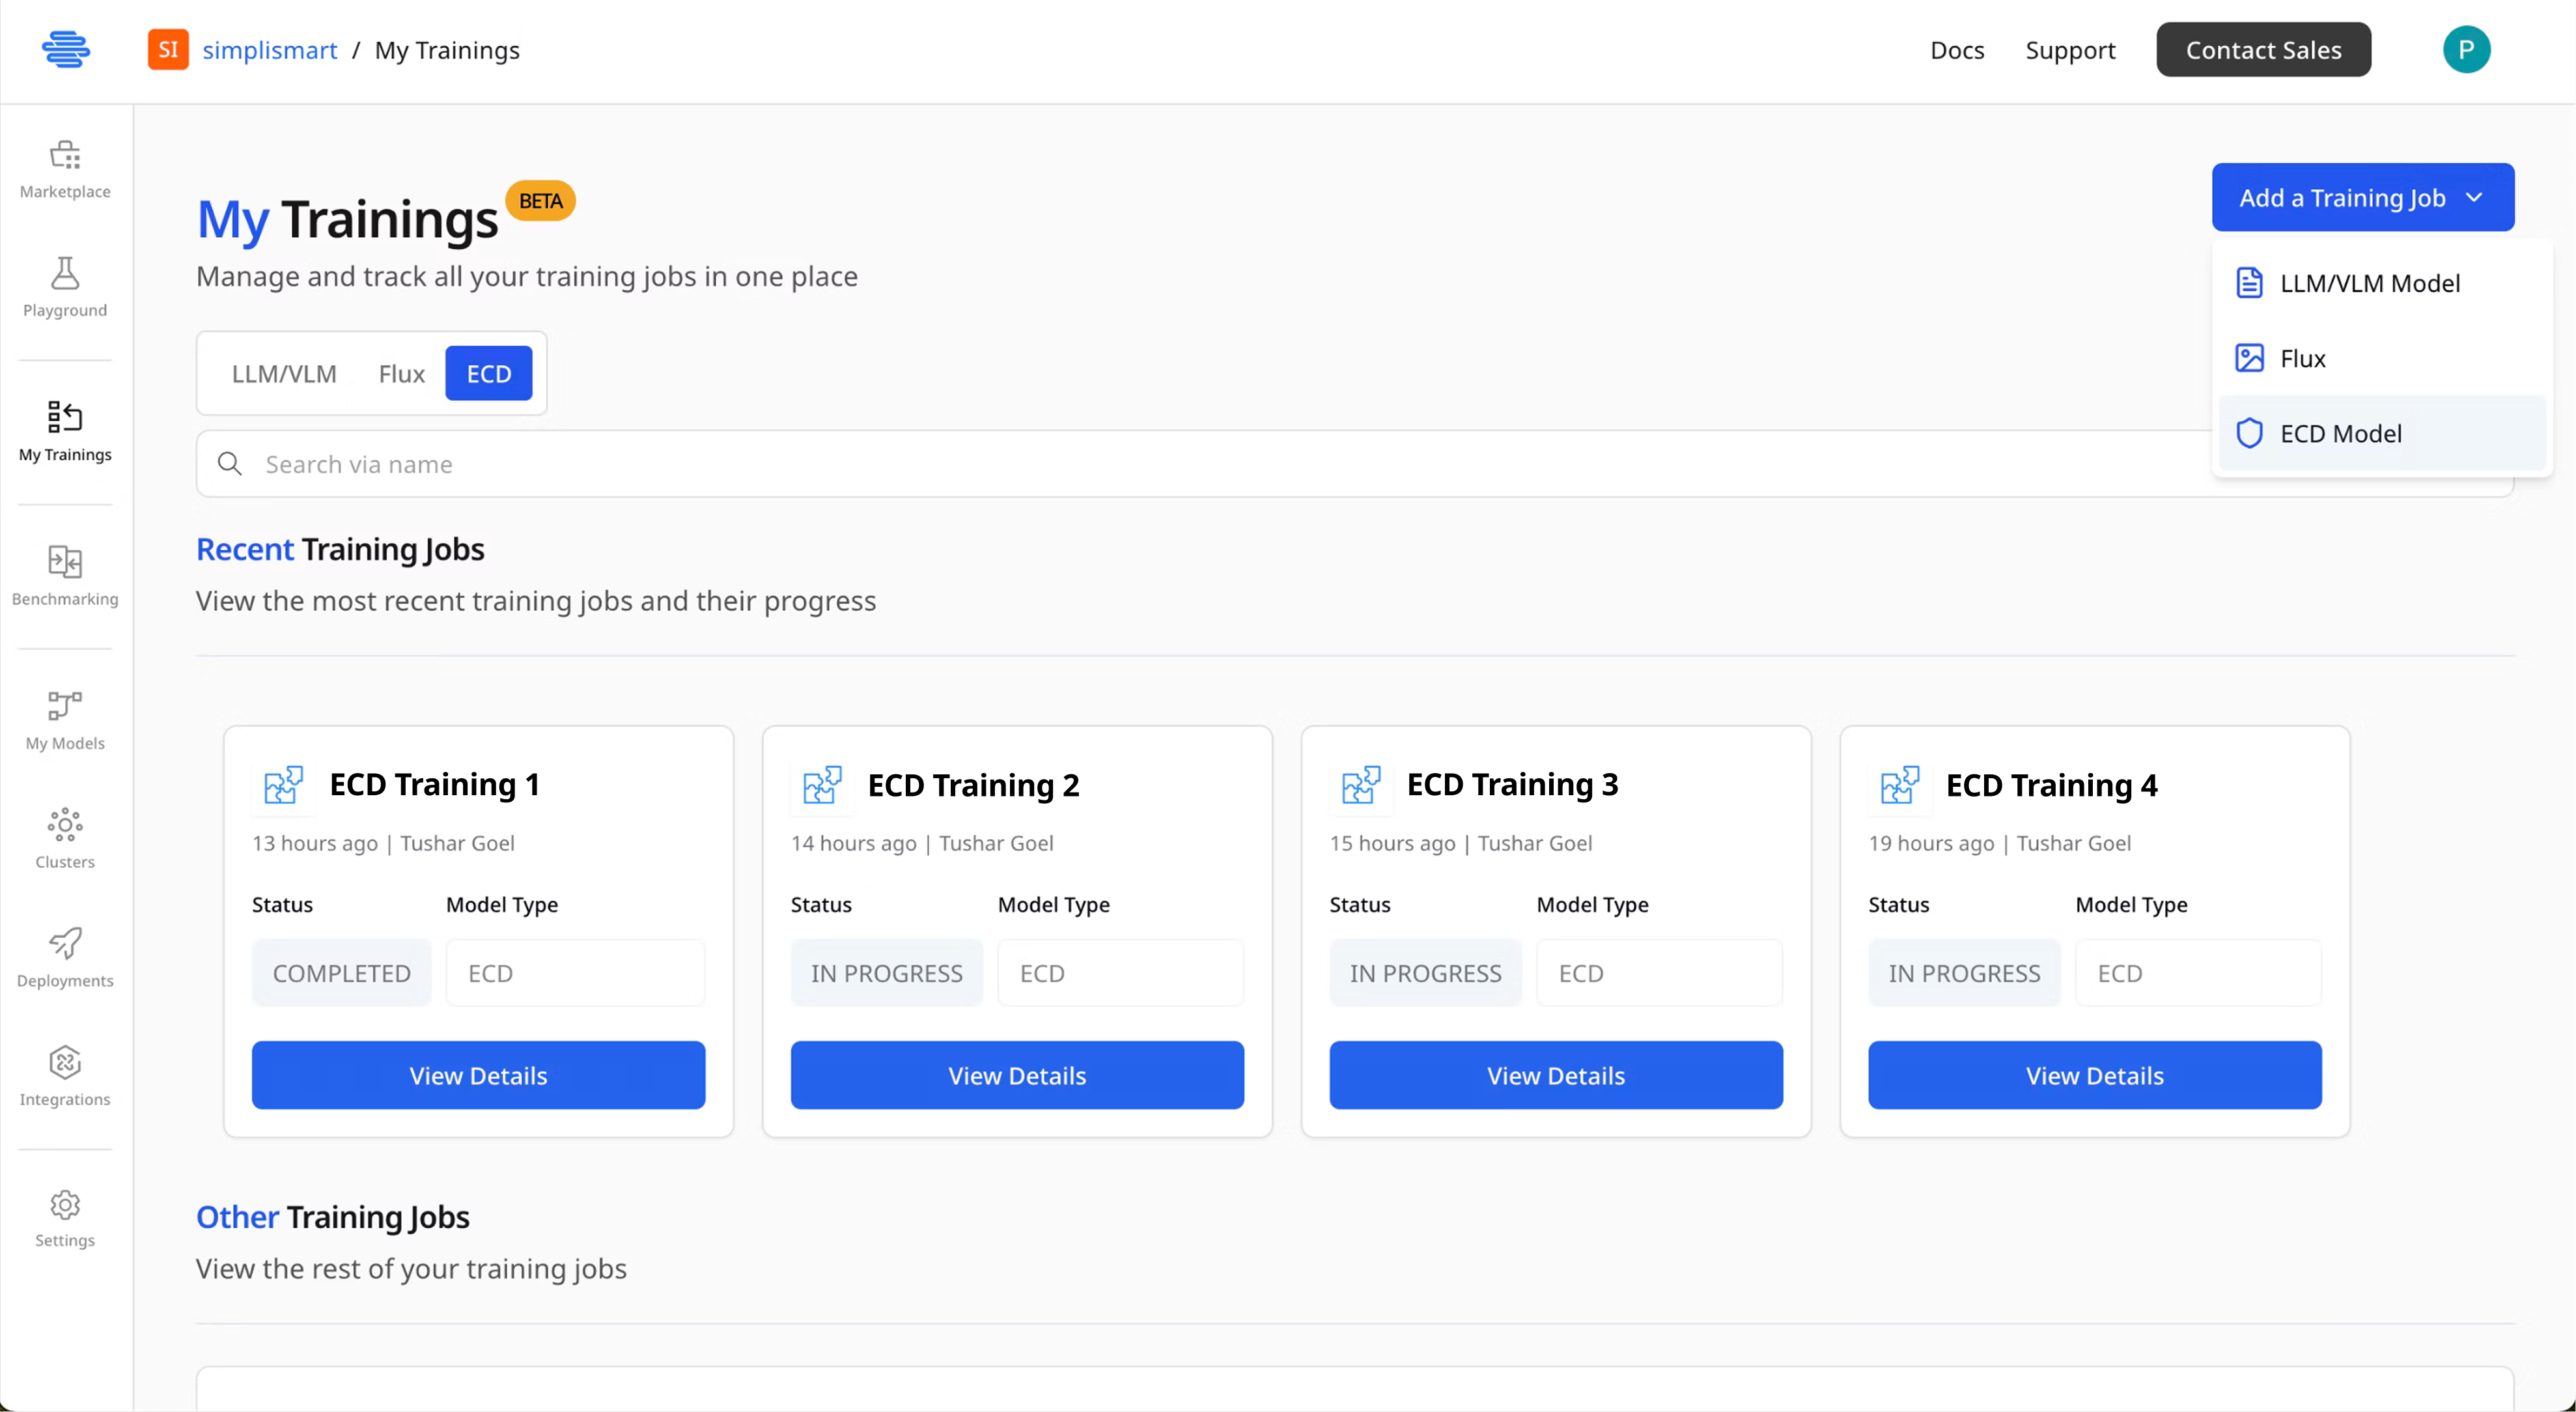
Creating a Training Job
1
Initiate Training Job
- Navigate to My Trainings from the left sidebar
- Click Add a Training Job
-
Select ECD as the model type from the available options
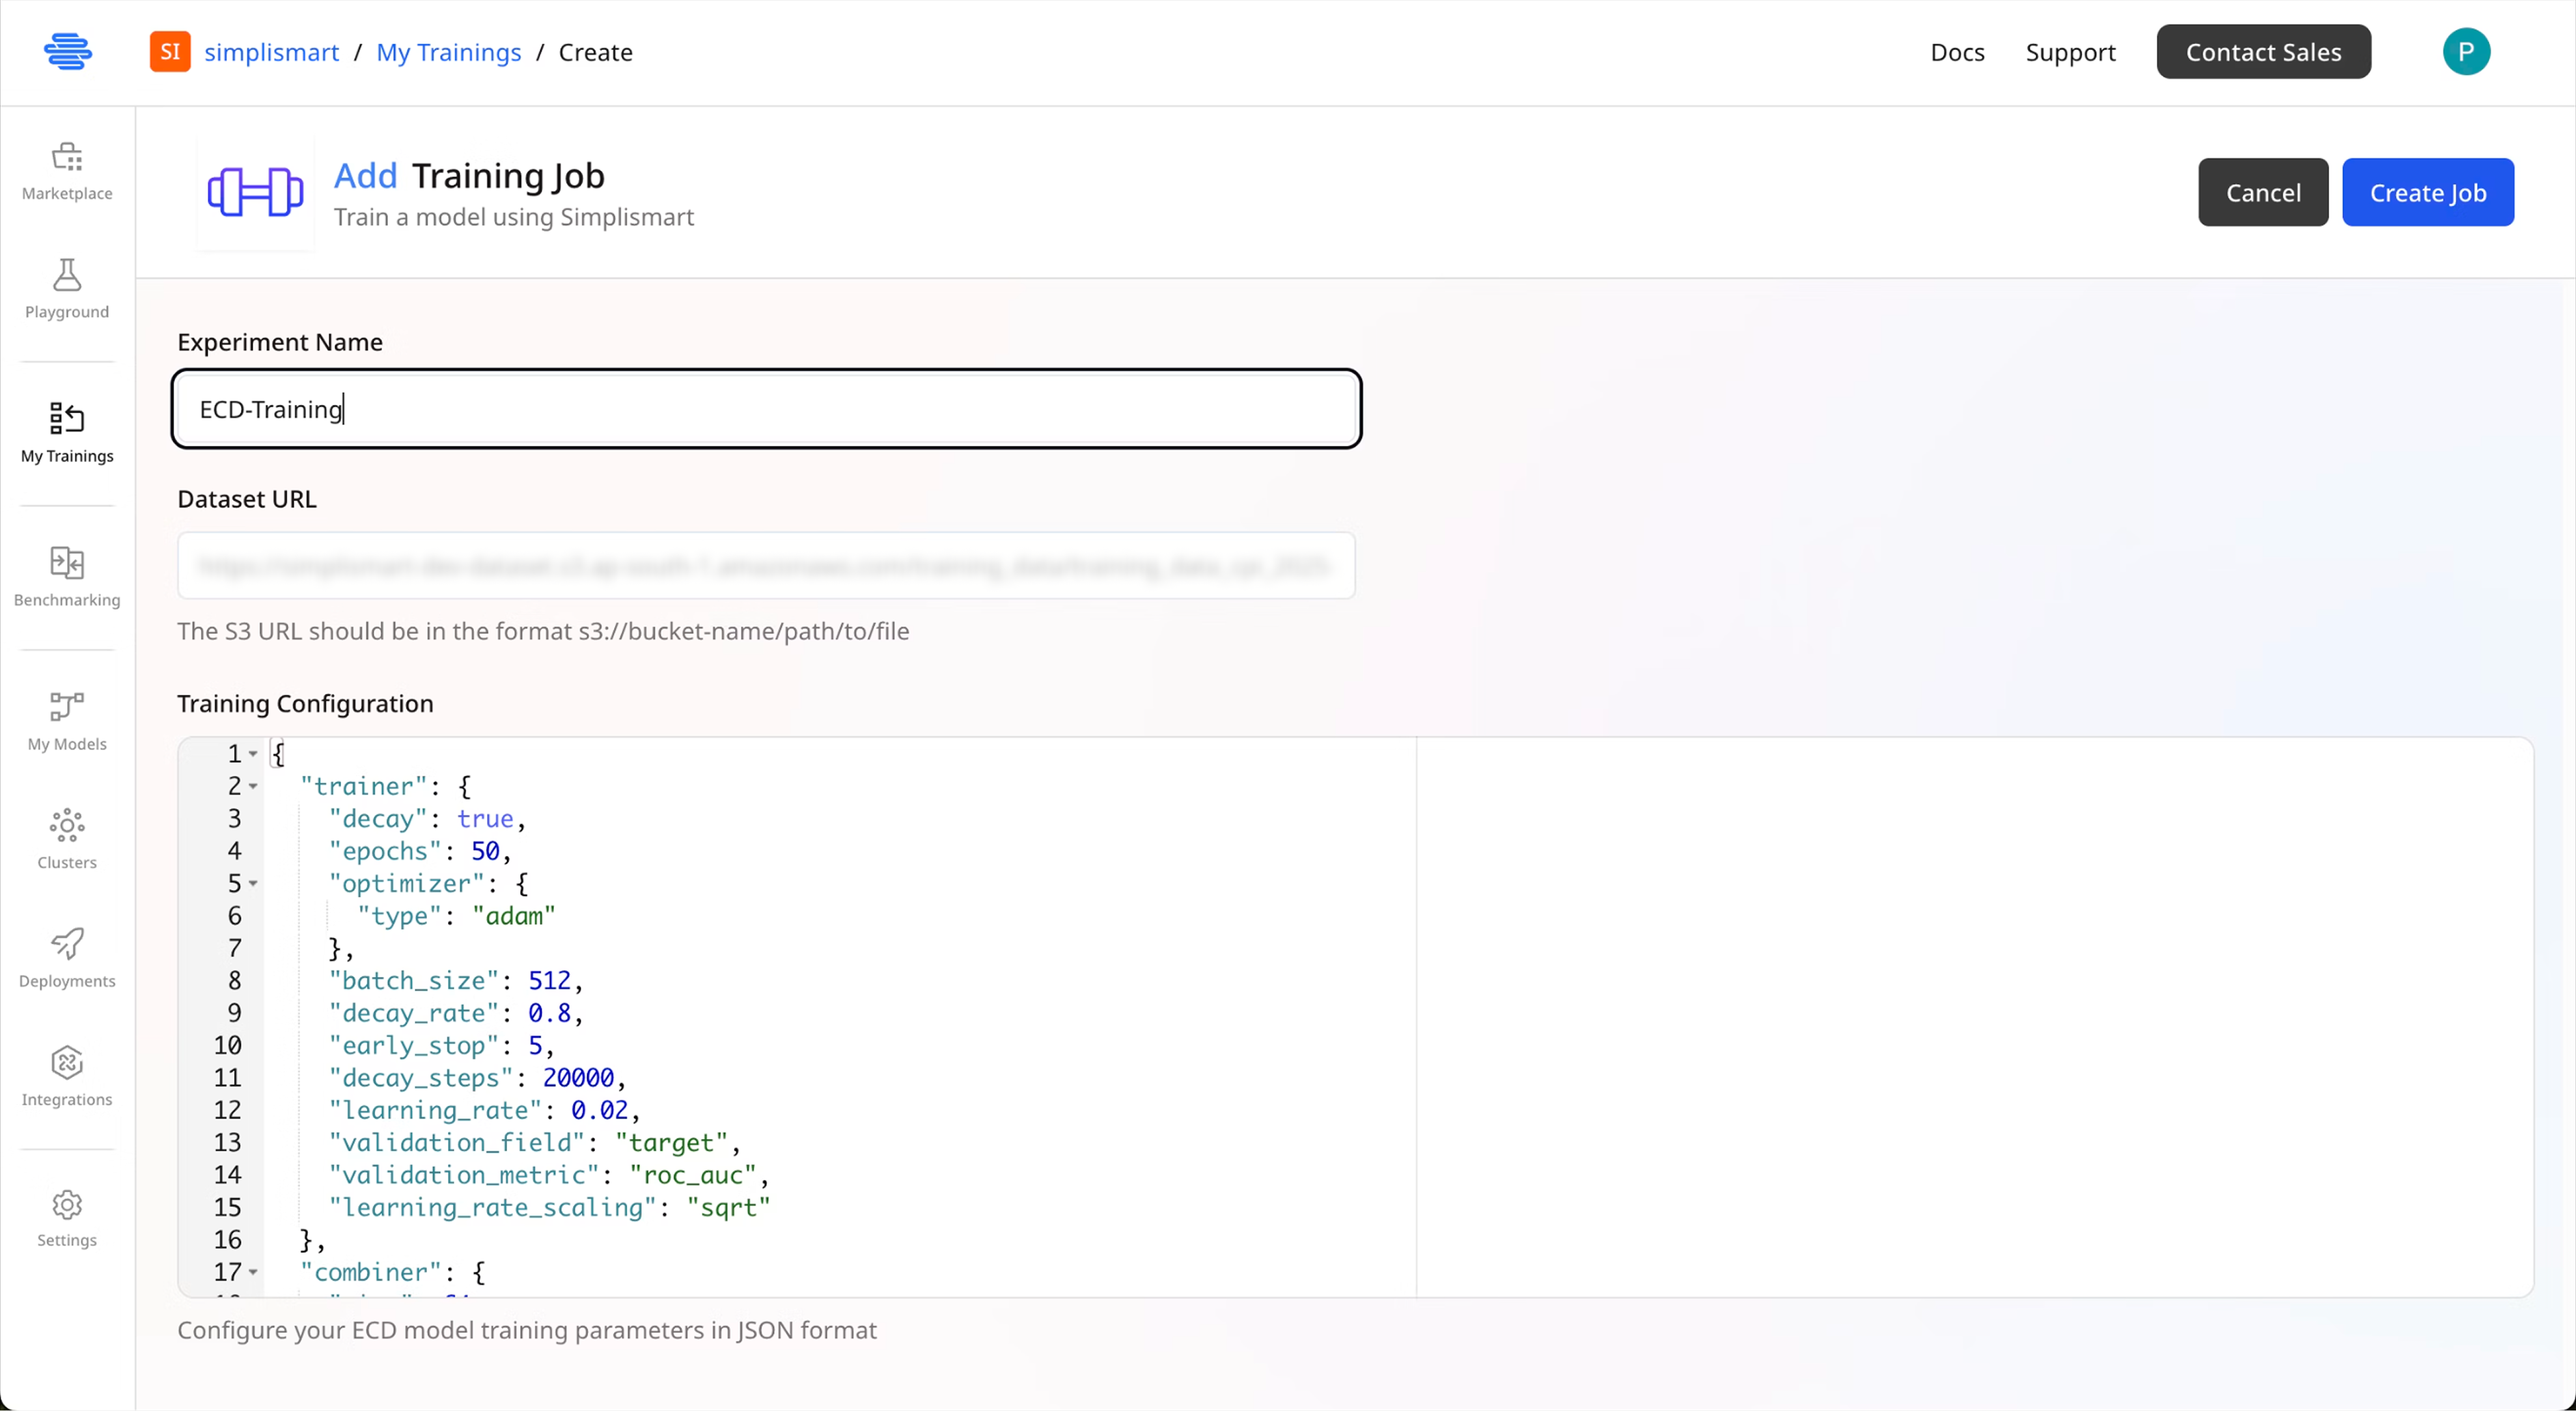
2
Configure Training Parameters
Provide the following details:
- Experiment Name: Enter a descriptive name for your training experiment
- Dataset URL: Provide the publicly accessible URL to your dataset
- Training Configuration: Add your ECD model configuration
-
Review all settings and click Create Job to start training
3
Monitor Training Progress
Once submitted, your training job will begin processing. You can:
- Monitor training progress in real-time
- View training metrics and logs
- Track loss curves and validation performance
Compiling Your Trained Model
After training completes, compile your model to prepare it for deployment.1
Navigate to Model Compilation
- Click the Compile button on your completed training job
- You’ll be redirected to the model compilation page
-
The page shows your model ready to be added to
My Models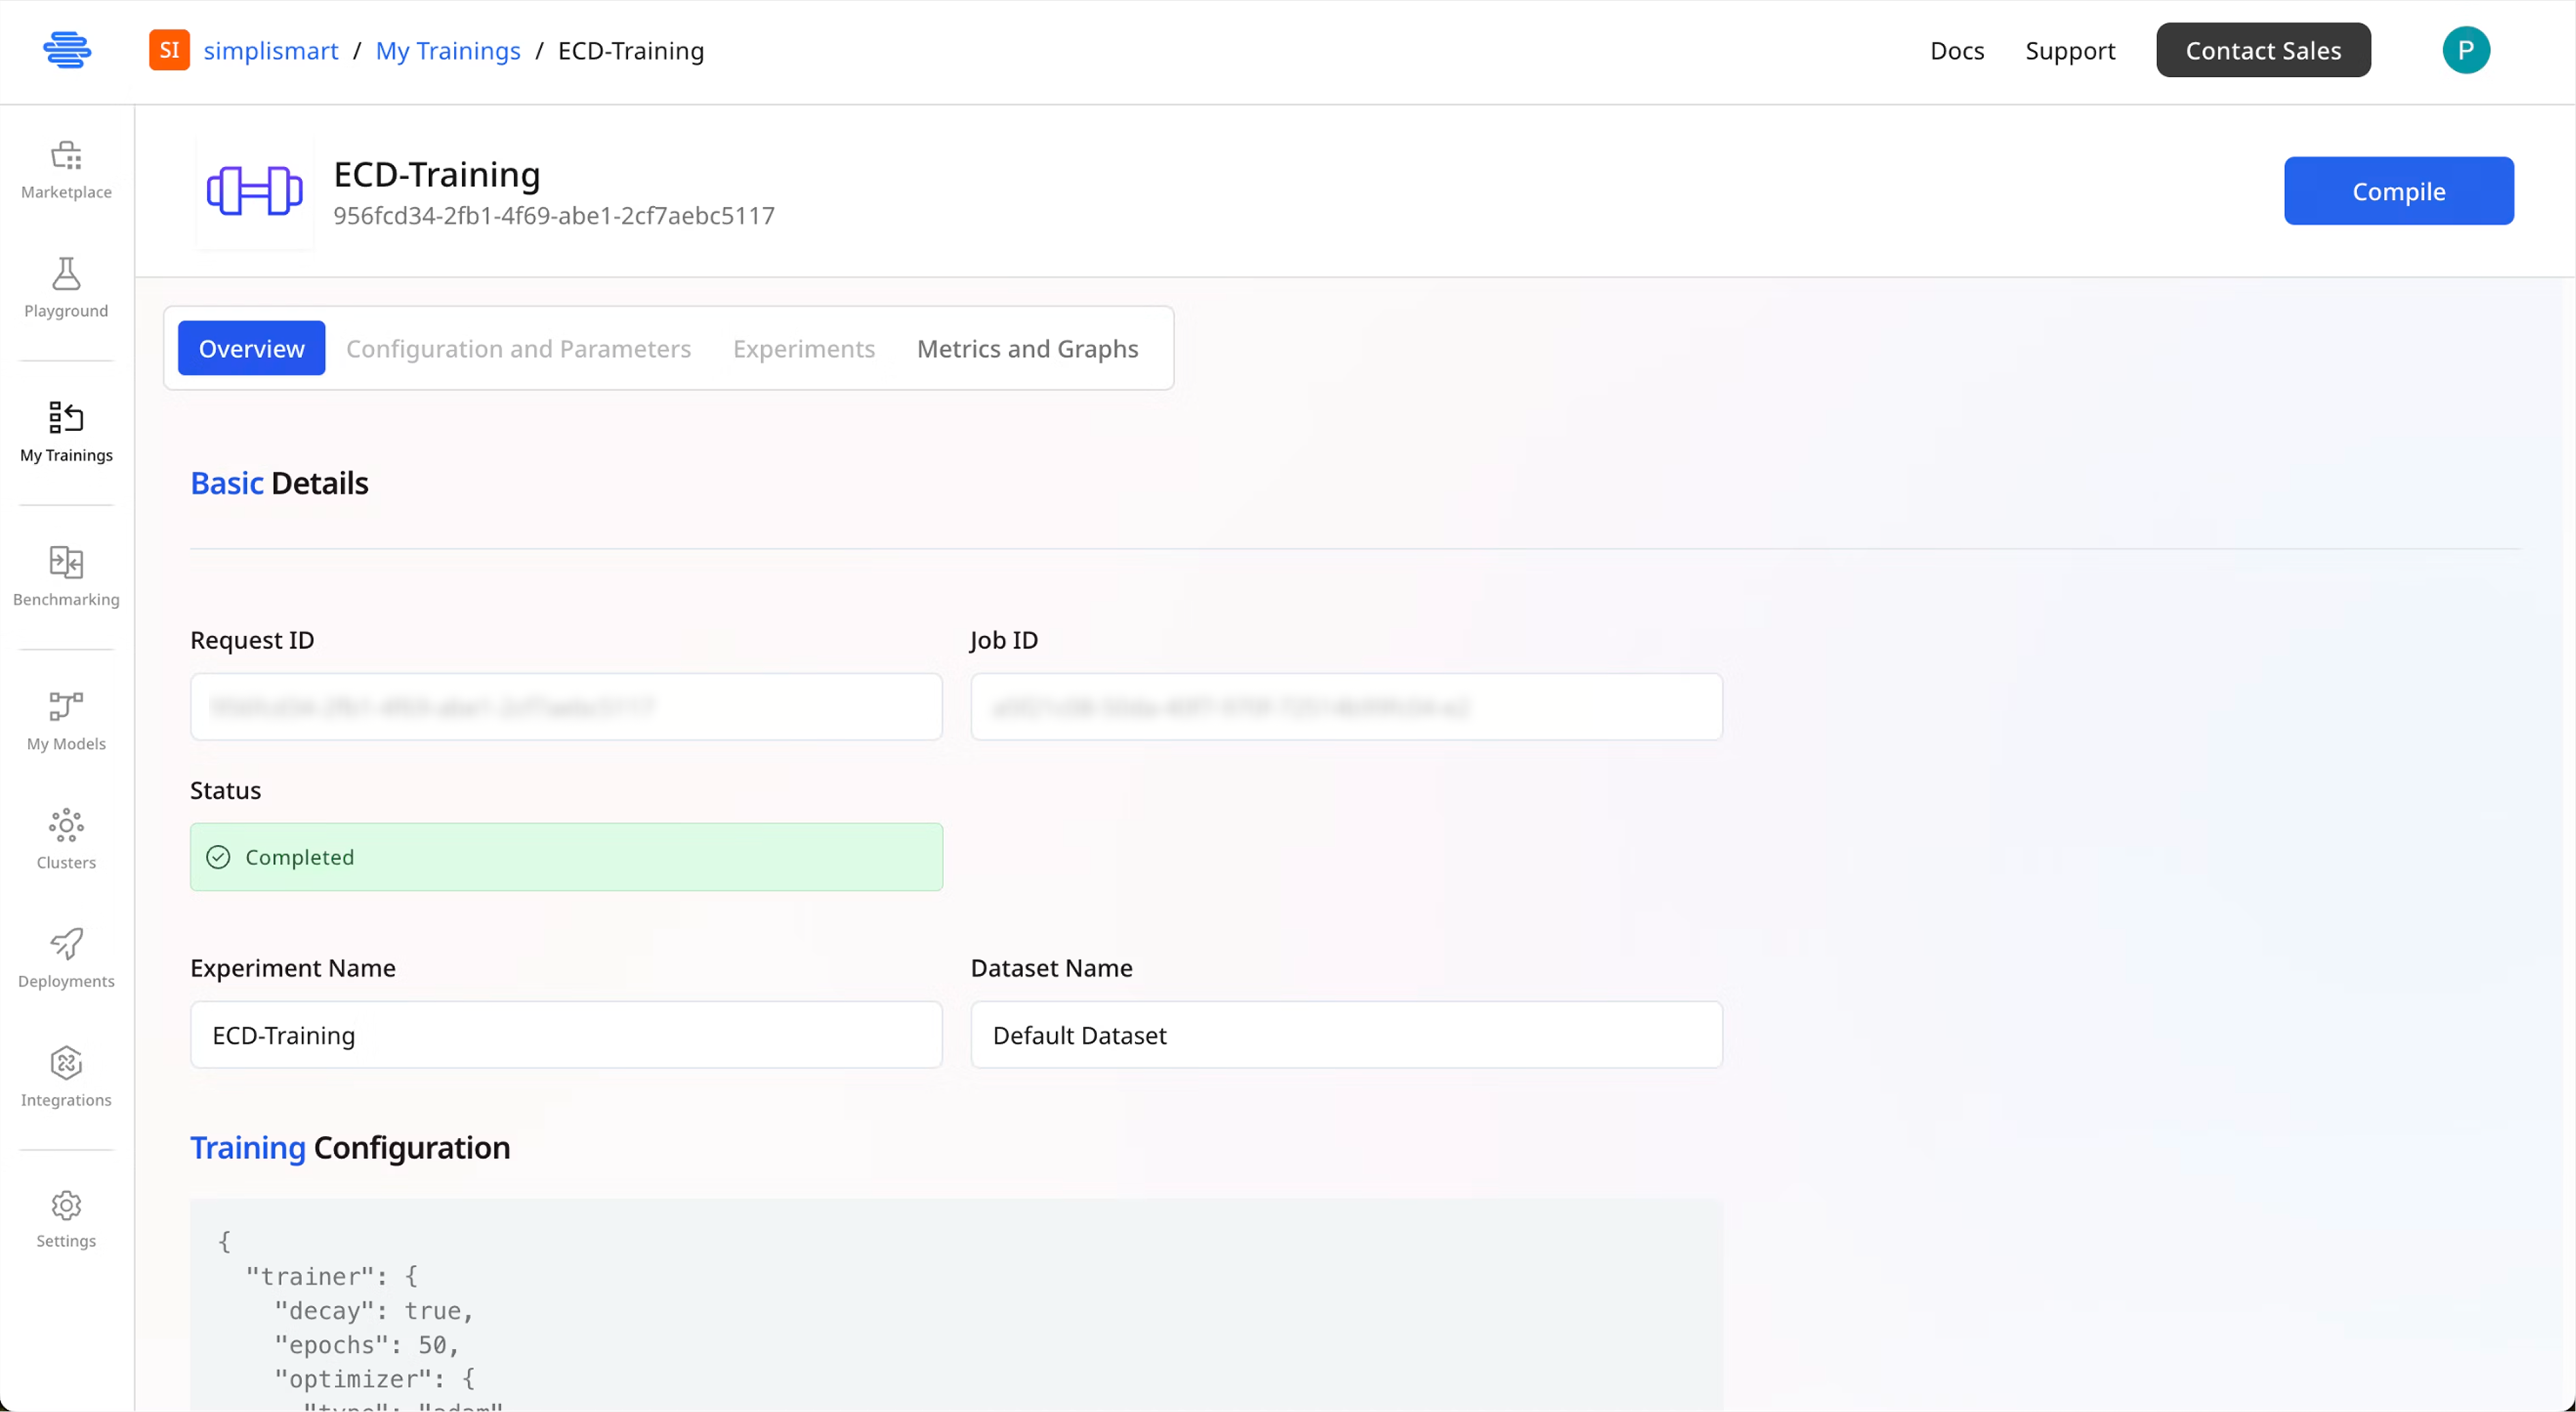
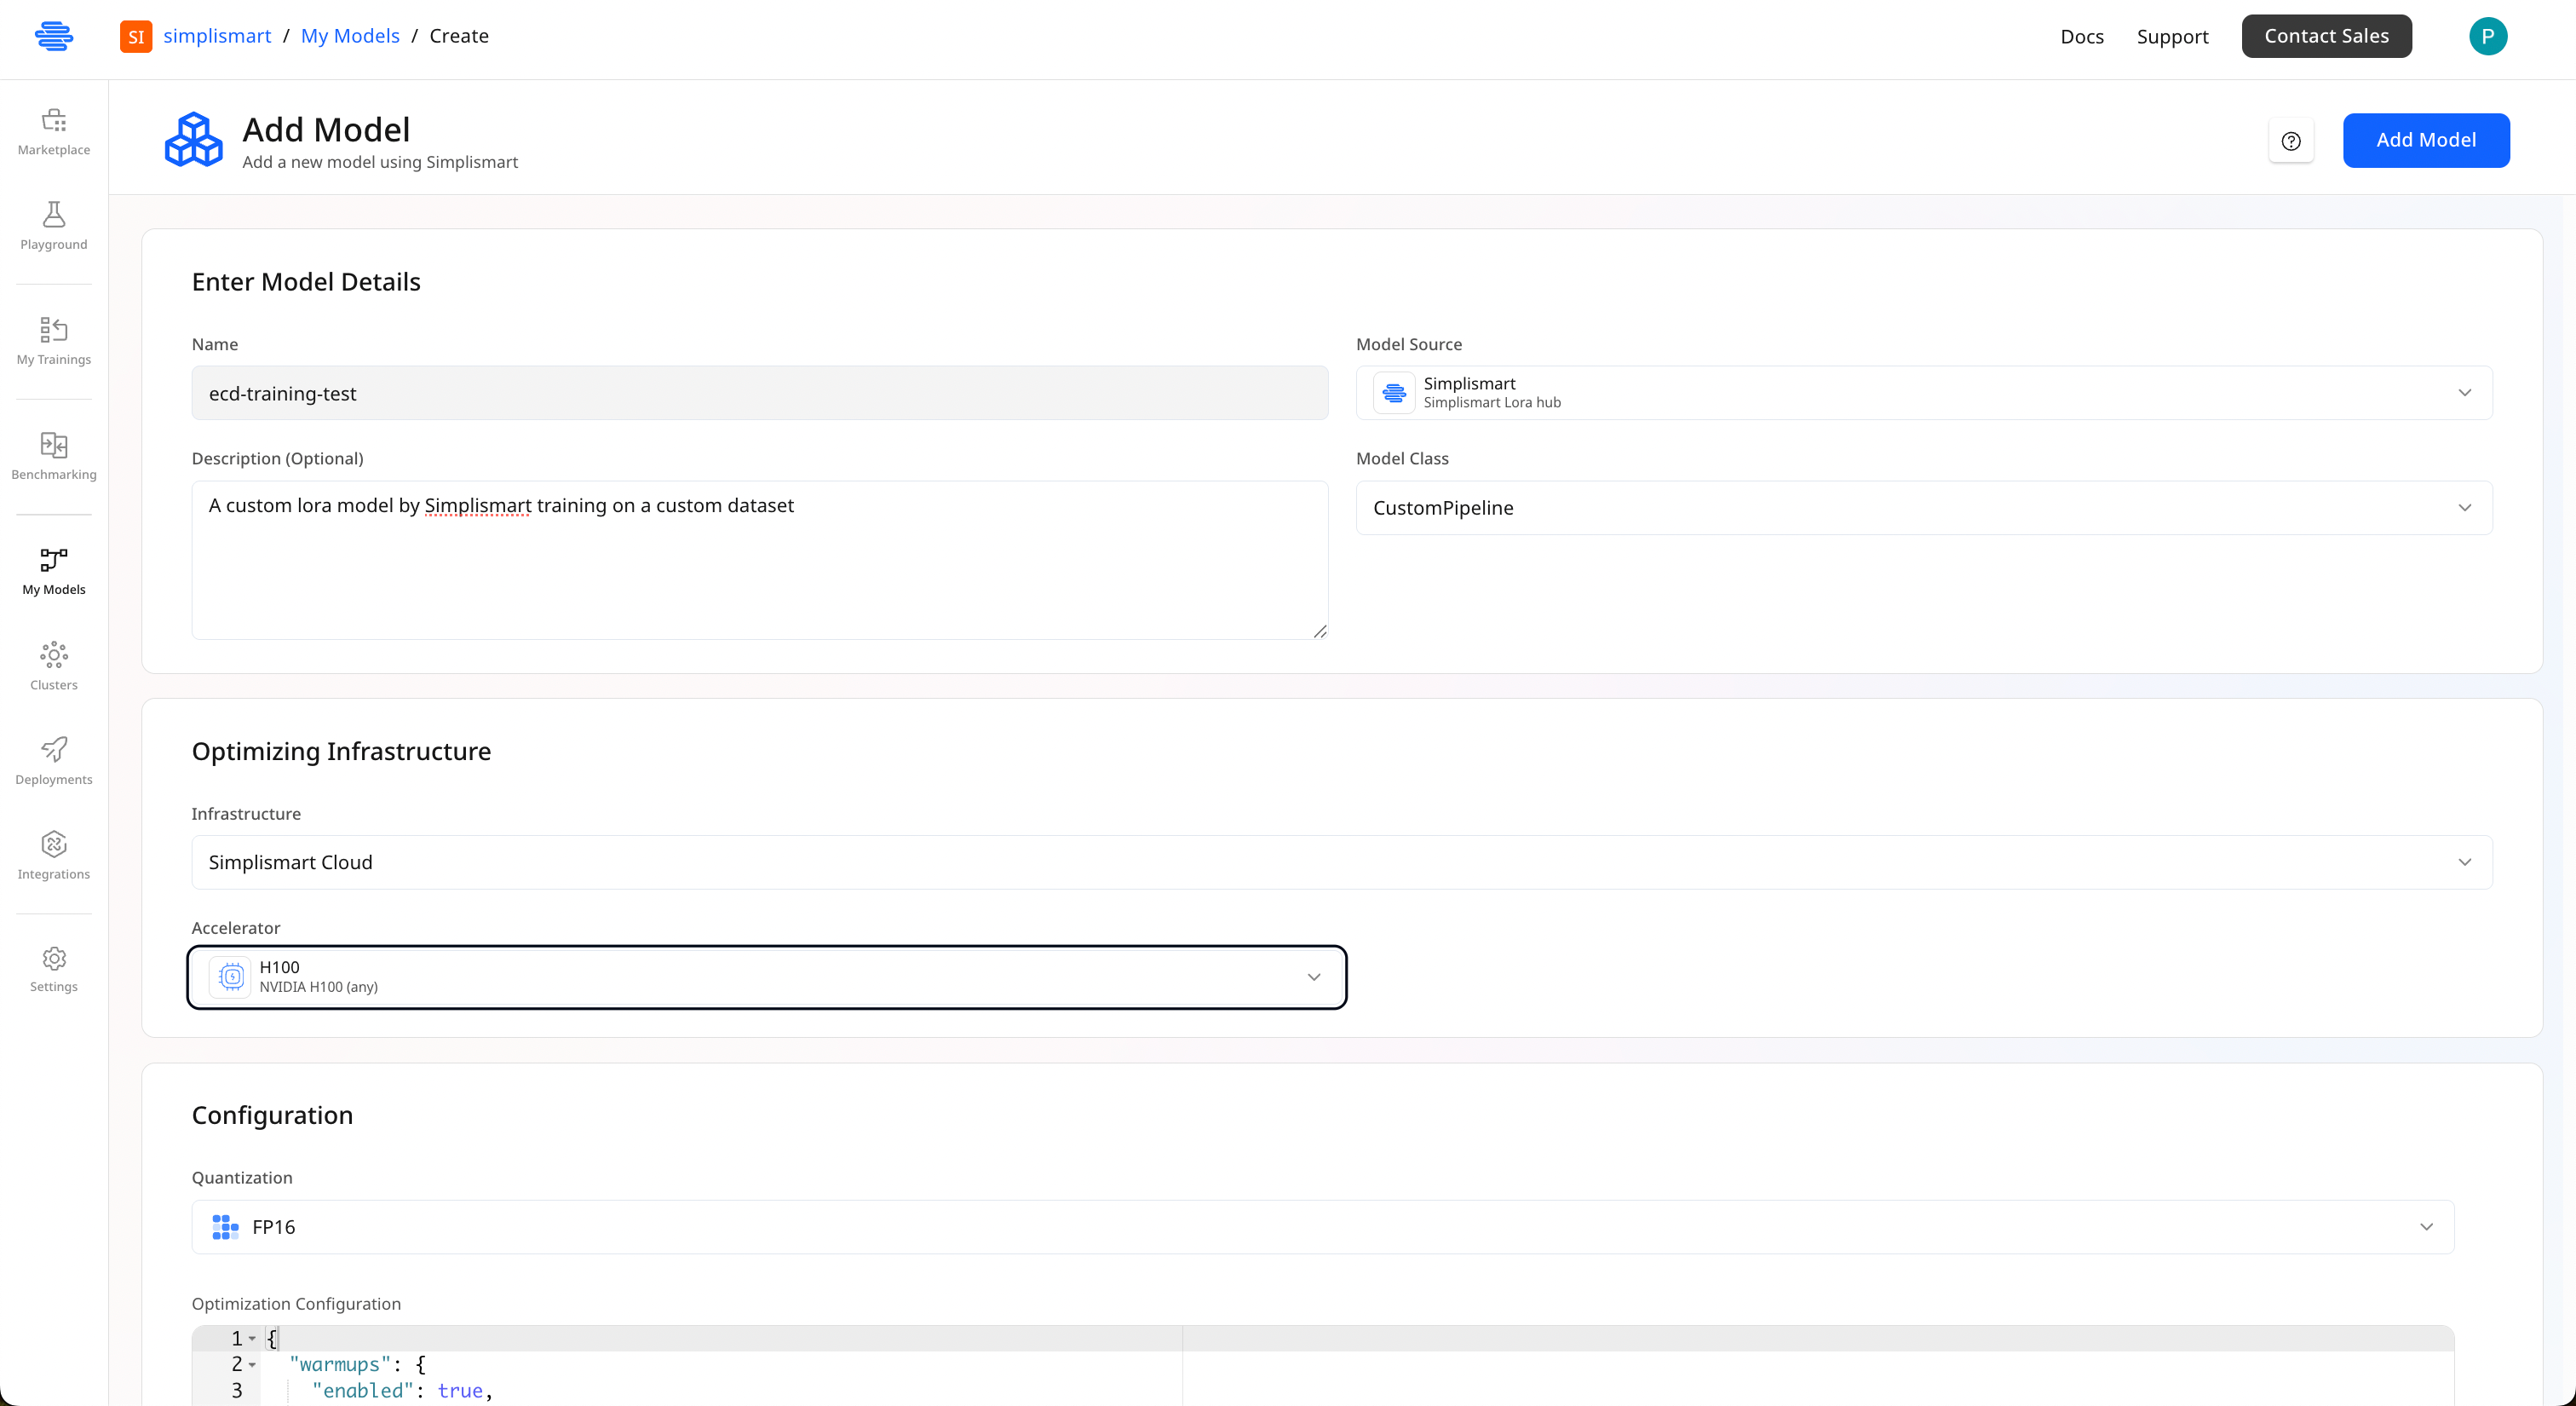
2
Configure Model Details
Provide the following information:
- Model Name: Enter a descriptive name for your compiled model
- Infrastructure: Choose your deployment infrastructure:
- Simplismart Cloud: Deploy on Simplismart’s managed infrastructure
- Your Own Cloud: Use your own infrastructure (BYOC guide)
Most configuration options will be auto-populated based on your model class. Review them before proceeding.
- Click Add Model to proceed with Model Compilation.
Deploying Your ECD Model
1
Initiate deployment
Once your model is compiled, click on 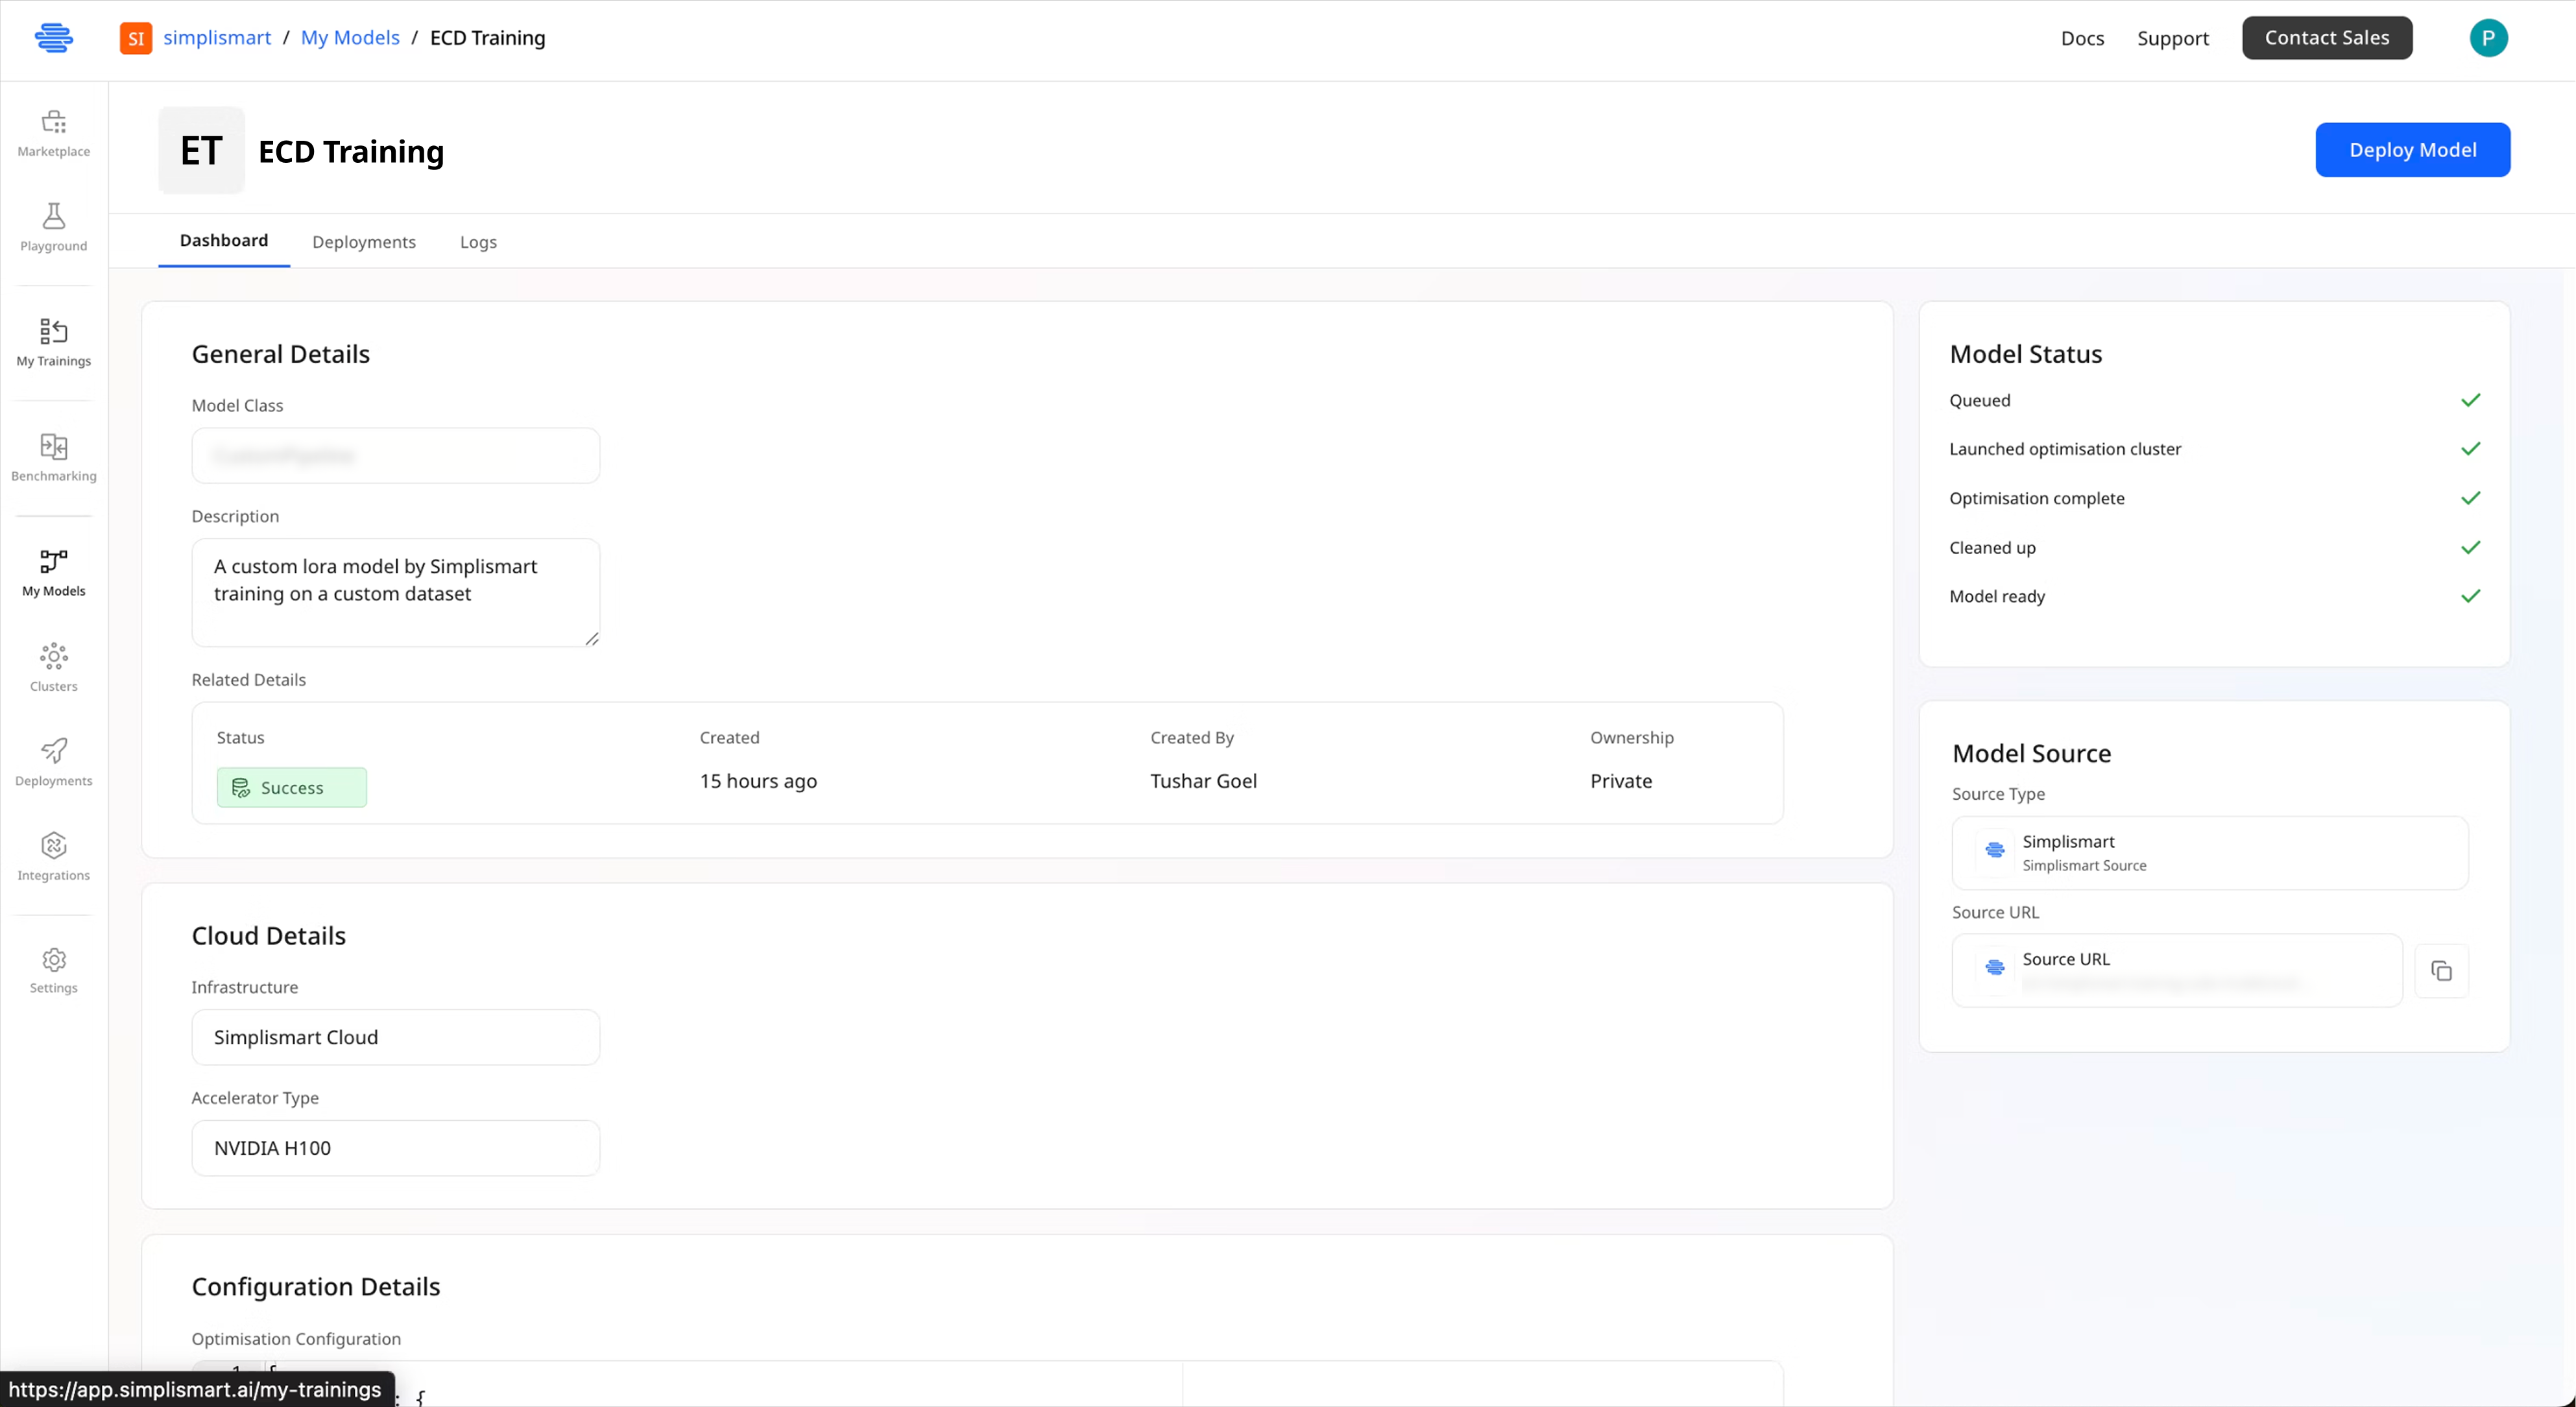
Deploy Model button from the top right corner on the model page.2
Configure Basic Deployment Settings
Go to Set up your deployment with these parameters:
Basic Details
- Deployment Name: Choose a unique, descriptive name
- Model: Auto-populated with your compiled model
- Cloud: Select your infrastructure (Simplismart Cloud or your own)
- Accelerator Type: Choose the GPU type for inference\
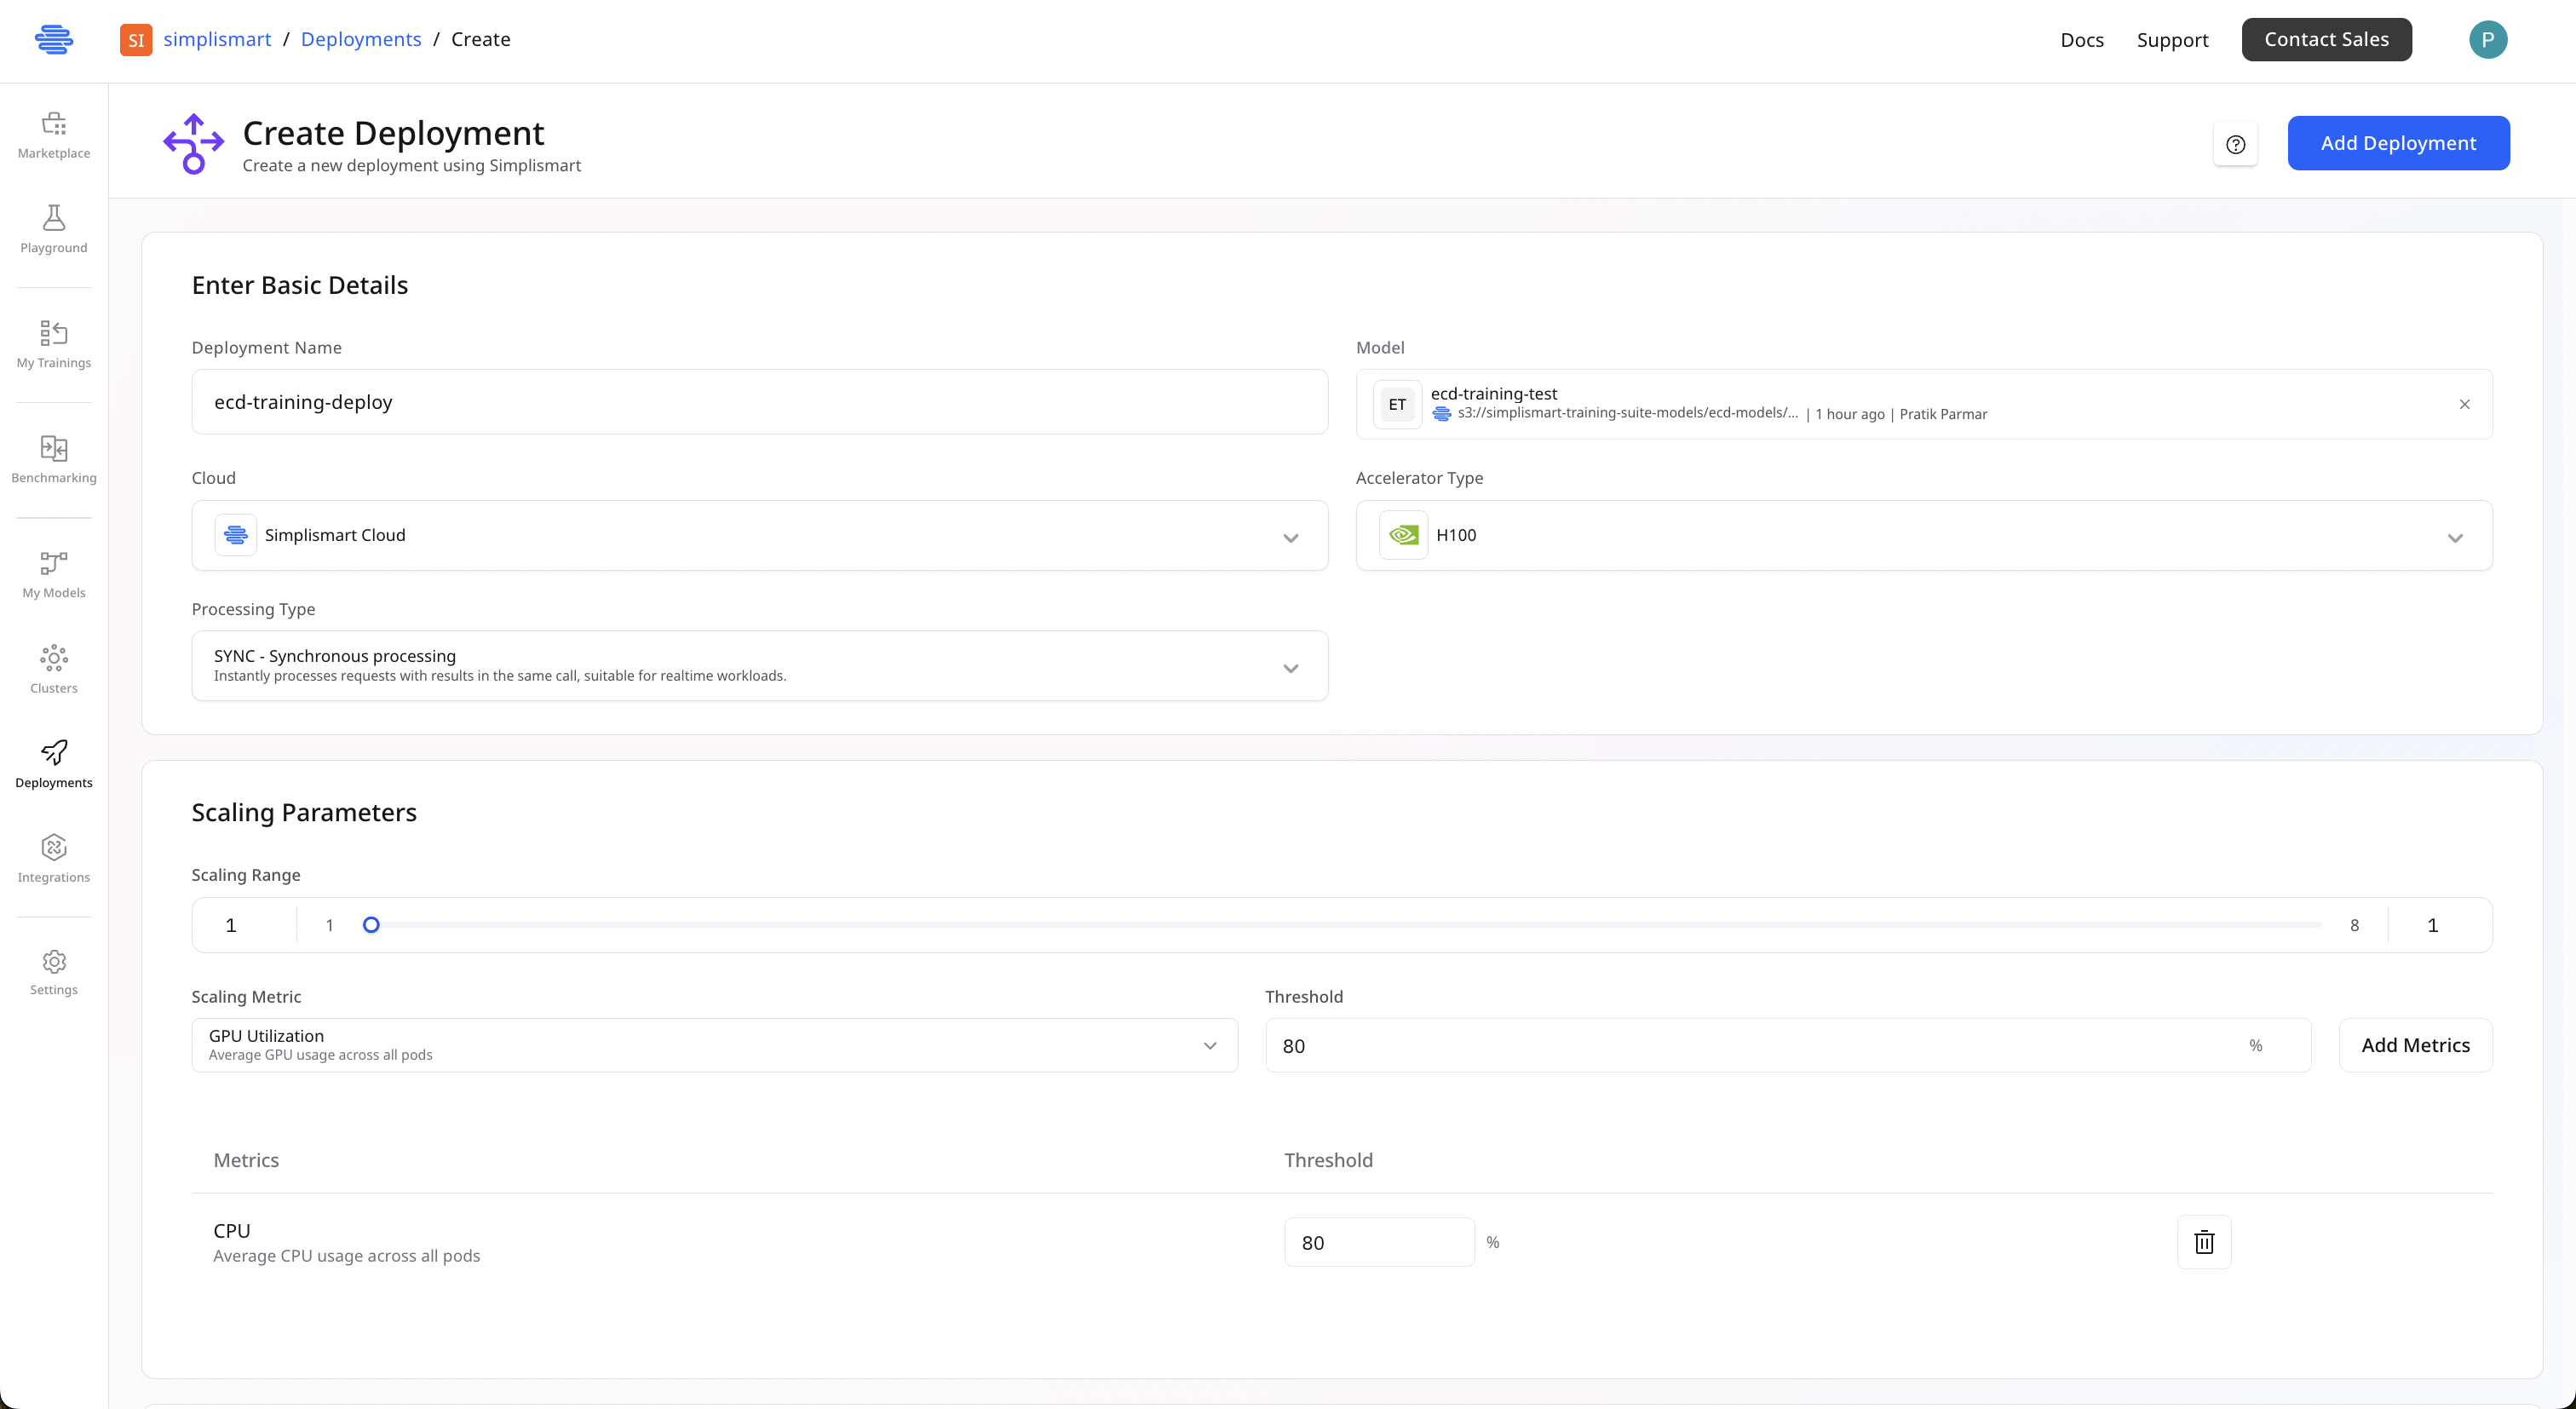
3
Set Up Auto-Scaling
Configure auto-scaling to handle variable workloads:
Scaling Range
- Minimum: 1 instance
- Maximum: Up to 8 instances (adjust based on your needs)
Scaling Metrics
Add metrics that trigger scaling actions:- GPU Utilization: Set threshold at 80% to scale up
- CPU Utilization: Set threshold at 80% for additional scaling control
4
Add Deployment Tags
Organize your deployments with tags (optional but recommended):Example tags:
- Key:
env, Value:staging - Key:
model-type, Value:ecd - Key:
version, Value:v1.0
5
Deploy and Verify
- Review all configuration settings
- Click Add Deployment to start the deployment process
- Monitor the deployment status on the right side of the screen
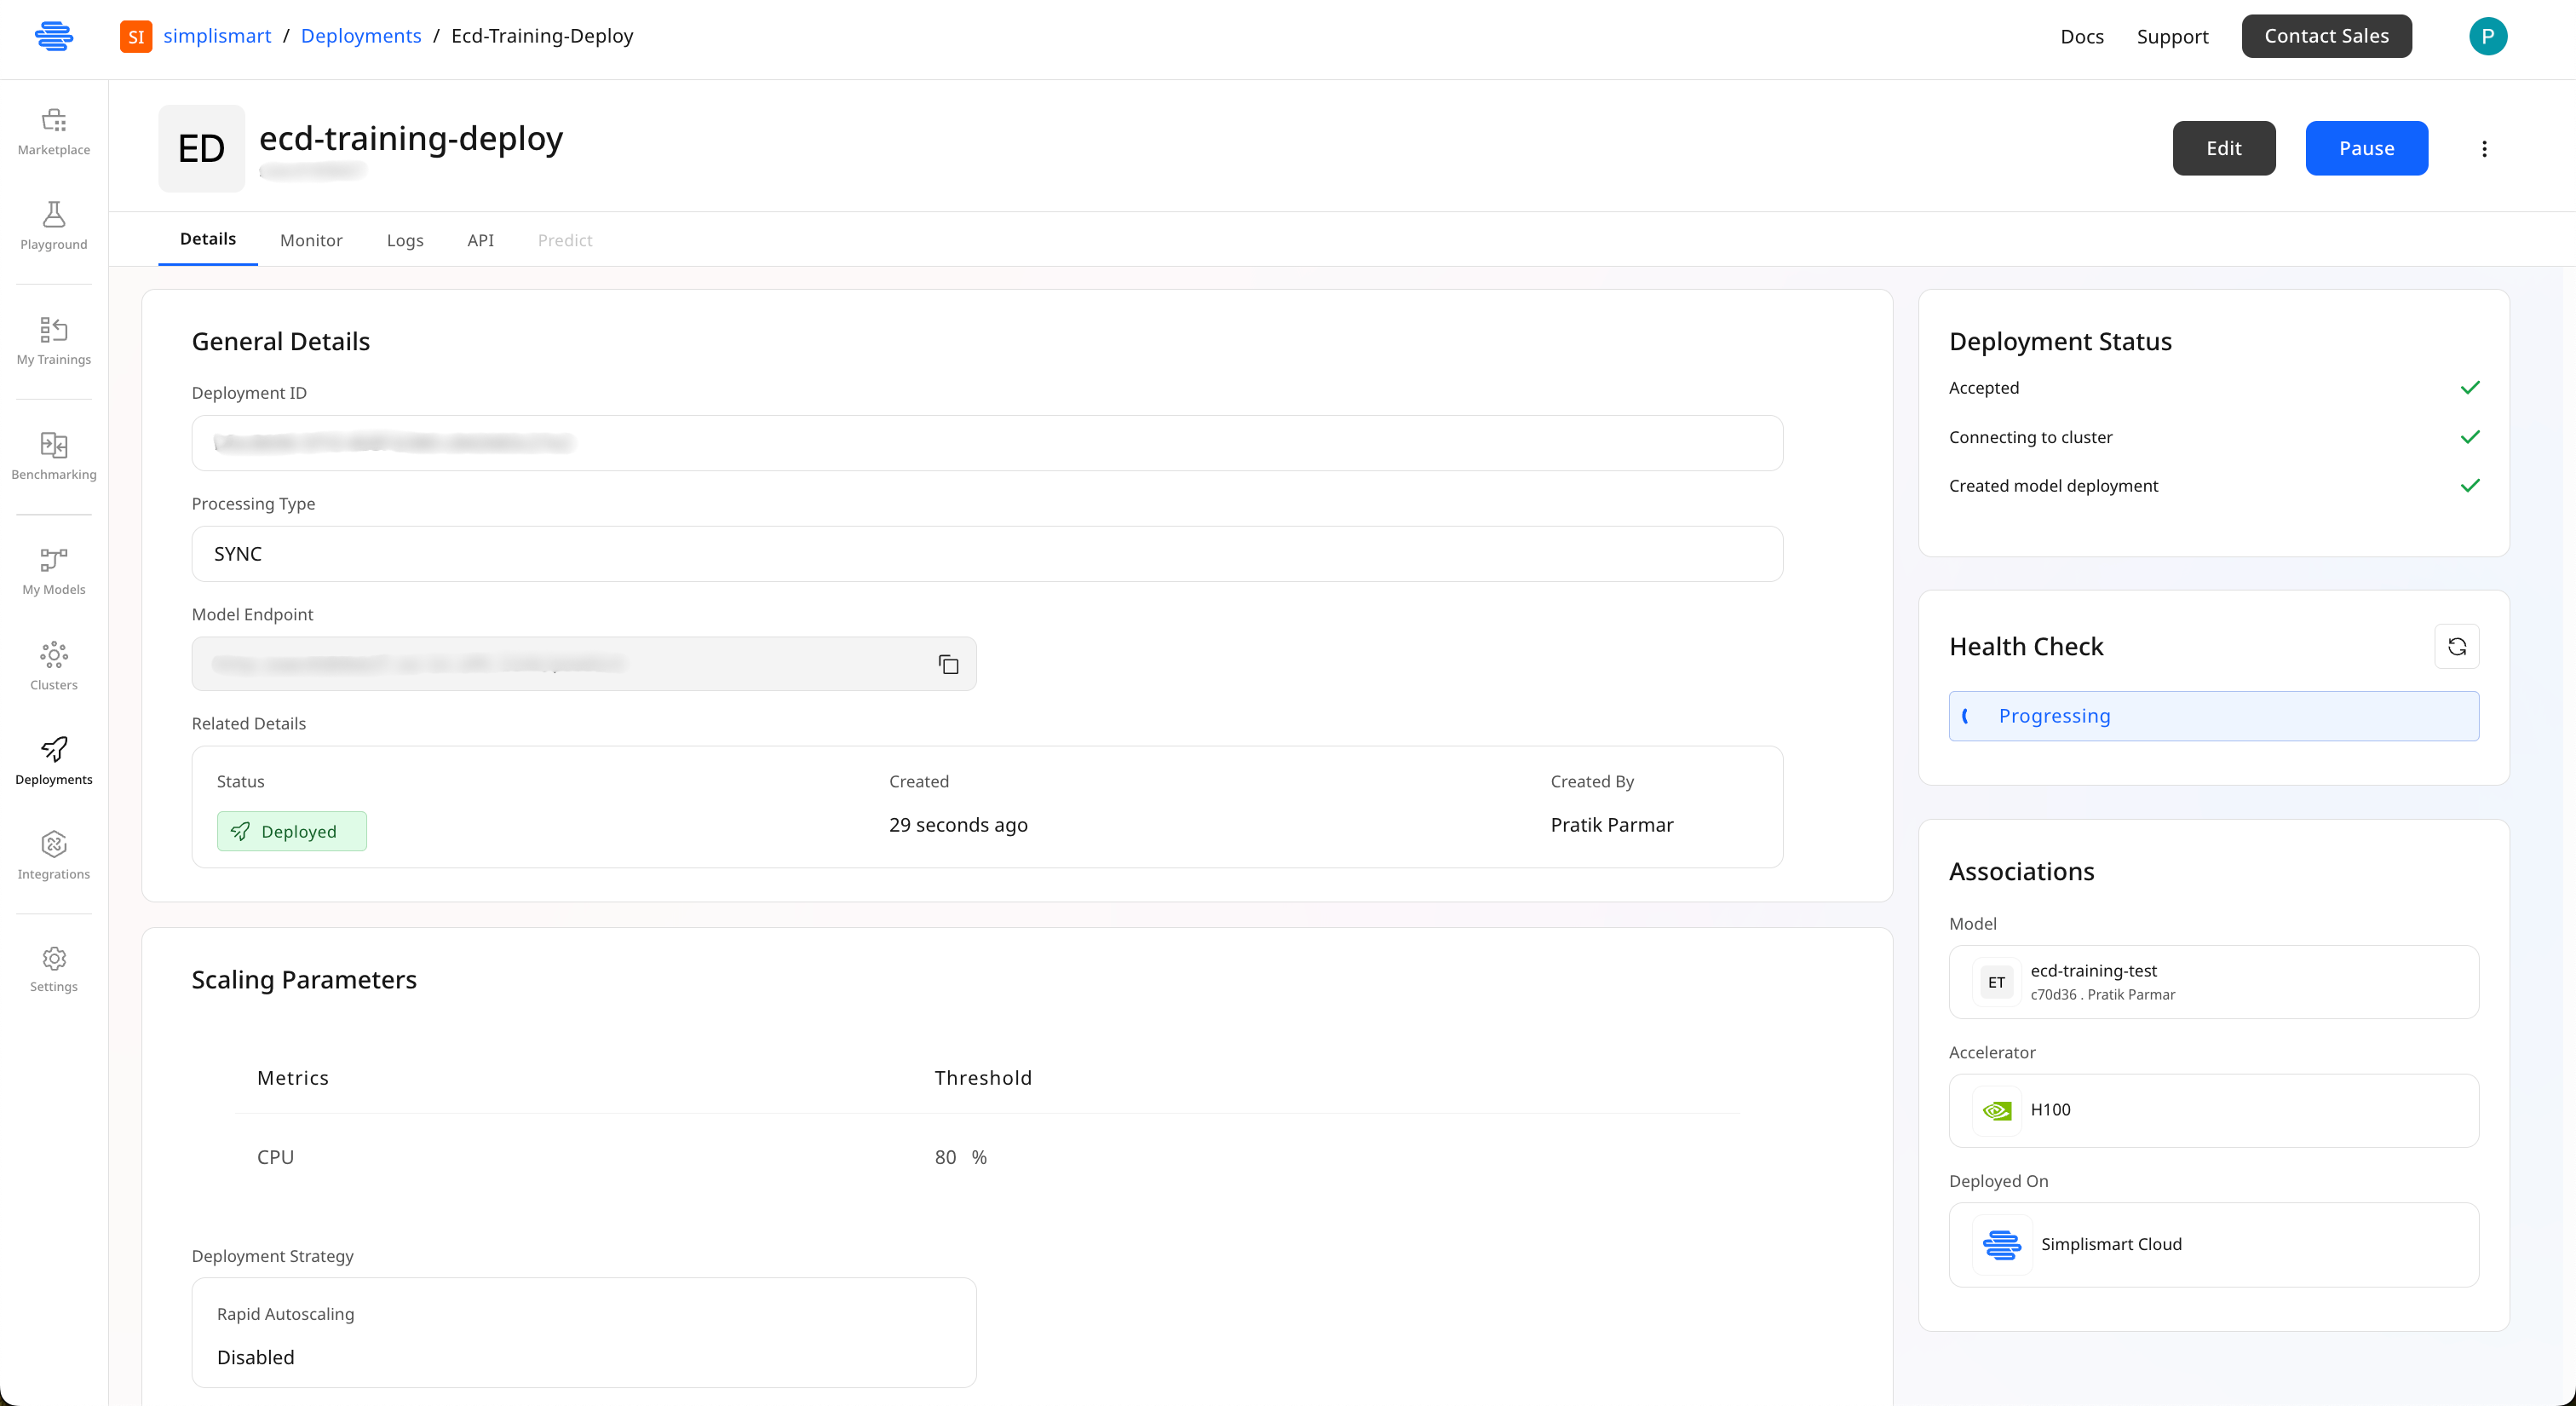
When the status shows Deployed, your model is ready to serve inference requests!
6
Access Your Model Endpoint
Once deployed, you can find your model endpoint:
- Navigate to Deployments in the left sidebar
- Click on your deployment name
- In the Details tab, find the Model Endpoint URL
- Copy this endpoint to use in your applications