Prerequisites
- A Simplismart account
- Basic Python knowledge
- Python 3.8+ installed on your system
Step-by-Step Guide
1
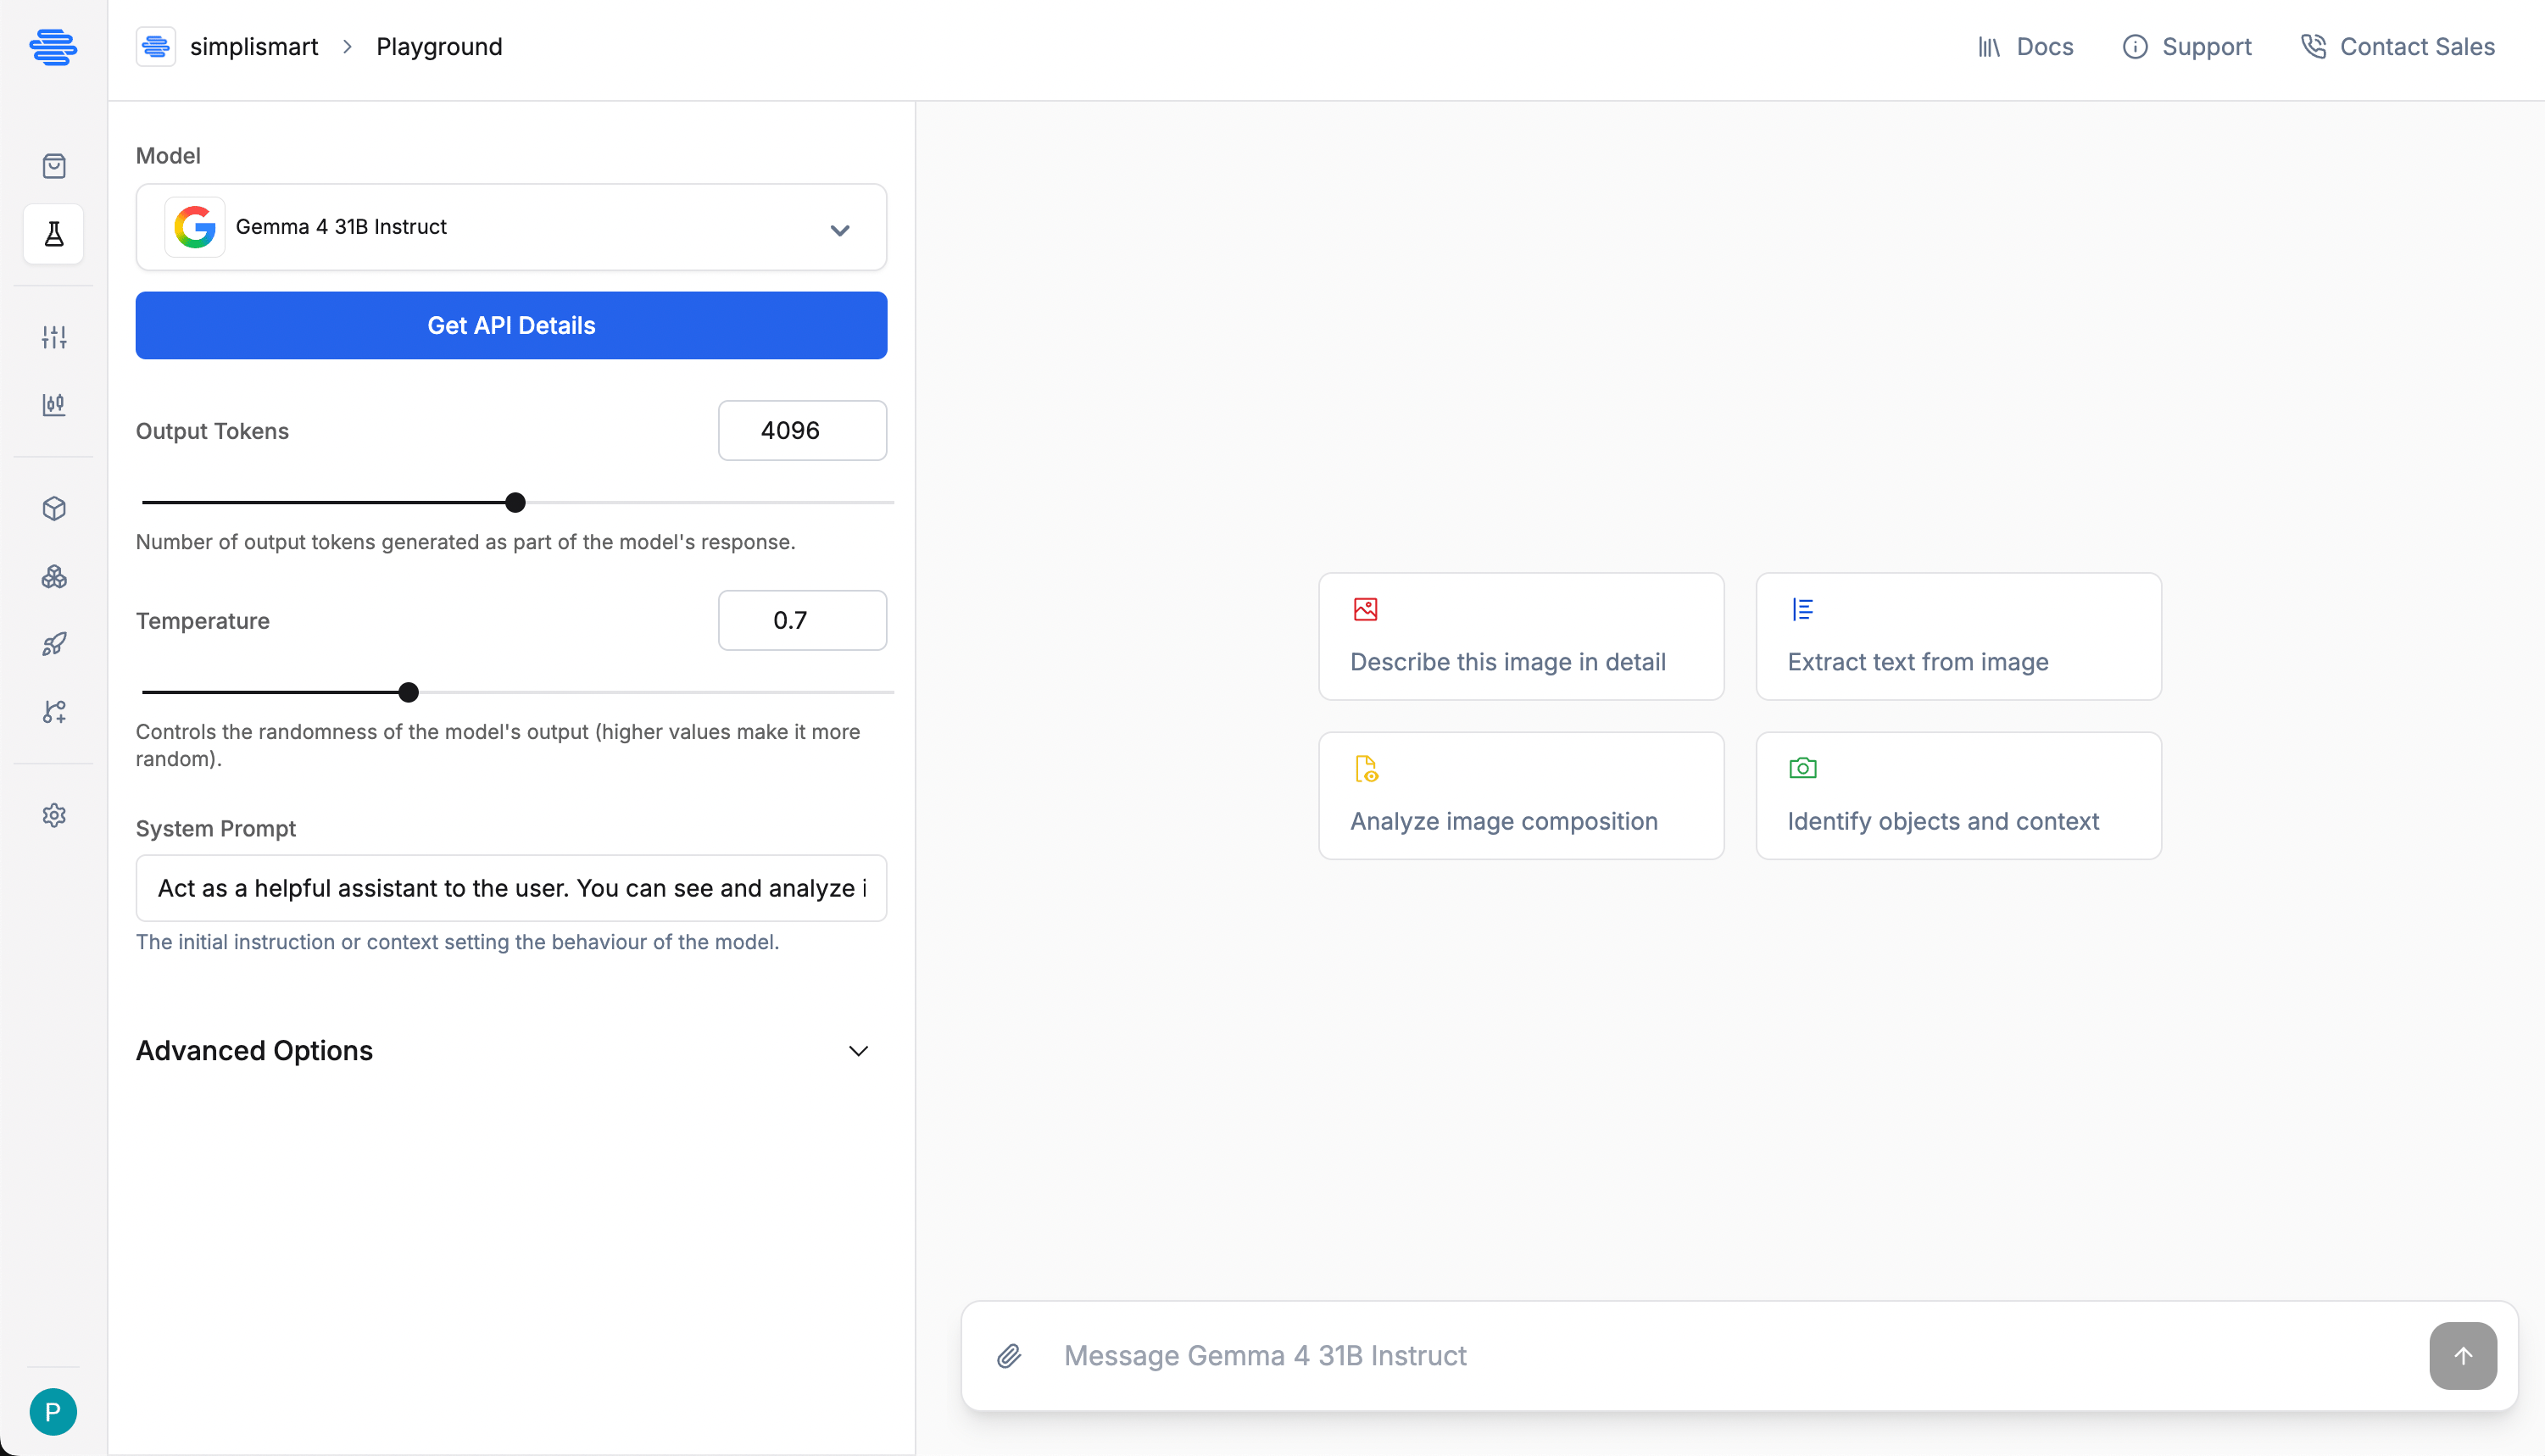
Access the Playground
- Log in to your Simplismart account
- From the left sidebar, click on Playground
- In the model dropdown, select Gemma 4 31B Instruct. (For example purposes, Gemma 4 31B is considered here. Any other LLM can be used as well.)
-
You’ll see an interactive chat interface where you can test the model directly
2
Get API Details
- In the Playground, click on Get API details in the left sidebar
- You’ll be redirected to a page with ready-to-use code snippets
- Note that both Python (OpenAI client) and cURL examples are provided
- Copy the provided code snippet or use the given below
3
Create Your Python Script
Create a new file named
inference.py with the following code:Remember to replace
"YOUR_API_KEY" and YOUR_MODEL_ENDPOINT with the actual API key and model endpoint you generated in the previous steps.4
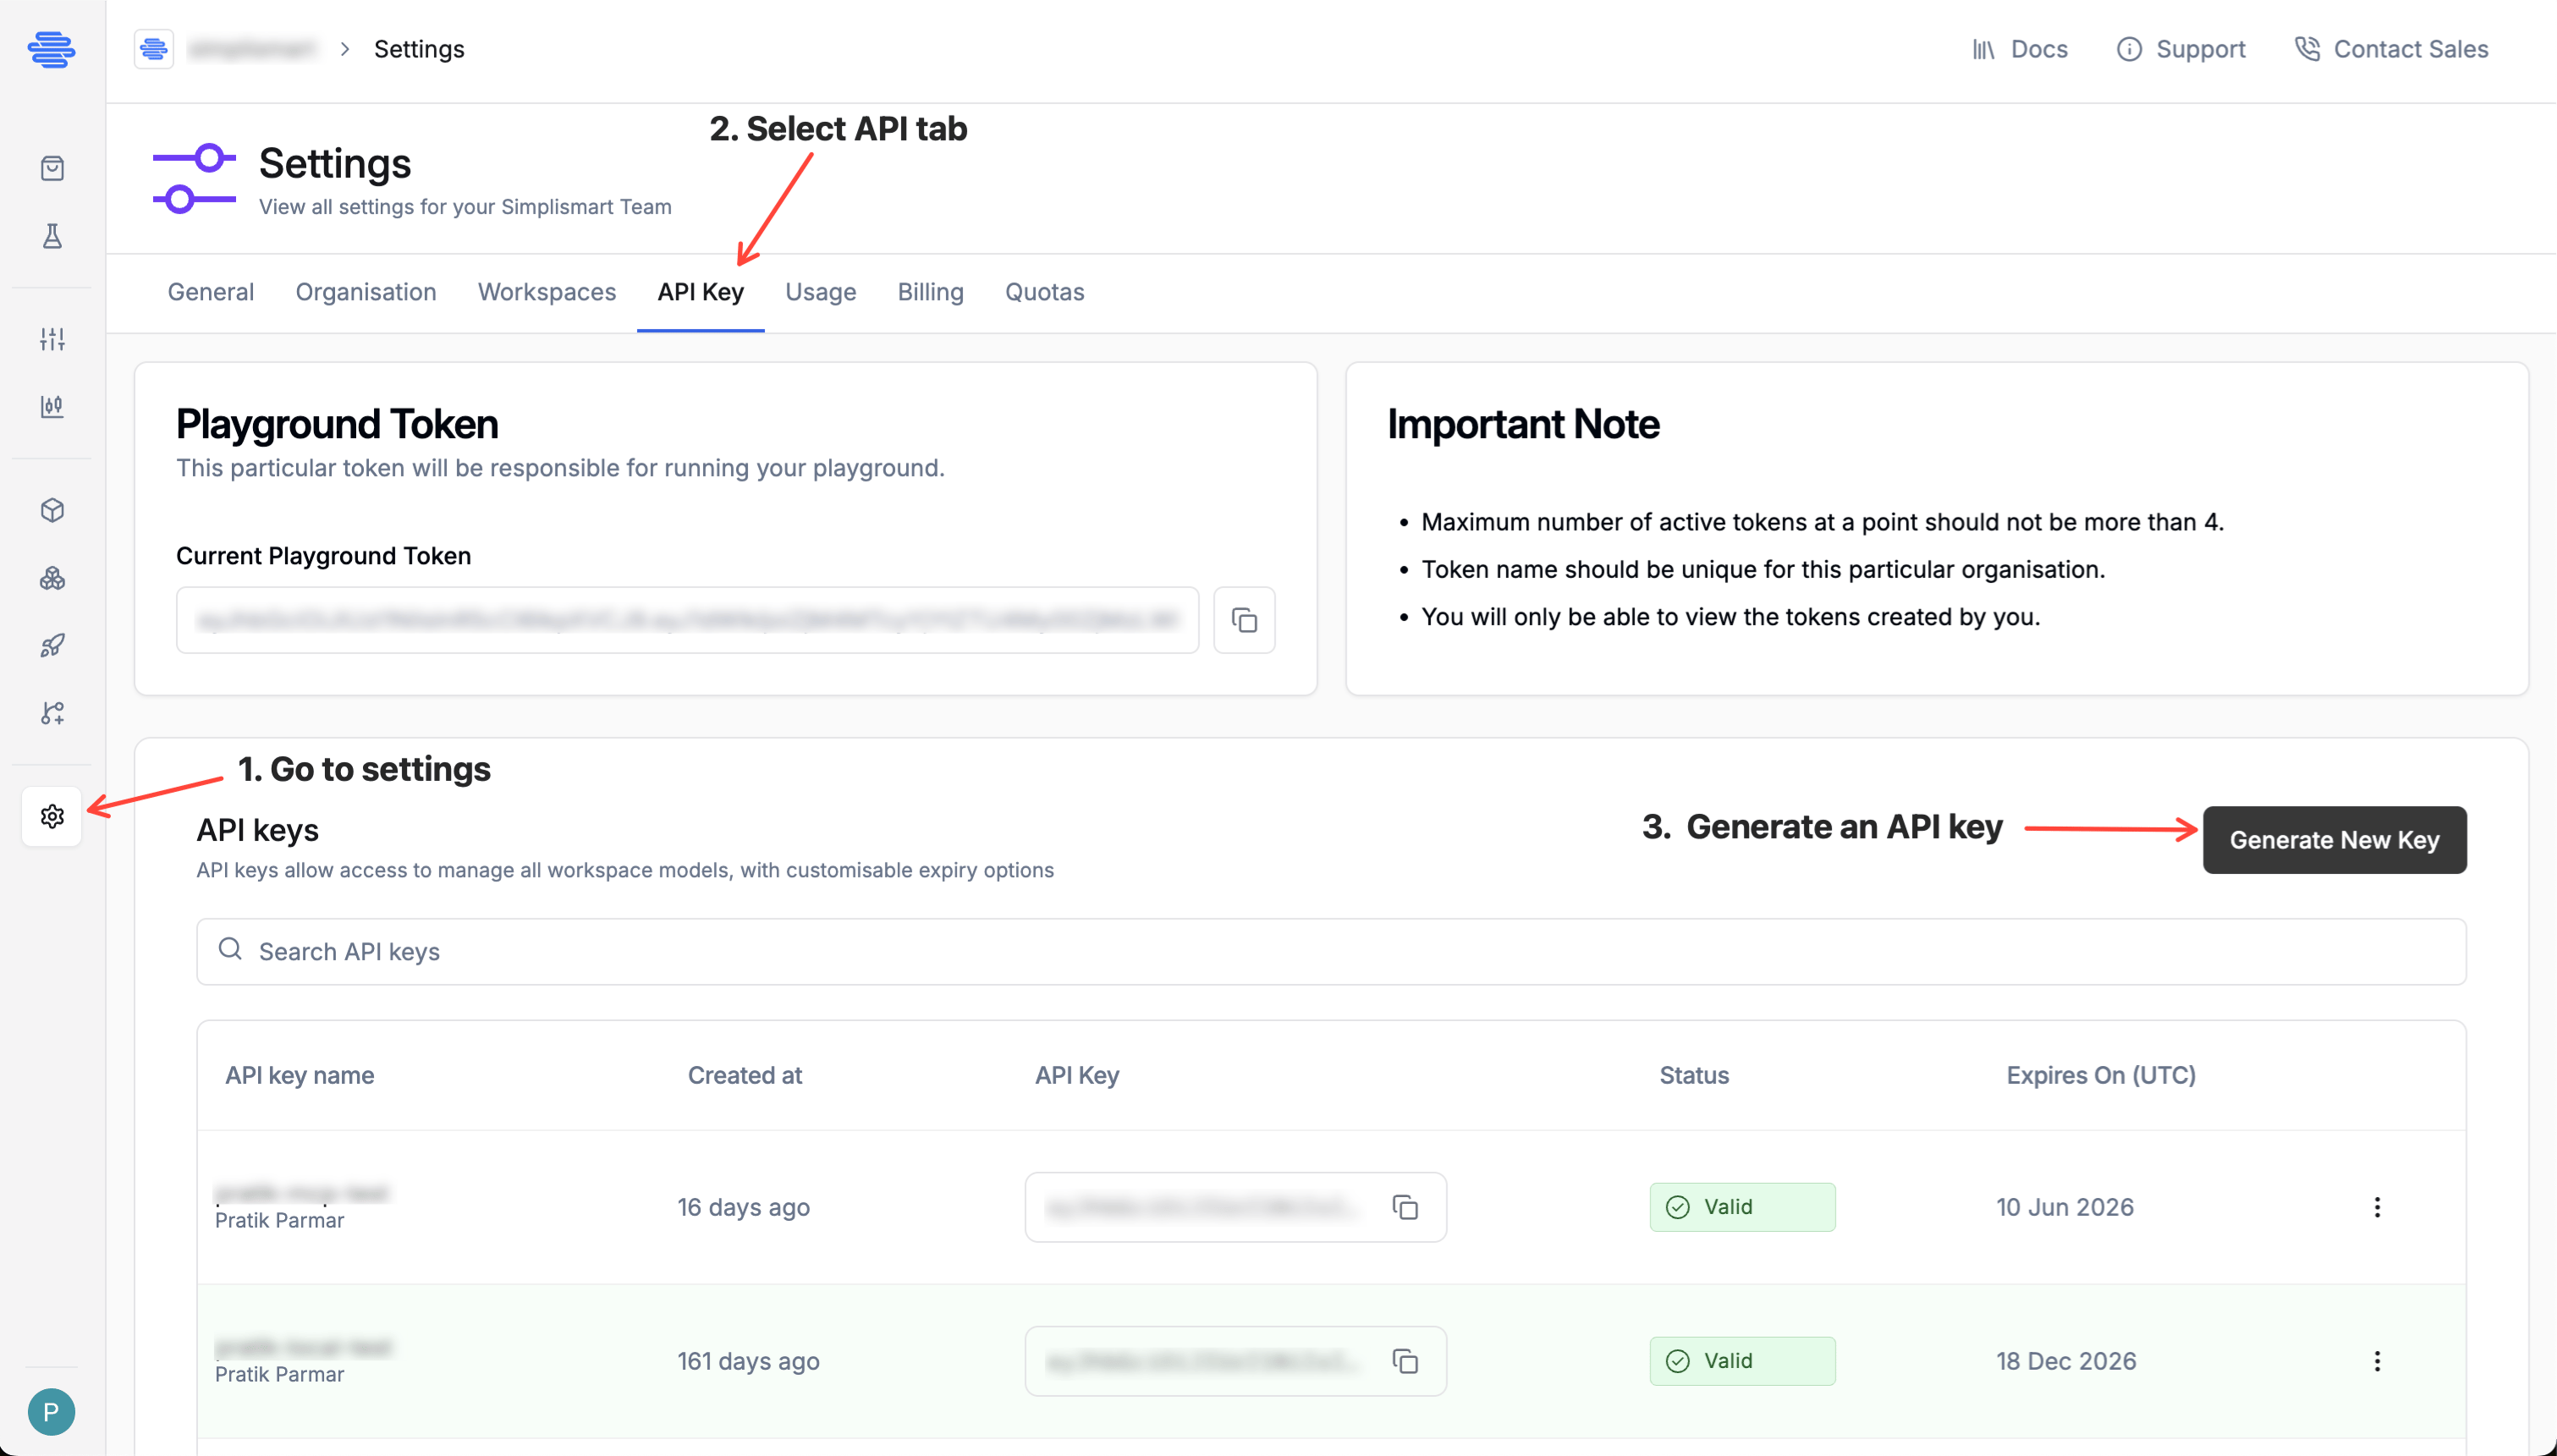
Generate an API Key
- Navigate to Settings > API Keys from the main sidebar
- Click Generate New Key
- Provide a descriptive name for your key (must be unique)
- Set an appropriate expiration date
-
Copy the generated API key (you won’t be able to see it again)
5
Run Your Script
- Install the OpenAI Python client if you haven’t already:
- Run your script:
- You should see the model’s response to your query streaming in your terminal!
Congratulations! 🎉 You’ve successfully made your first API call to a Simplismart model.
Understanding Shared vs. Dedicated Endpoints
In this quickstart, you used a shared endpoint - a pre-deployed model that’s available to all Simplismart users. While convenient for testing and development, shared endpoints have some limitations:Shared Endpoints
- Quick to get started and no deployment required
- Easy switching between different models
- Pay-as-you-go pricing
- Limited customization options
Dedicated Endpoints
- Private to your organisation and optimised for your needs
- Option to choose from a wide range of customisation
- Deploy and scale your proprietary model hassle-free
- Better control over latency, throughput, and costs
Next Steps
Ready to take your AI implementation further? Try these next steps:- Deploy your own dedicated model for better performance and customization
- Explore the API reference for advanced integration options