Prerequisites
- A Simplismart account (Sign up here if you haven’t already)
- A Simplismart API key (Generate one here if needed)
Deployment Process
1
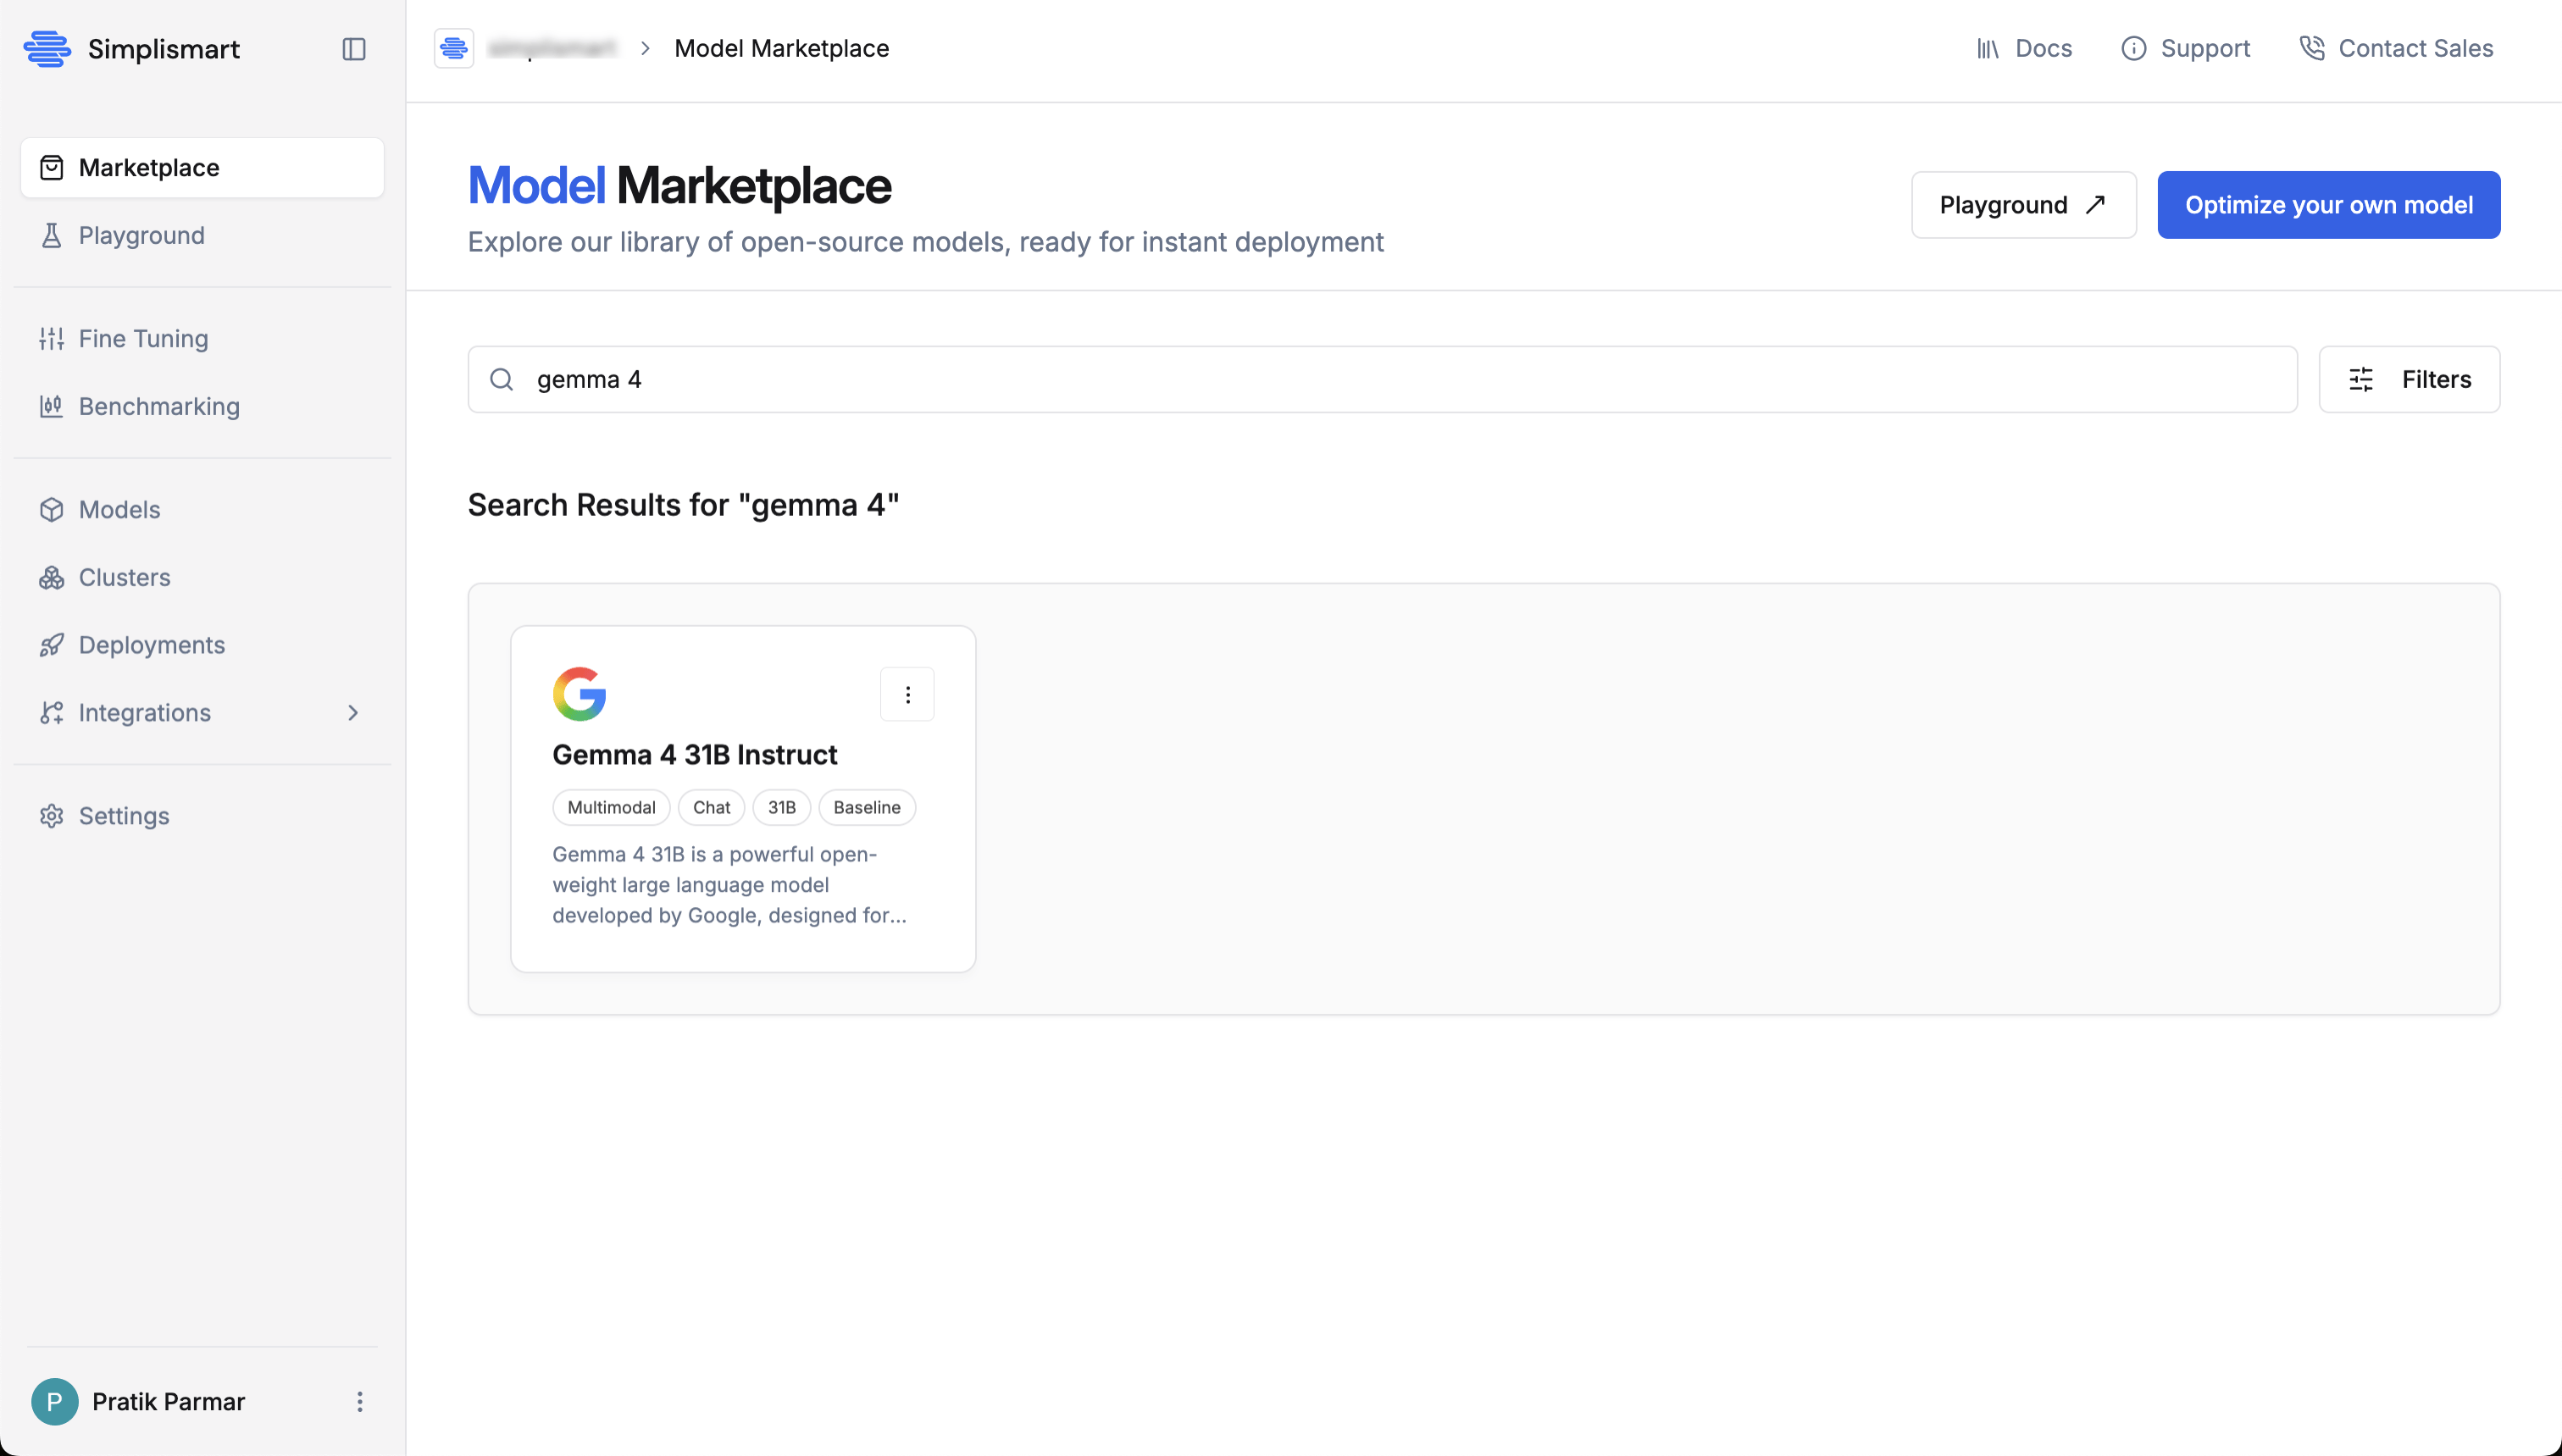
Select a Model
- Navigate to the Marketplace section in the left sidebar
-
Search for
Gemma 4 31Bin the search bar -
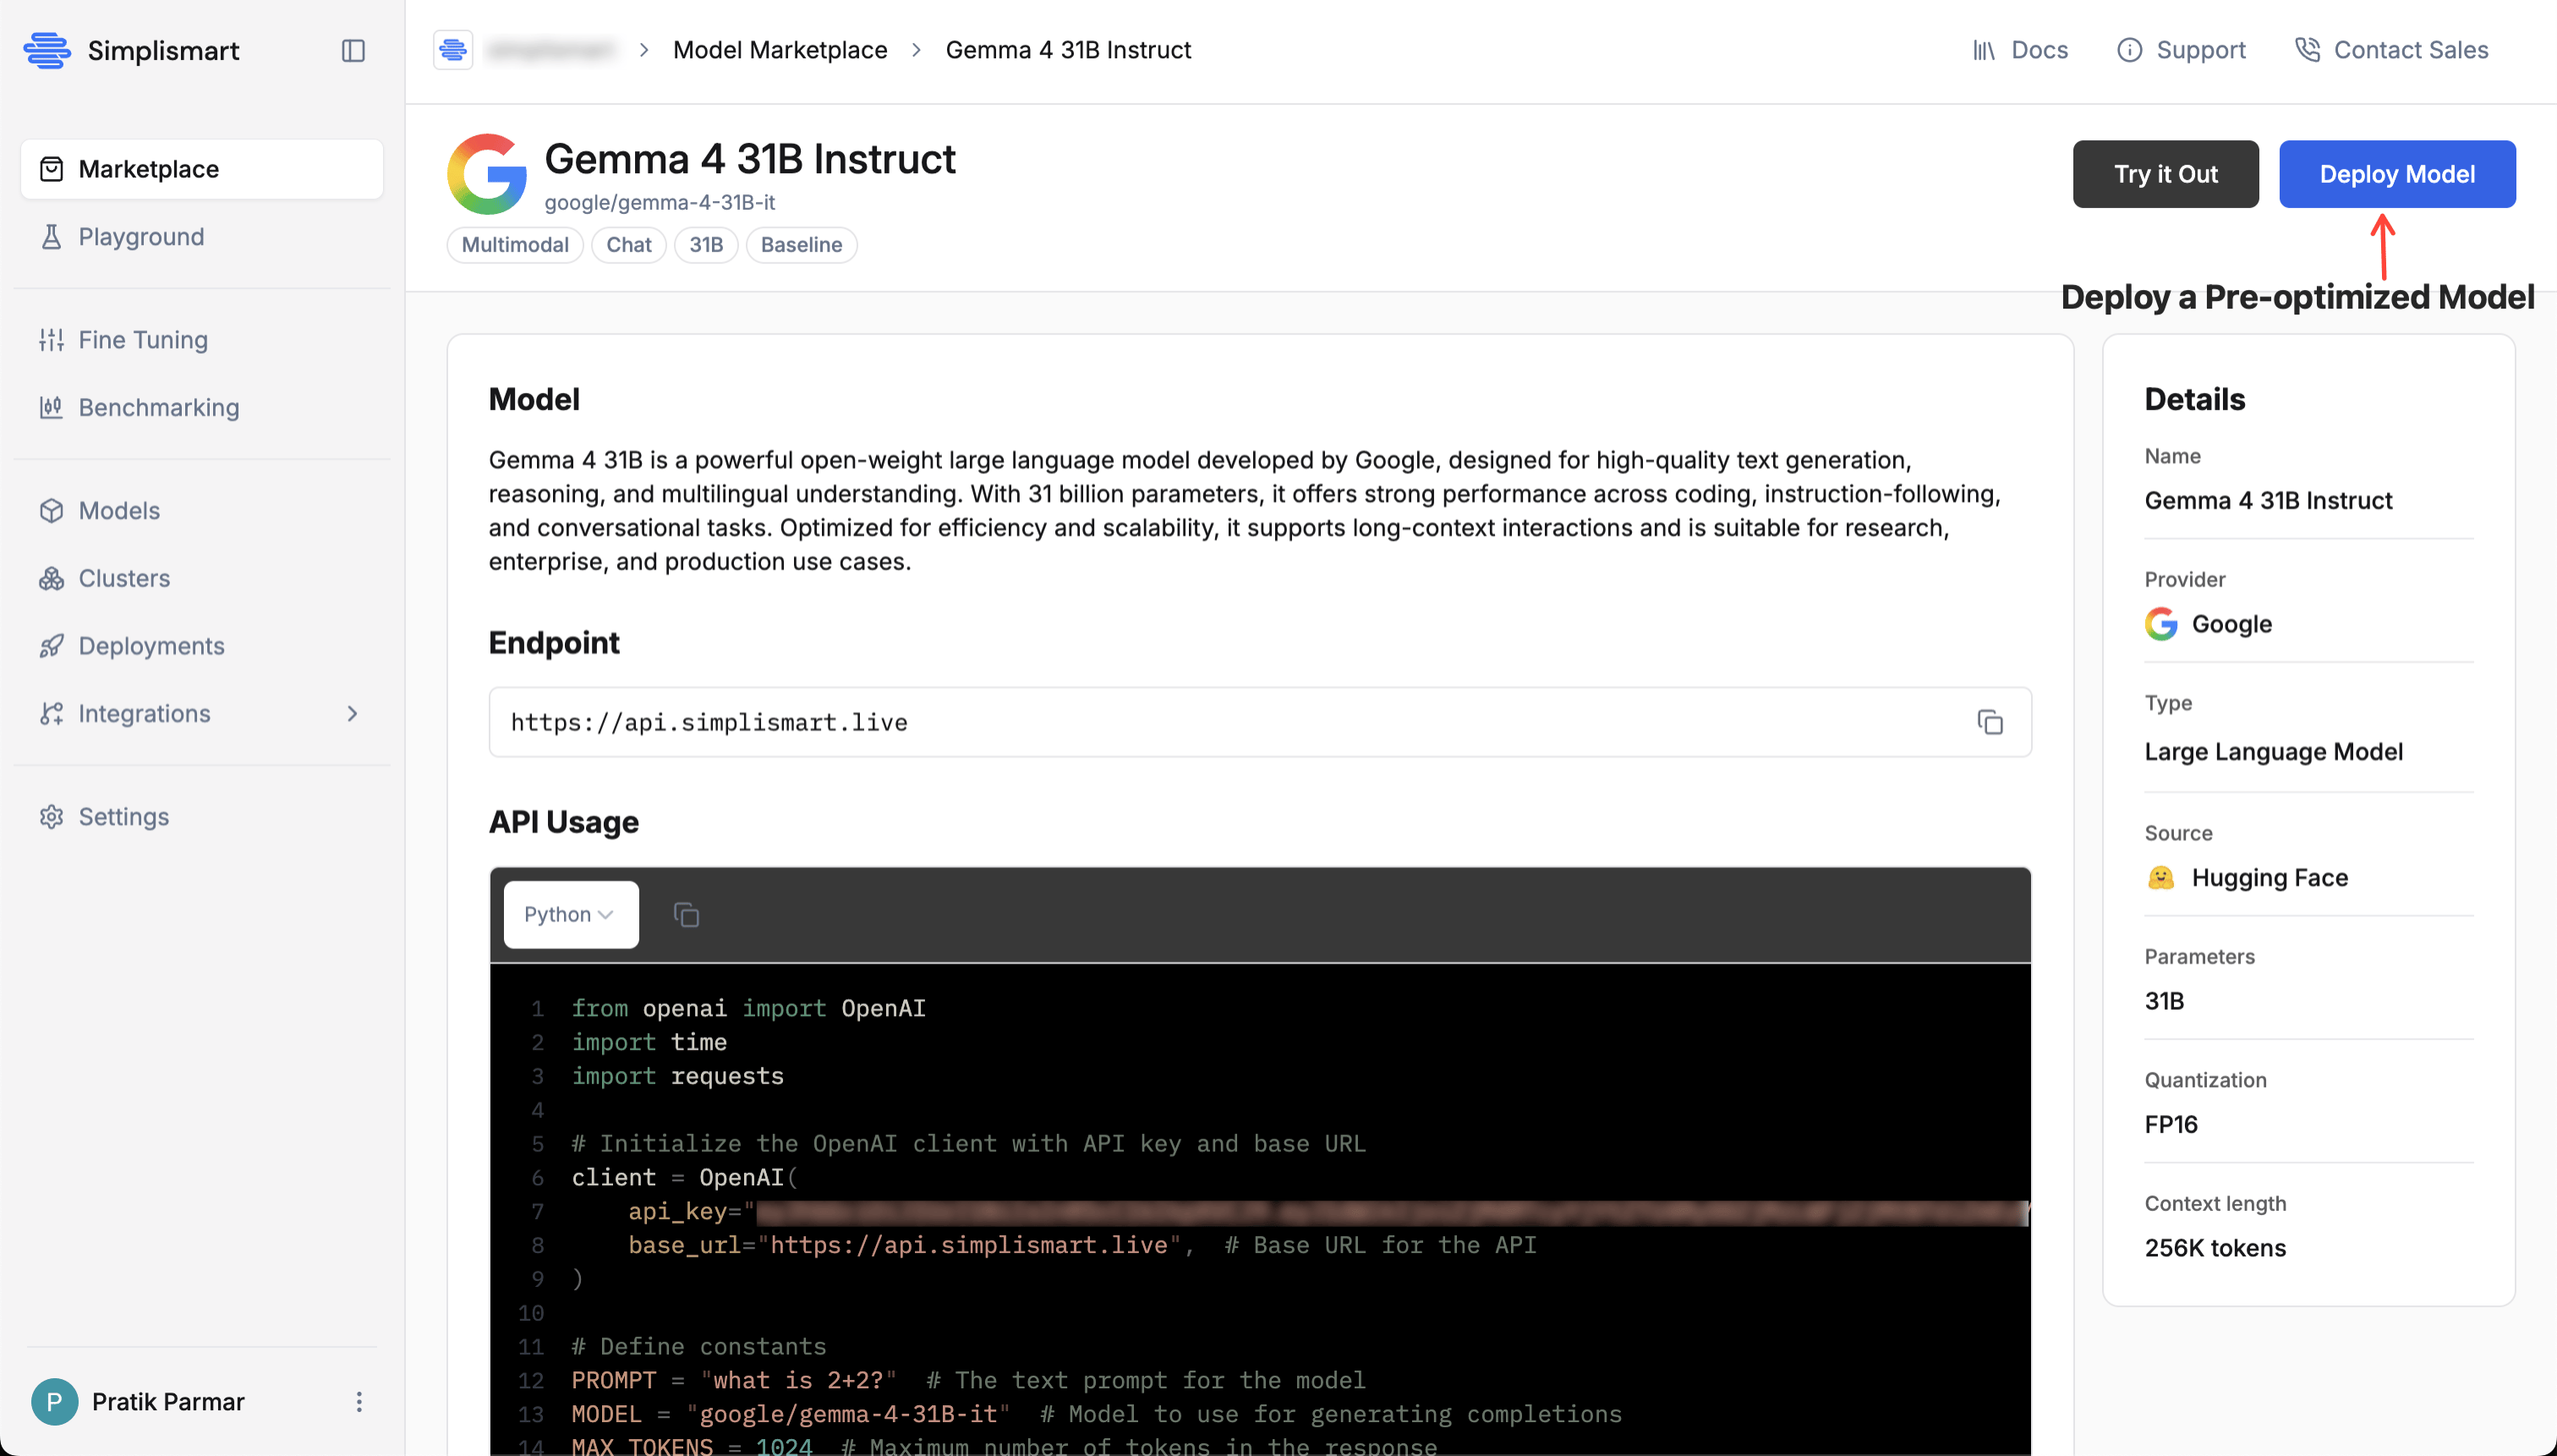
Click on the Gemma 4 31B Instruct model card to view its details
-
On the model detail page, click Deploy Model to begin the deployment process
2
Configure Deployment Settings
In the Create Deployment screen, fill in the following: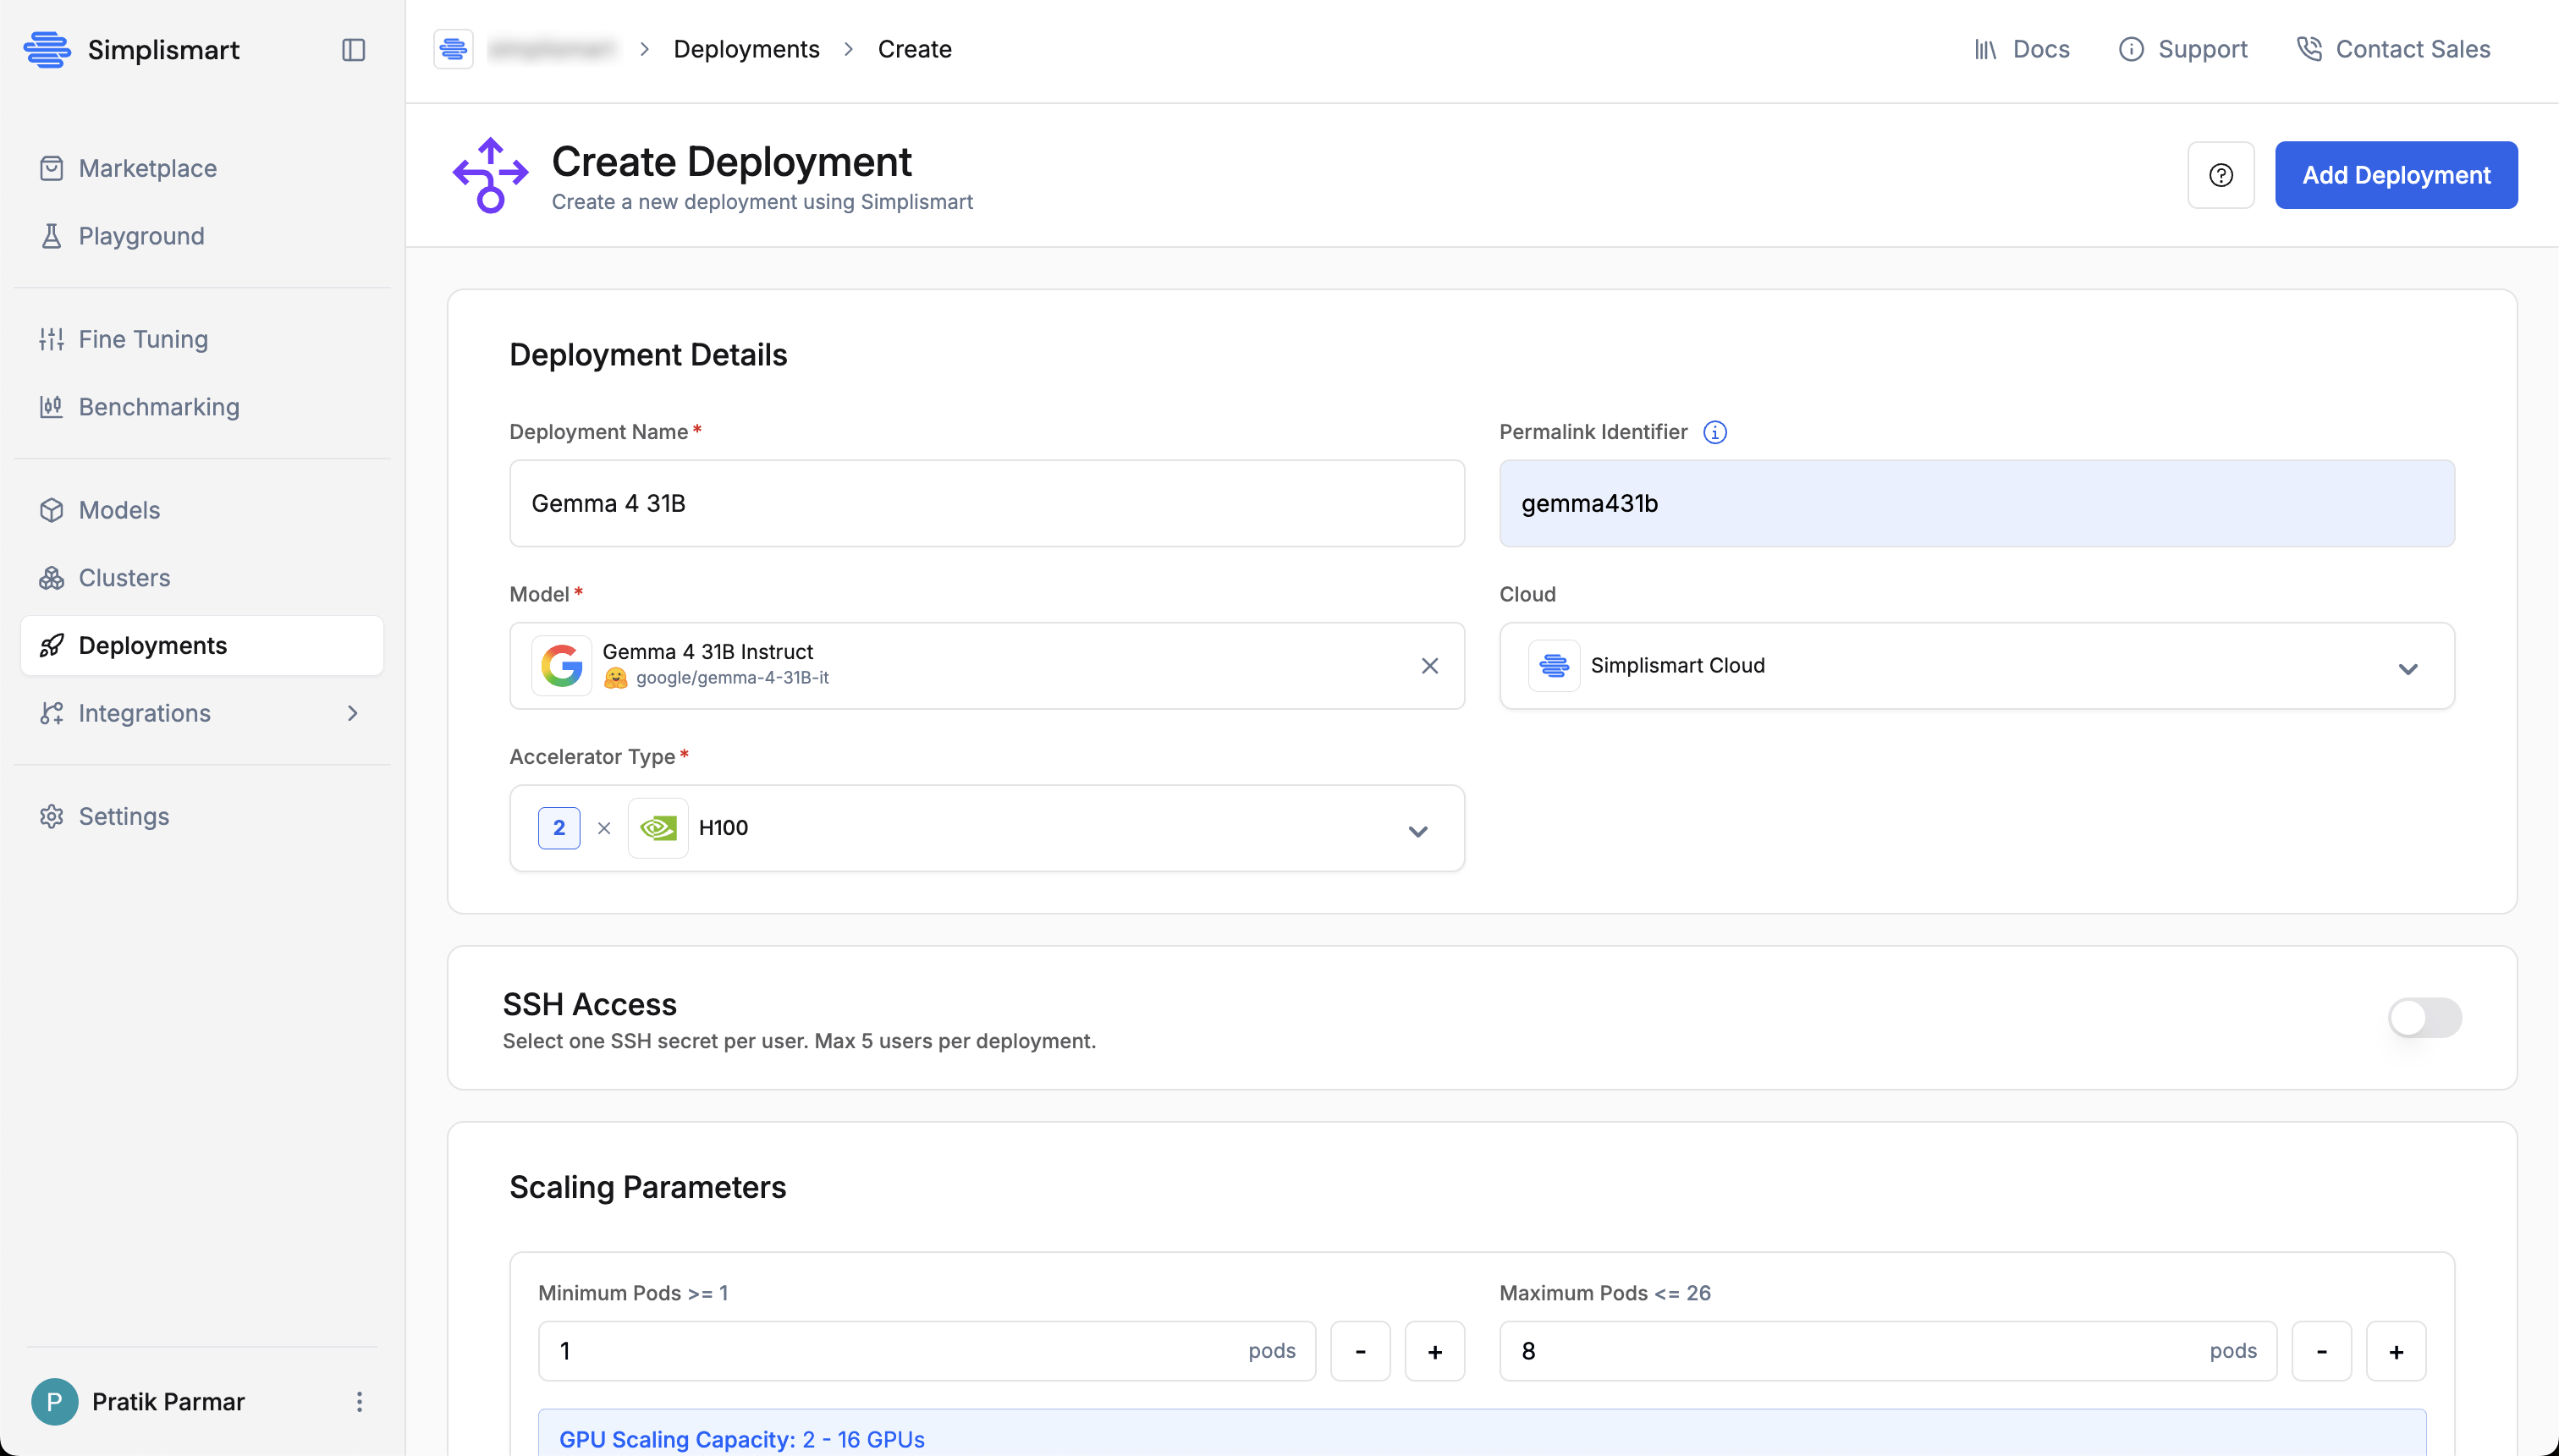
Deployment Details
- Deployment Name: A unique name (e.g.
gemma-4-31b) - Permalink Identifier: A custom identifier used to create your model endpoint URL. This value will be added as a prefix to your endpoint URL.
- Model: Confirm “Gemma 4 31B Instruct” is selected
- Cloud: Select Simplismart Cloud for managed hosting. Choose Bring Your Own Cloud to deploy on your own cluster.
- Accelerator Type: Select H100 (or another available GPU based on your quota)
Scaling Parameters
Set Minimum Pods to1 and Maximum Pods to 1. The GPU scaling capacity is shown below the inputs so you can verify resource availability before deploying.3
Add Tags
Tags help filter and organize deployments. Add at least one:
- Key:
env - Value:
quickstart
4
Confirm and Deploy
Click Add Deployment in the top-right corner. A Deploy Model Confirmation modal appears summarising your configuration:Review the details, then click Confirm to start the deployment.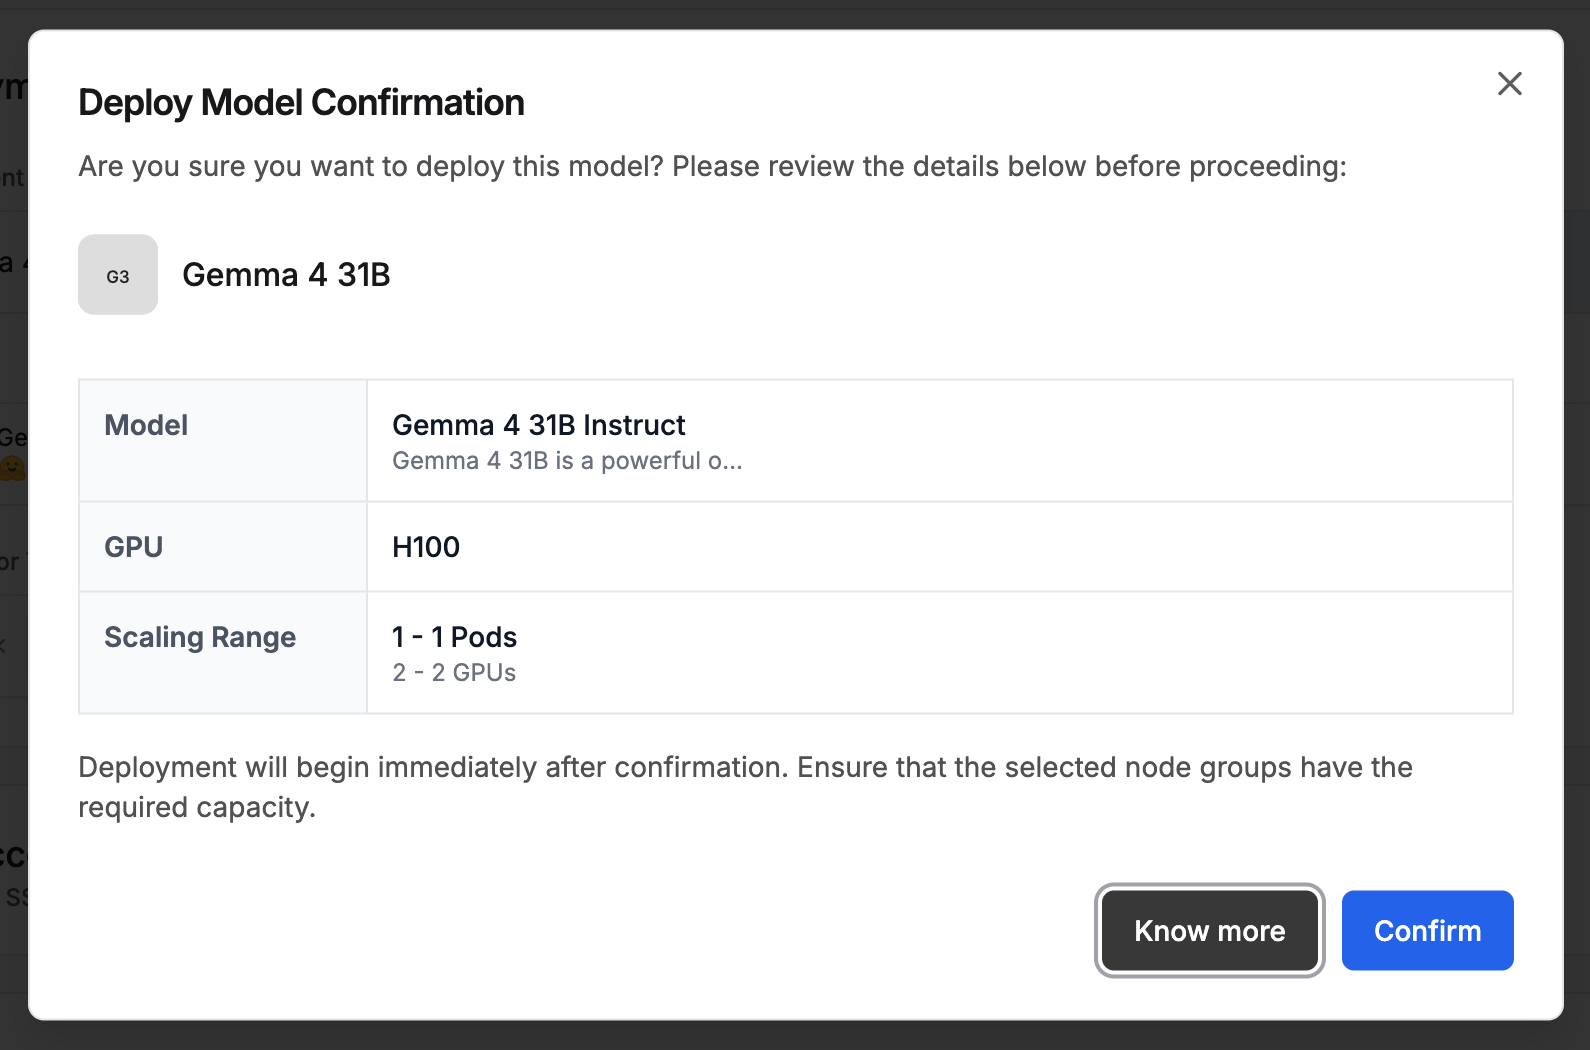
5
Monitor Deployment Progress
After confirming, you are taken to the deployment detail page. The Health Check panel on the right shows Progressing while pods come up and the model loads. Once the model is ready, the status changes to Healthy.The Details tab shows the Deployment ID, processing type (SYNC), model endpoint, and scaling configuration. Use the Logs and Events tabs to follow startup activity.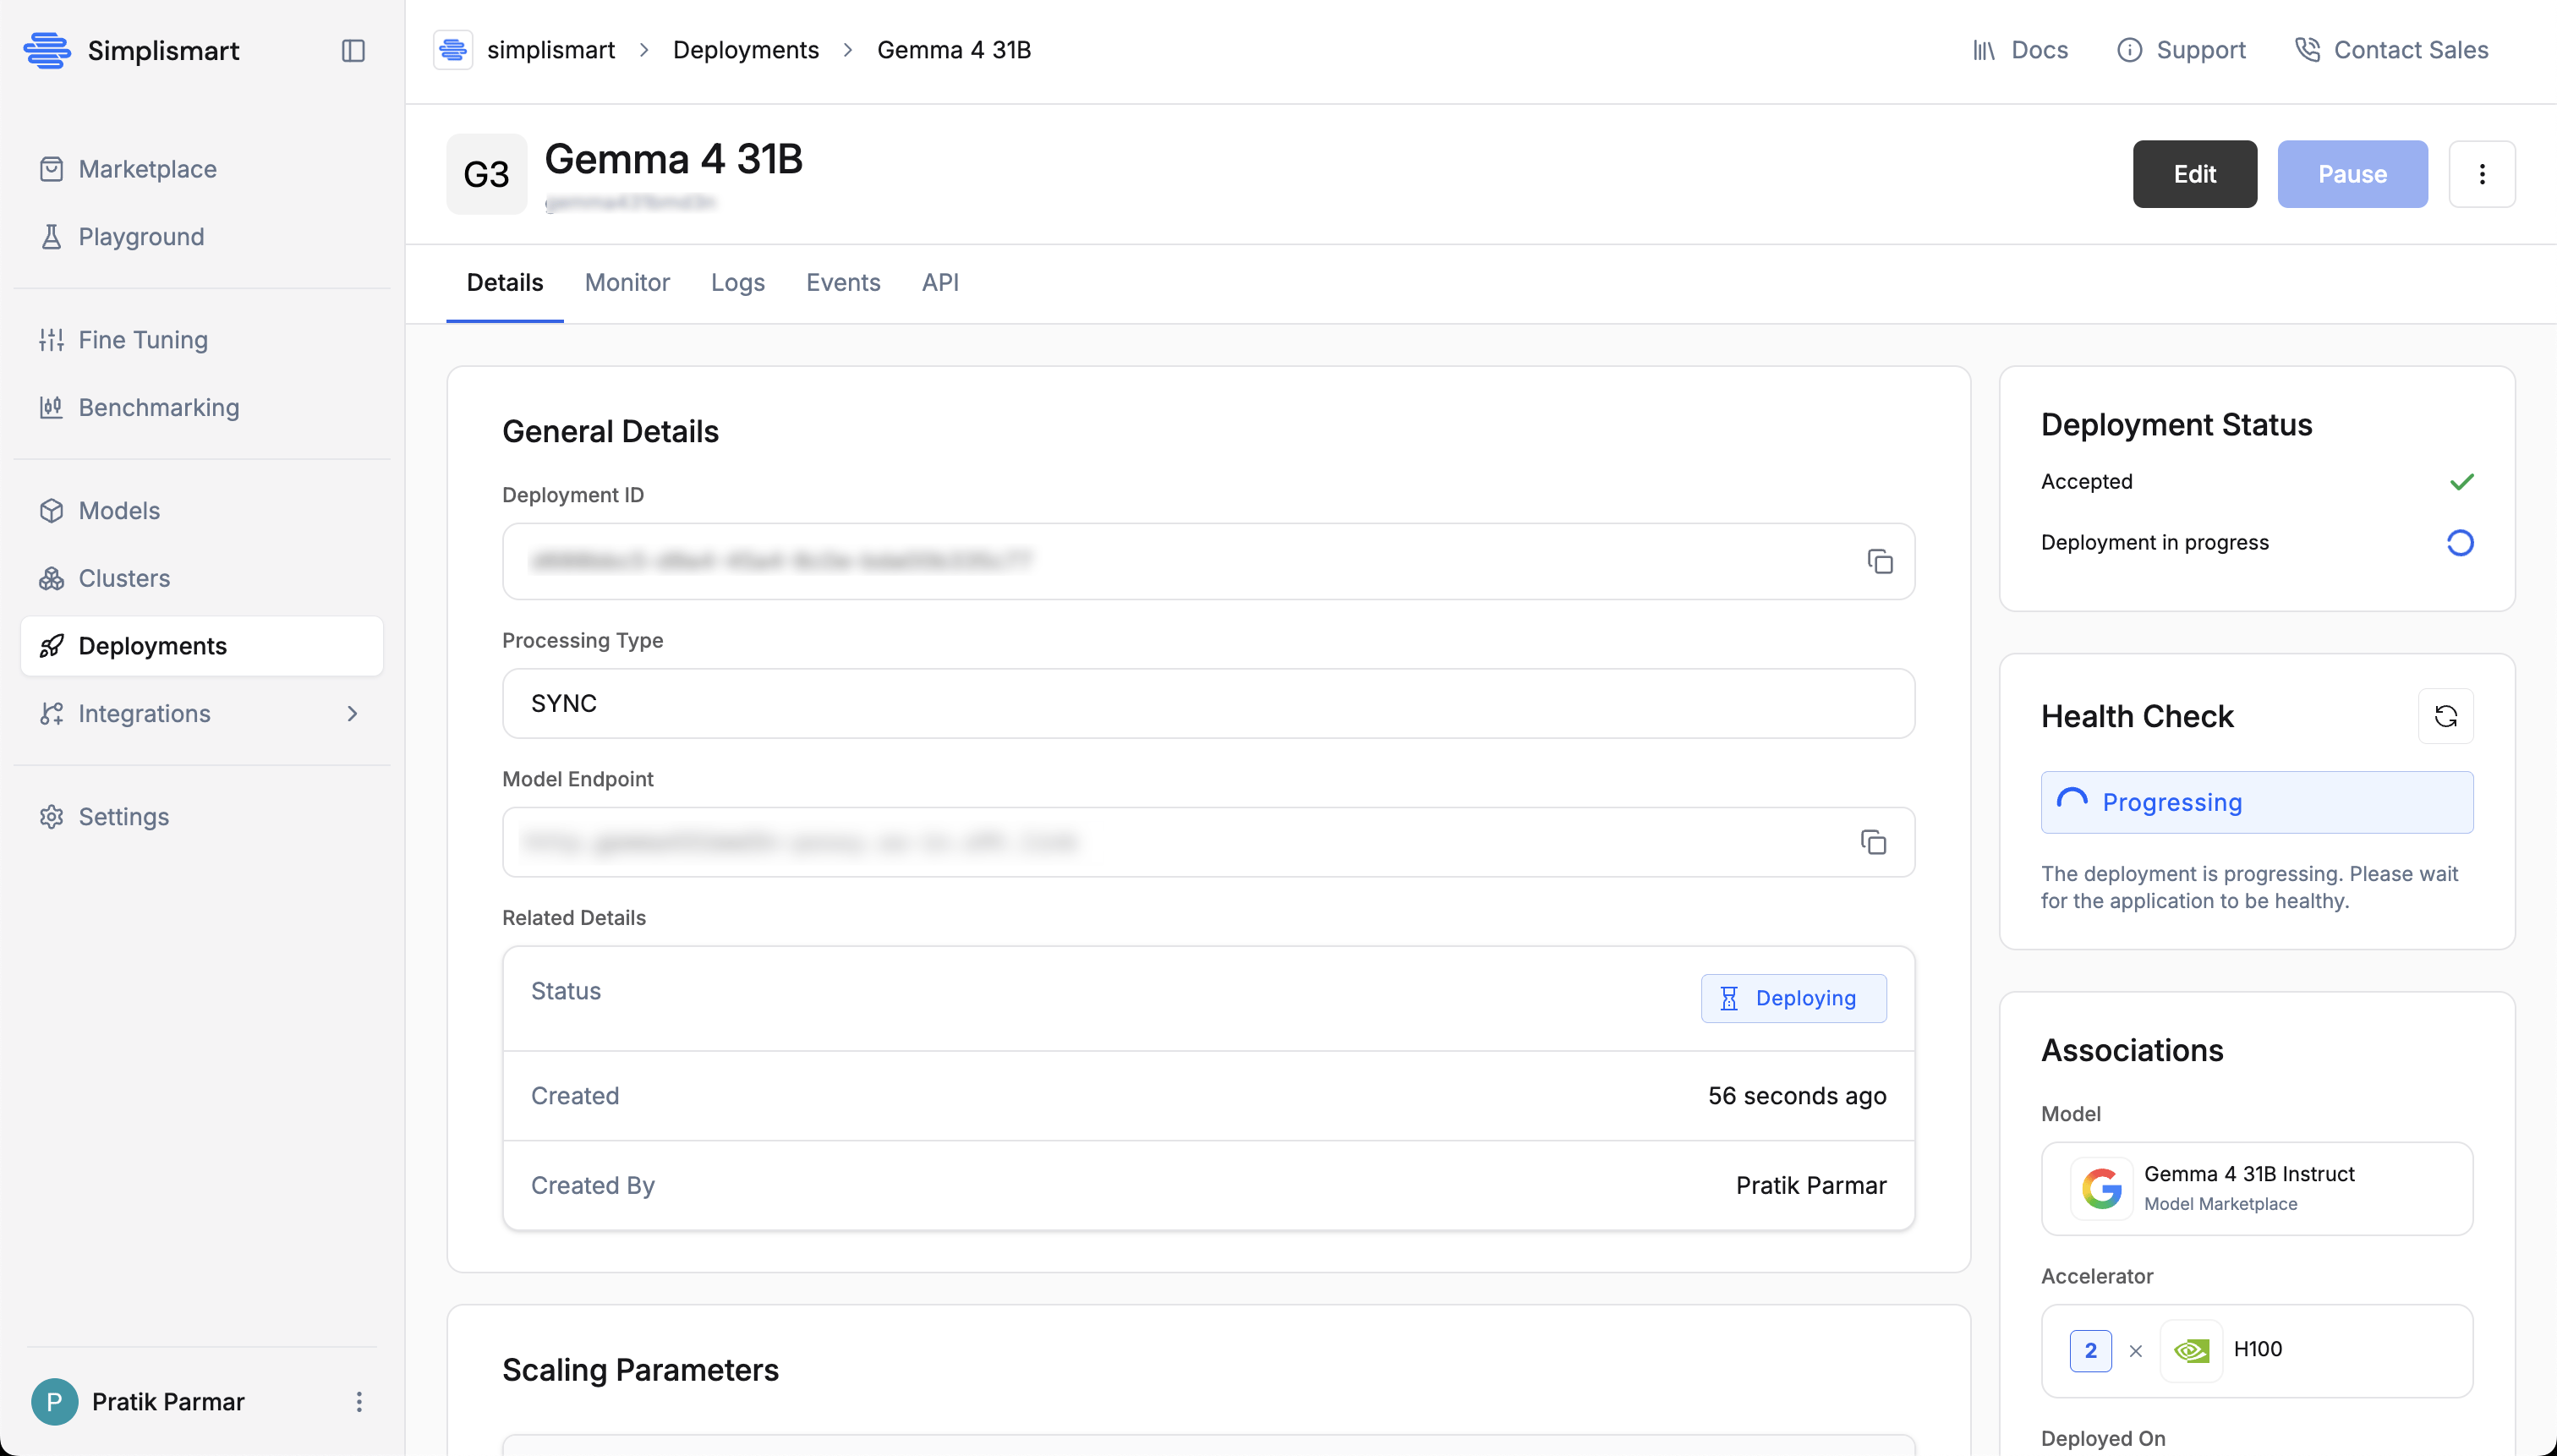
For the full deployment state machine and monitoring guidance, see Monitoring and Access.
6
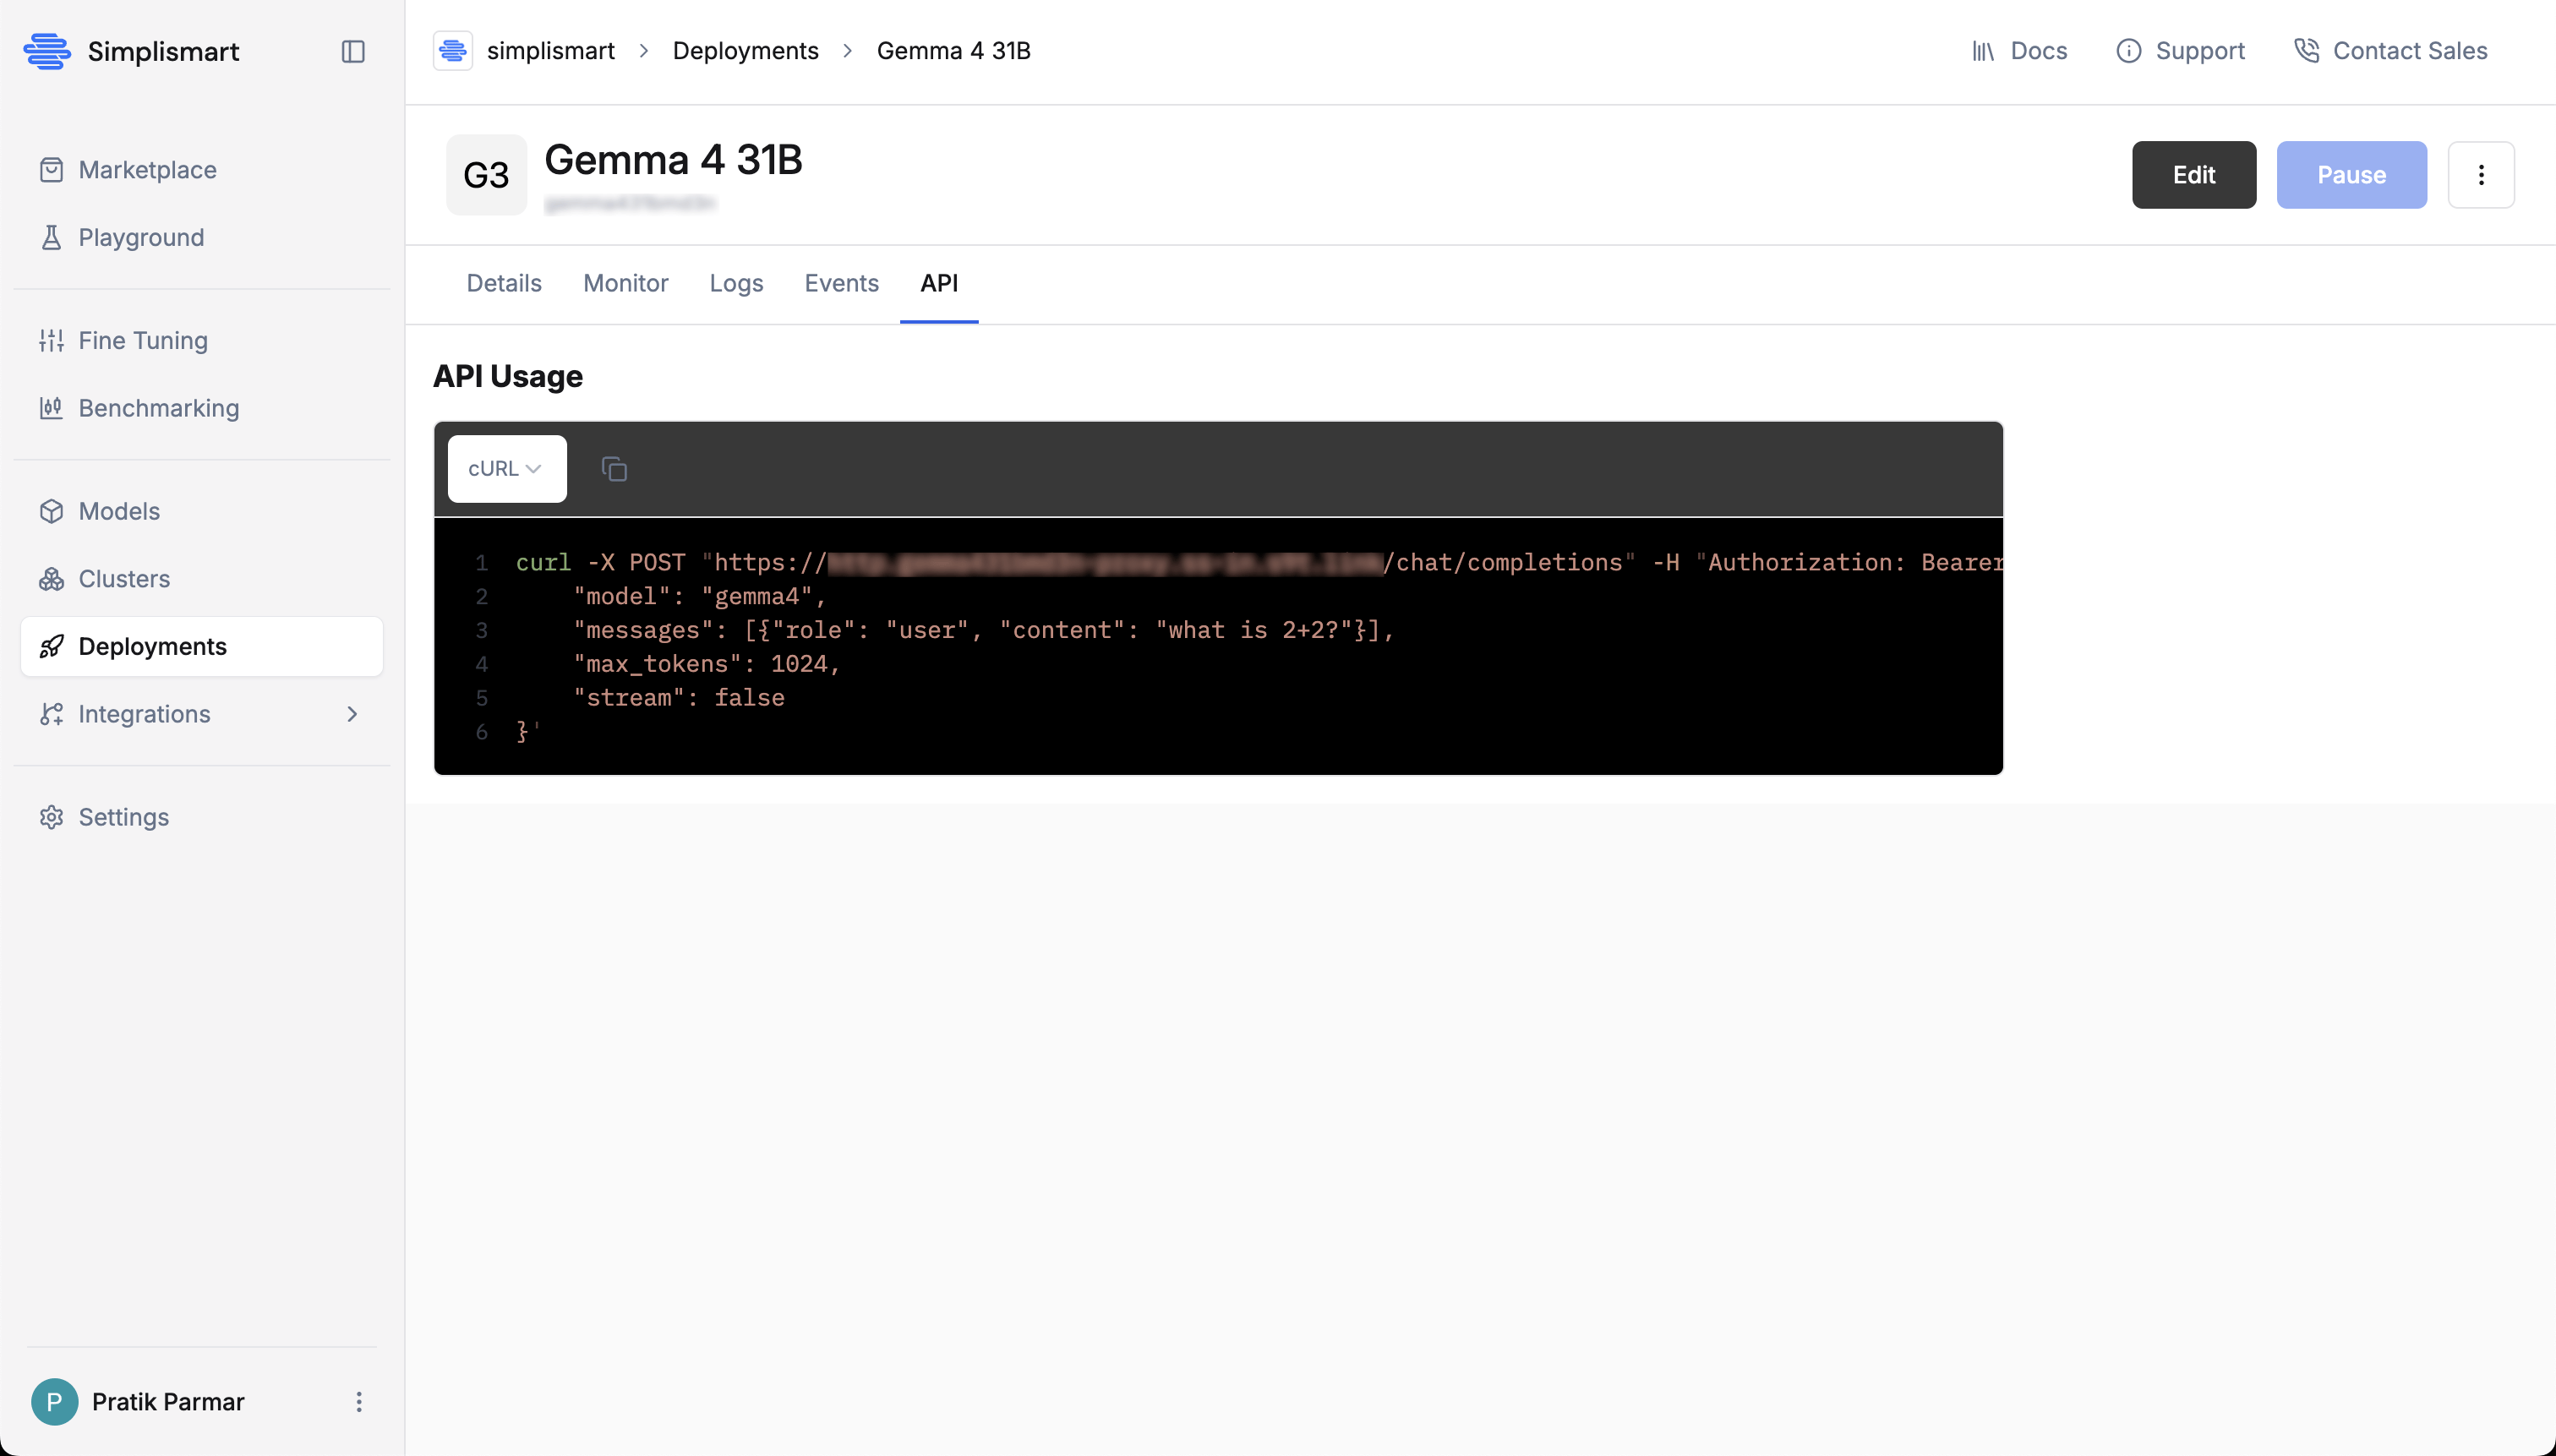
Test Your Deployment
Once the deployment status shows Healthy, open the API tab in the deployment detail page to test it:
- The cURL snippet is pre-filled with your endpoint URL.
-
Set the
Authorizationheader toBearer <your API key>. -
Copy and run the snippet.
7
Clean Up Resources
To free up GPU resources and avoid unnecessary charges, delete the deployment when you are done.
- Open the Deployments tab.
- Select your deployment.
- Click the kebab menu (
⋮) in the top-right of the deployment card and select Delete. See Managing Your Deployment for the full action set (Pause, Edit, Clone, Delete).
Understanding Your Deployment
Your deployed model exposes an OpenAI-compatible endpoint, so you can use it with any client library that supports the OpenAI API format. The endpoint supports:- Text inputs and completions
- Streaming and non-streaming responses
- Standard OpenAI API parameters like
temperatureandmax_tokens
Monitoring and Management
After deployment, you can:Monitor Performance
Track usage deployment health, request metrics, latency metrics, LLM metrics, and Pod resouce details in the Monitor tab
Adjust Resources
Scale your deployment up or down based on actual usage patterns
View Logs
Access detailed logs and events to troubleshoot any issues
Manage API Keys
Create and revoke API keys for secure access
Next Steps
Now that you’ve successfully deployed your first model, consider these next steps:Optimize Performance
Learn techniques to improve latency, throughput, and cost-efficiency using Simplismart Copilot.