Deployment Configuration
Select your model
Go to My Models, select the model you added, and click Deploy Model.
Configure deployment details
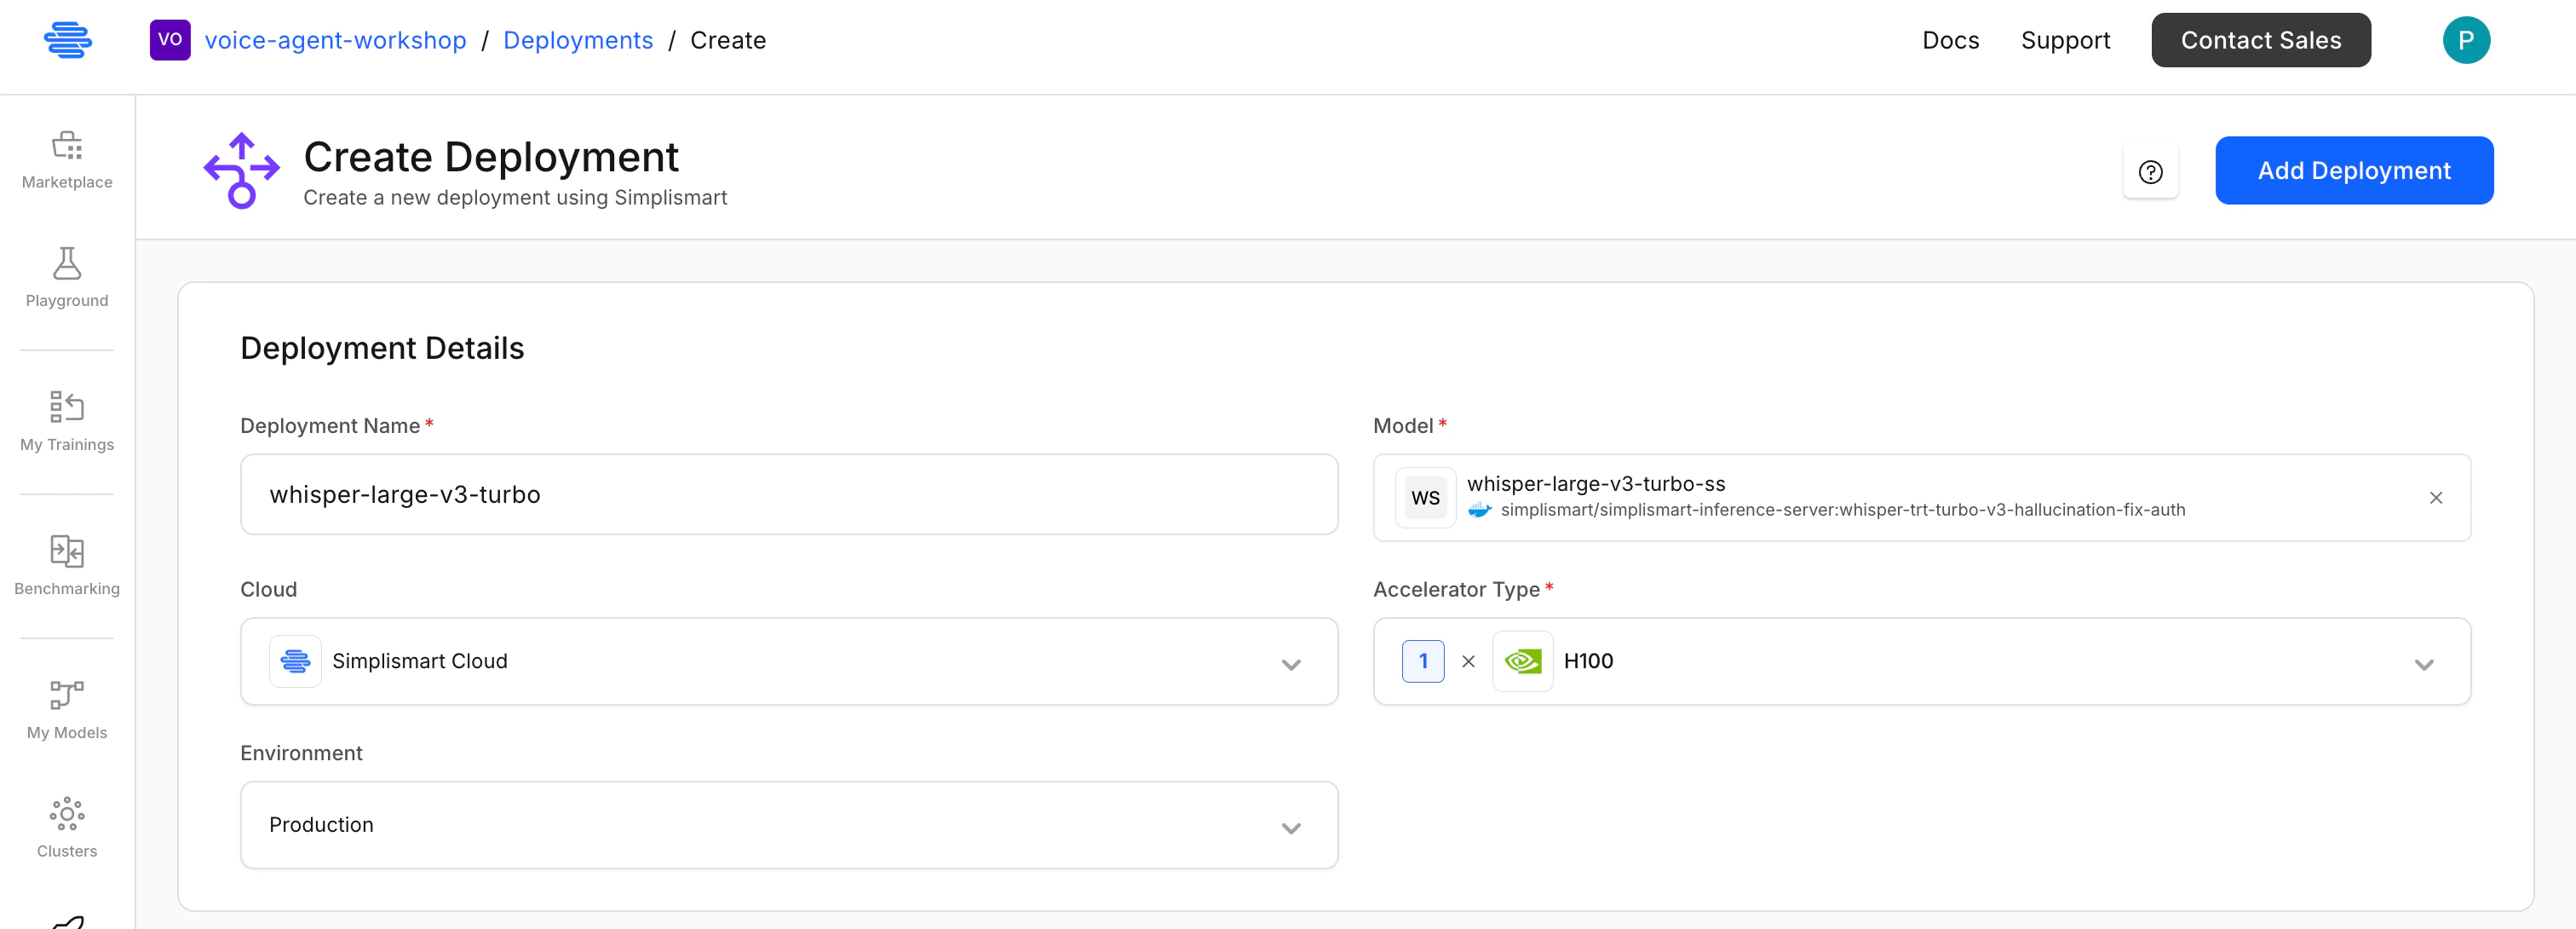
- Deployment Name: Provide a name for this deployment, it should be unique for this organization.
- Model: Select the model you want to deploy.
- Cloud: Select Simplismart-Cloud for managed deployments, or BYOC to deploy on your own cloud.
- Accelerator Type: Choose the required GPU (H100 or L40S).
To deploy on a GPU type not listed above or for CPU-only deployments, email support@simplismart.tech.
- Environment: Select Production for live workloads or Testing for development and staging. This tag can be used to filter deployments on the deployments page.
Container Configuration
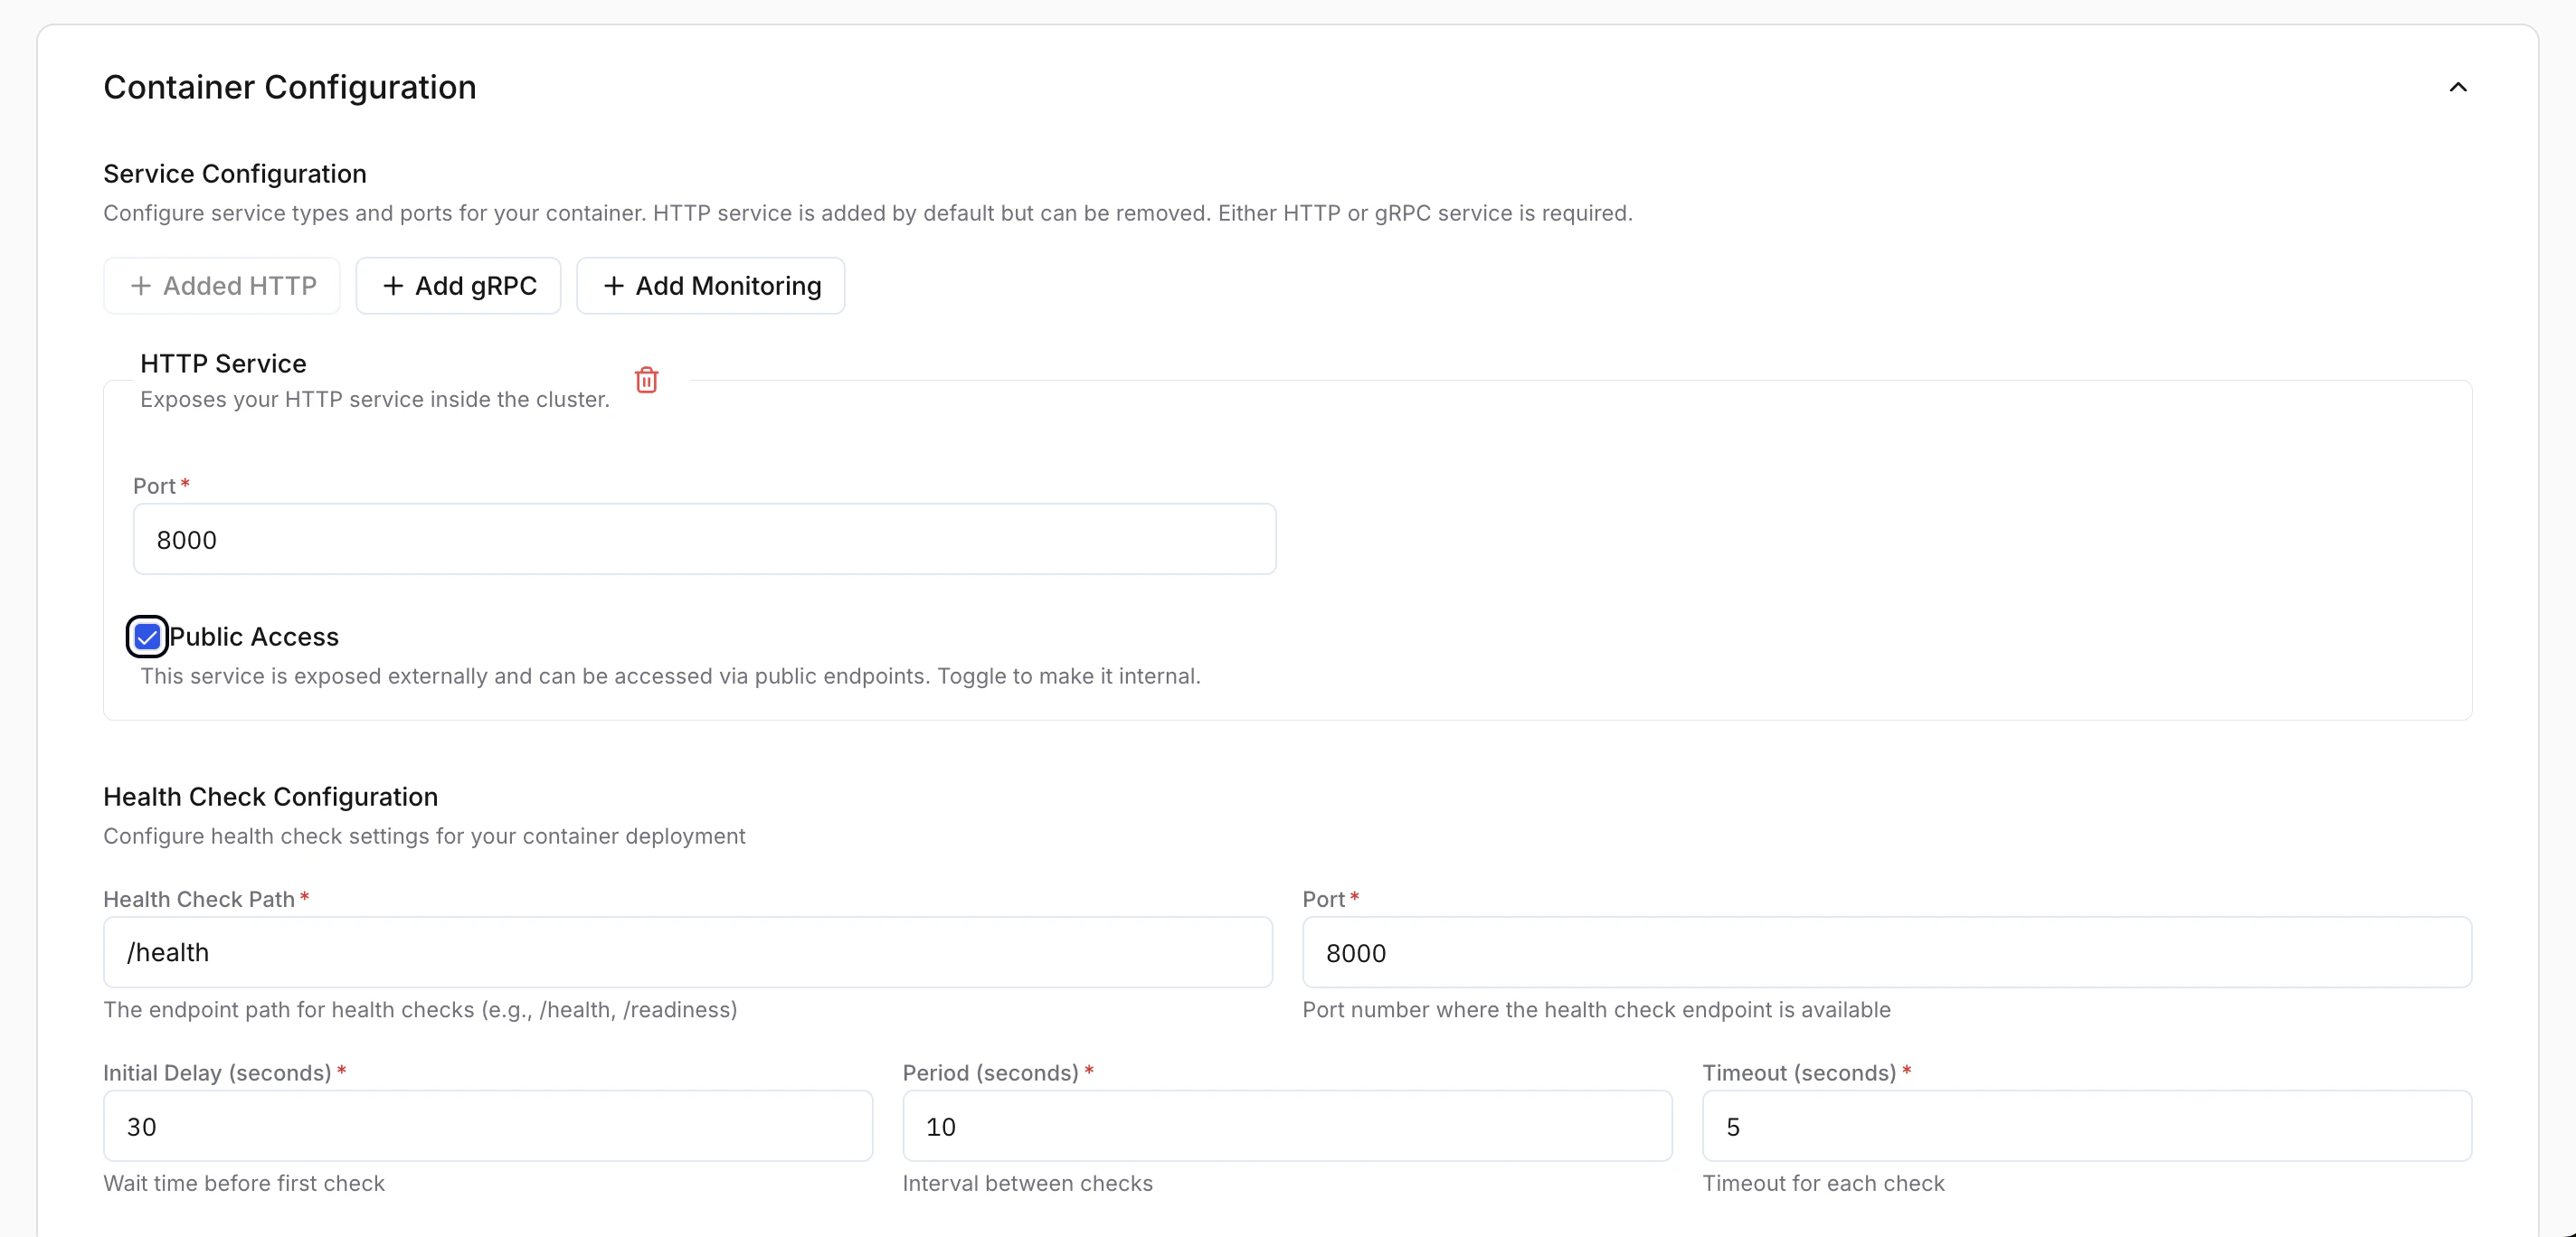
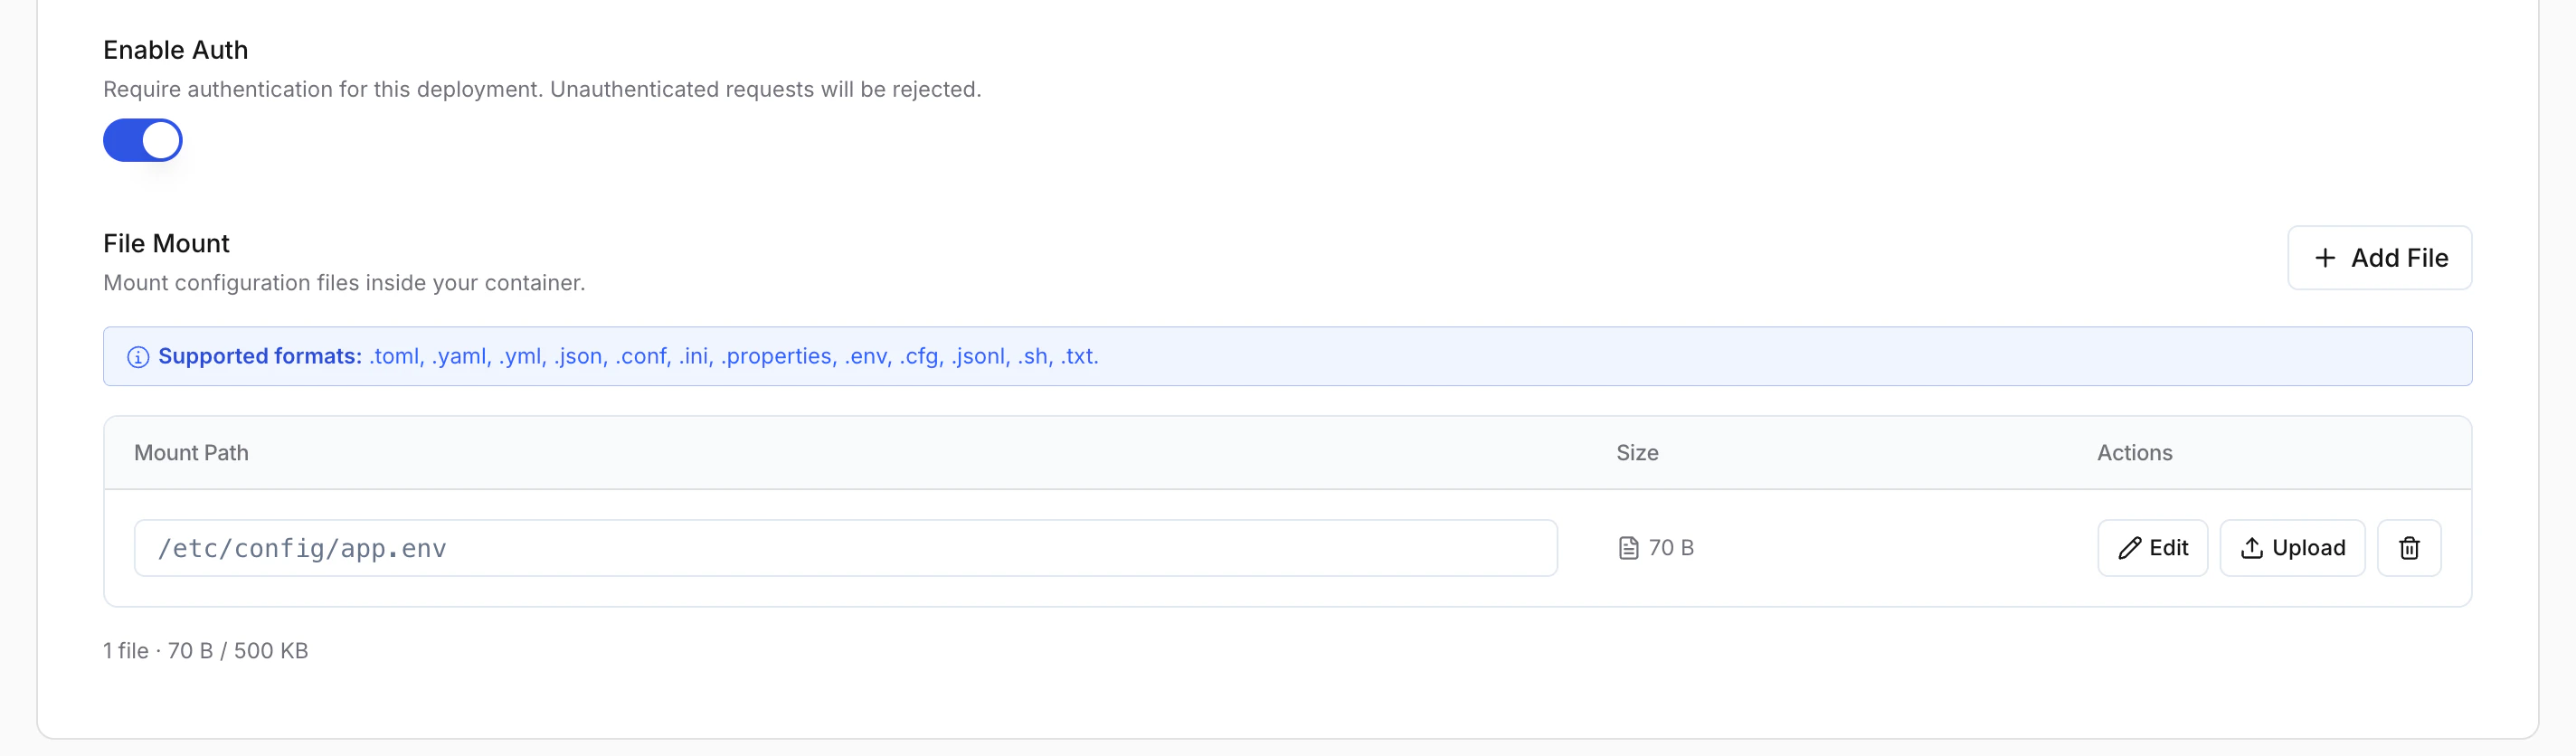
If you already configured ports, health checks, environment variables, or a command override in the Add Model step, those values are pre-filled here and can be overridden. The only fields exclusive to this step are Enable Auth and File Mount Path.
- HTTP Service (Required): The port your application server listens on (e.g.
8000).- Public Access: Enable to make the deployment reachable externally. When disabled, the service is accessible only within the cluster.
- gRPC Service (Optional): Enable if your application uses gRPC. Must use a different port than the HTTP service.
- Monitoring Service (Optional): Enable for enhanced monitoring capabilities.
- Health Check Path: Endpoint your app exposes for health probes (e.g.
/health). - Port: Must match your HTTP/gRPC service port (e.g.
8000). - Initial Delay: Wait time before the first health check (e.g.
30s). - Period: How frequently health checks run (e.g.
10s). - Timeout: Maximum time to wait for a health check response (e.g.
5s).
Scaling Parameters
Define how your deployment scales based on demand:
- Range: Minimum and maximum number of instances. The limits are governed by your account quota.
- Scaling Metric: The metric used to trigger scaling. Choose from:
- Memory Usage: Average memory usage across all pods.
- Latency: Response time per request.
- Throughput: Number of requests processed per second.
- Concurrency: Number of concurrent requests being processed.
- Threshold: The metric value that triggers a scaling event for both scale-out and scale-in (e.g. scale out at 80% CPU, scale in when it drops back below the threshold).
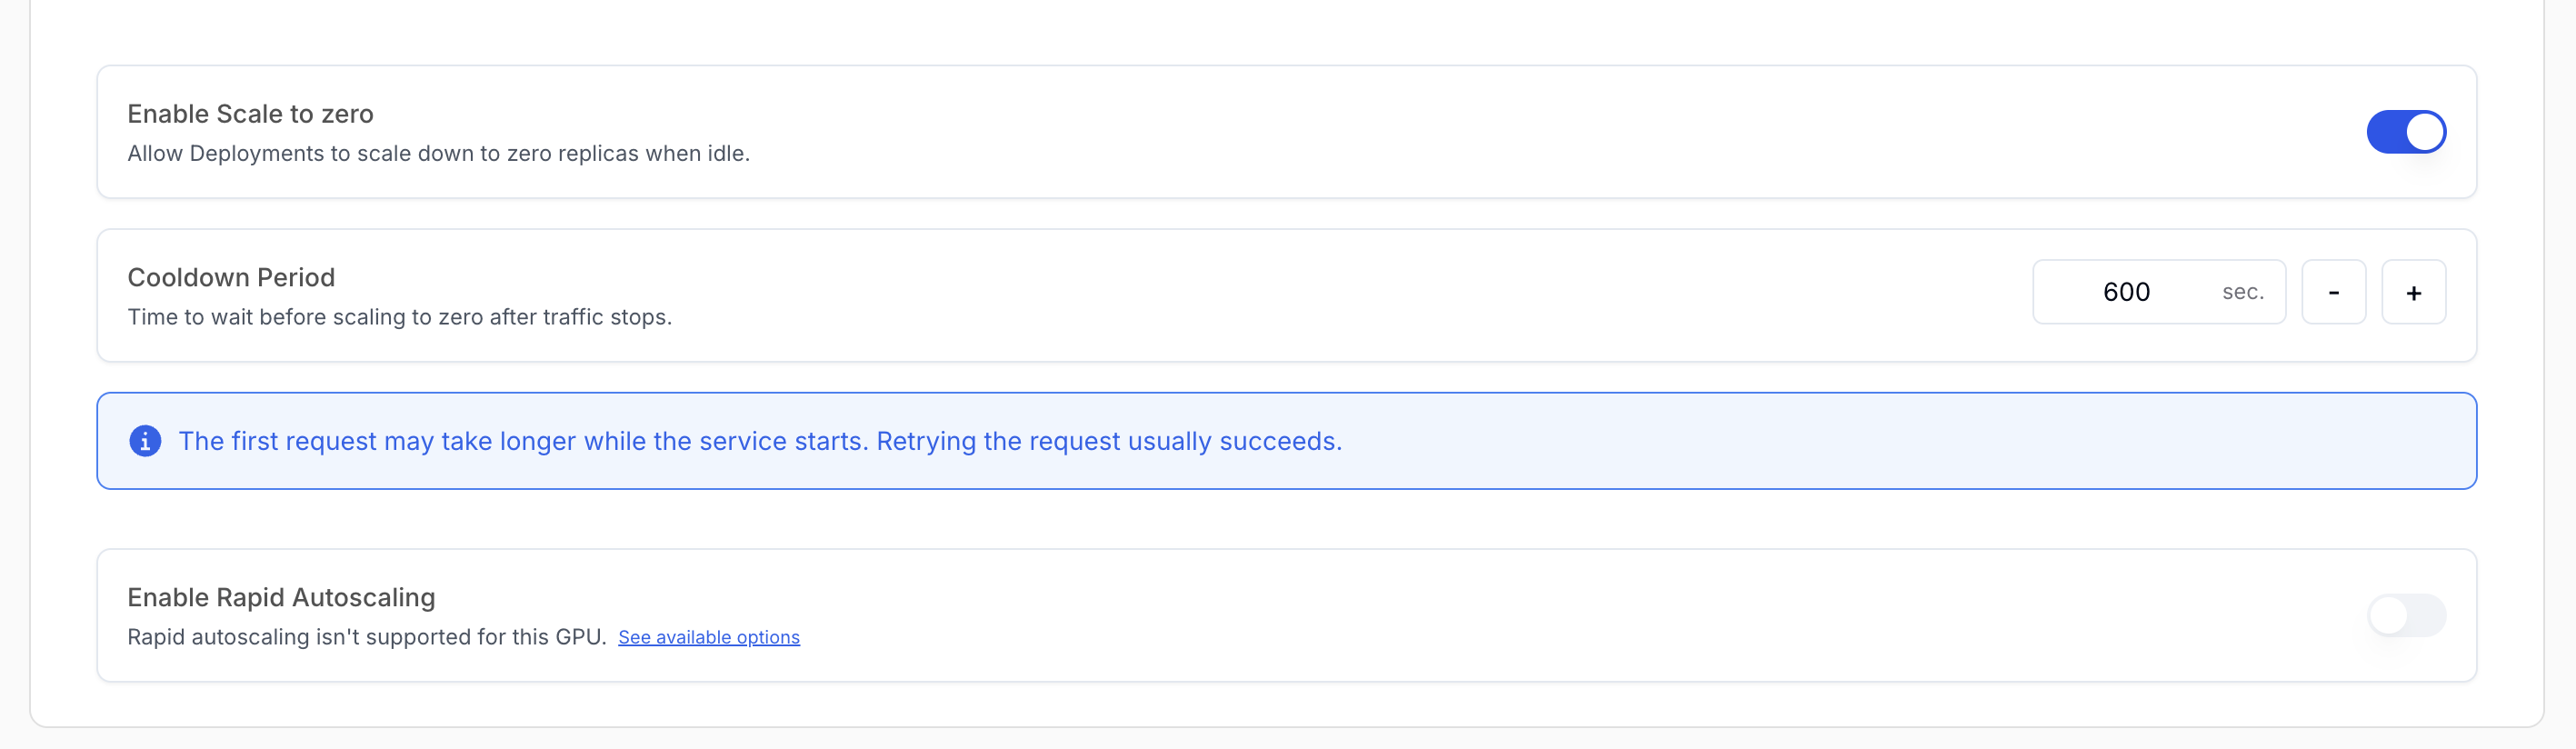
- Enable Scale to Zero: Scales the deployment down to zero instances when there is no incoming traffic, reducing idle costs. When traffic resumes, the deployment scales back up automatically.
-
Cooldown Period: The amount of time (in seconds) to wait after traffic stops before scaling down to zero. A longer cooldown avoids premature scale-downs during brief traffic lulls.
-
Cooldown Period: The amount of time (in seconds) to wait after traffic stops before scaling down to zero. A longer cooldown avoids premature scale-downs during brief traffic lulls.
For rapid autoscaling for your deployments, contact support@simplismart.tech.
Deploy
Review configuration
Review all settings across deployment details, container configuration, and scaling parameters.
Create the deployment
Click Add Deployment. Simplismart provisions your container and starts the deployment process.
Monitoring and Access
Once deployed successfully:- Health Status: Shows Healthy on the deployment page.
- Deployment URL: Direct link to your running application. Use the API tab to find the endpoint URL and a pre-generated inference script. See Inference & Monitoring for a full walkthrough.
- Events Tab: Tracks deployment lifecycle events such as scale-out, scale-in, and instance restarts. Useful for debugging unexpected behaviour.
Managing Your Deployment
Edit Deployment
Adjust scaling, model, or tags without redeploying. Changes are applied as rolling updates.
Stop Deployment
Halts all running instances. The deployment configuration is preserved and can be restarted at any time.
Delete Deployment
Permanently removes the deployment and all its instances. This action cannot be undone.
Clone Deployment
Duplicates the current deployment’s configuration as a starting point for a new deployment.
Troubleshooting
- Verify your application implements the health check endpoint and responds within the configured timeout.
- For private images, ensure the registry secret has read access to the repository.
- Confirm the HTTP service port matches the port your application listens on.