> ## Documentation Index
> Fetch the complete documentation index at: https://docs.simplismart.ai/llms.txt
> Use this file to discover all available pages before exploring further.
# ECD Training Suite
> Step-by-step guide to training and deploying an Encoder-Combiner-Decoder (ECD) model on Simplismart
Learn how to create and deploy a custom Encoder-Combiner-Decoder (ECD) model on Simplismart. This guide covers the complete workflow from initiating a training job to deploying your trained model.
ECD models are particularly effective for tabular data and feature engineering tasks, using the TabNet architecture for superior performance on structured datasets.
## Prerequisites
Before starting, ensure you have:
* A Simplismart account with access to the Training Suite
* A publicly accessible dataset URL
* Your training configuration prepared ([configuration schema](./ecd-training-config-schema))
## Creating a Training Job
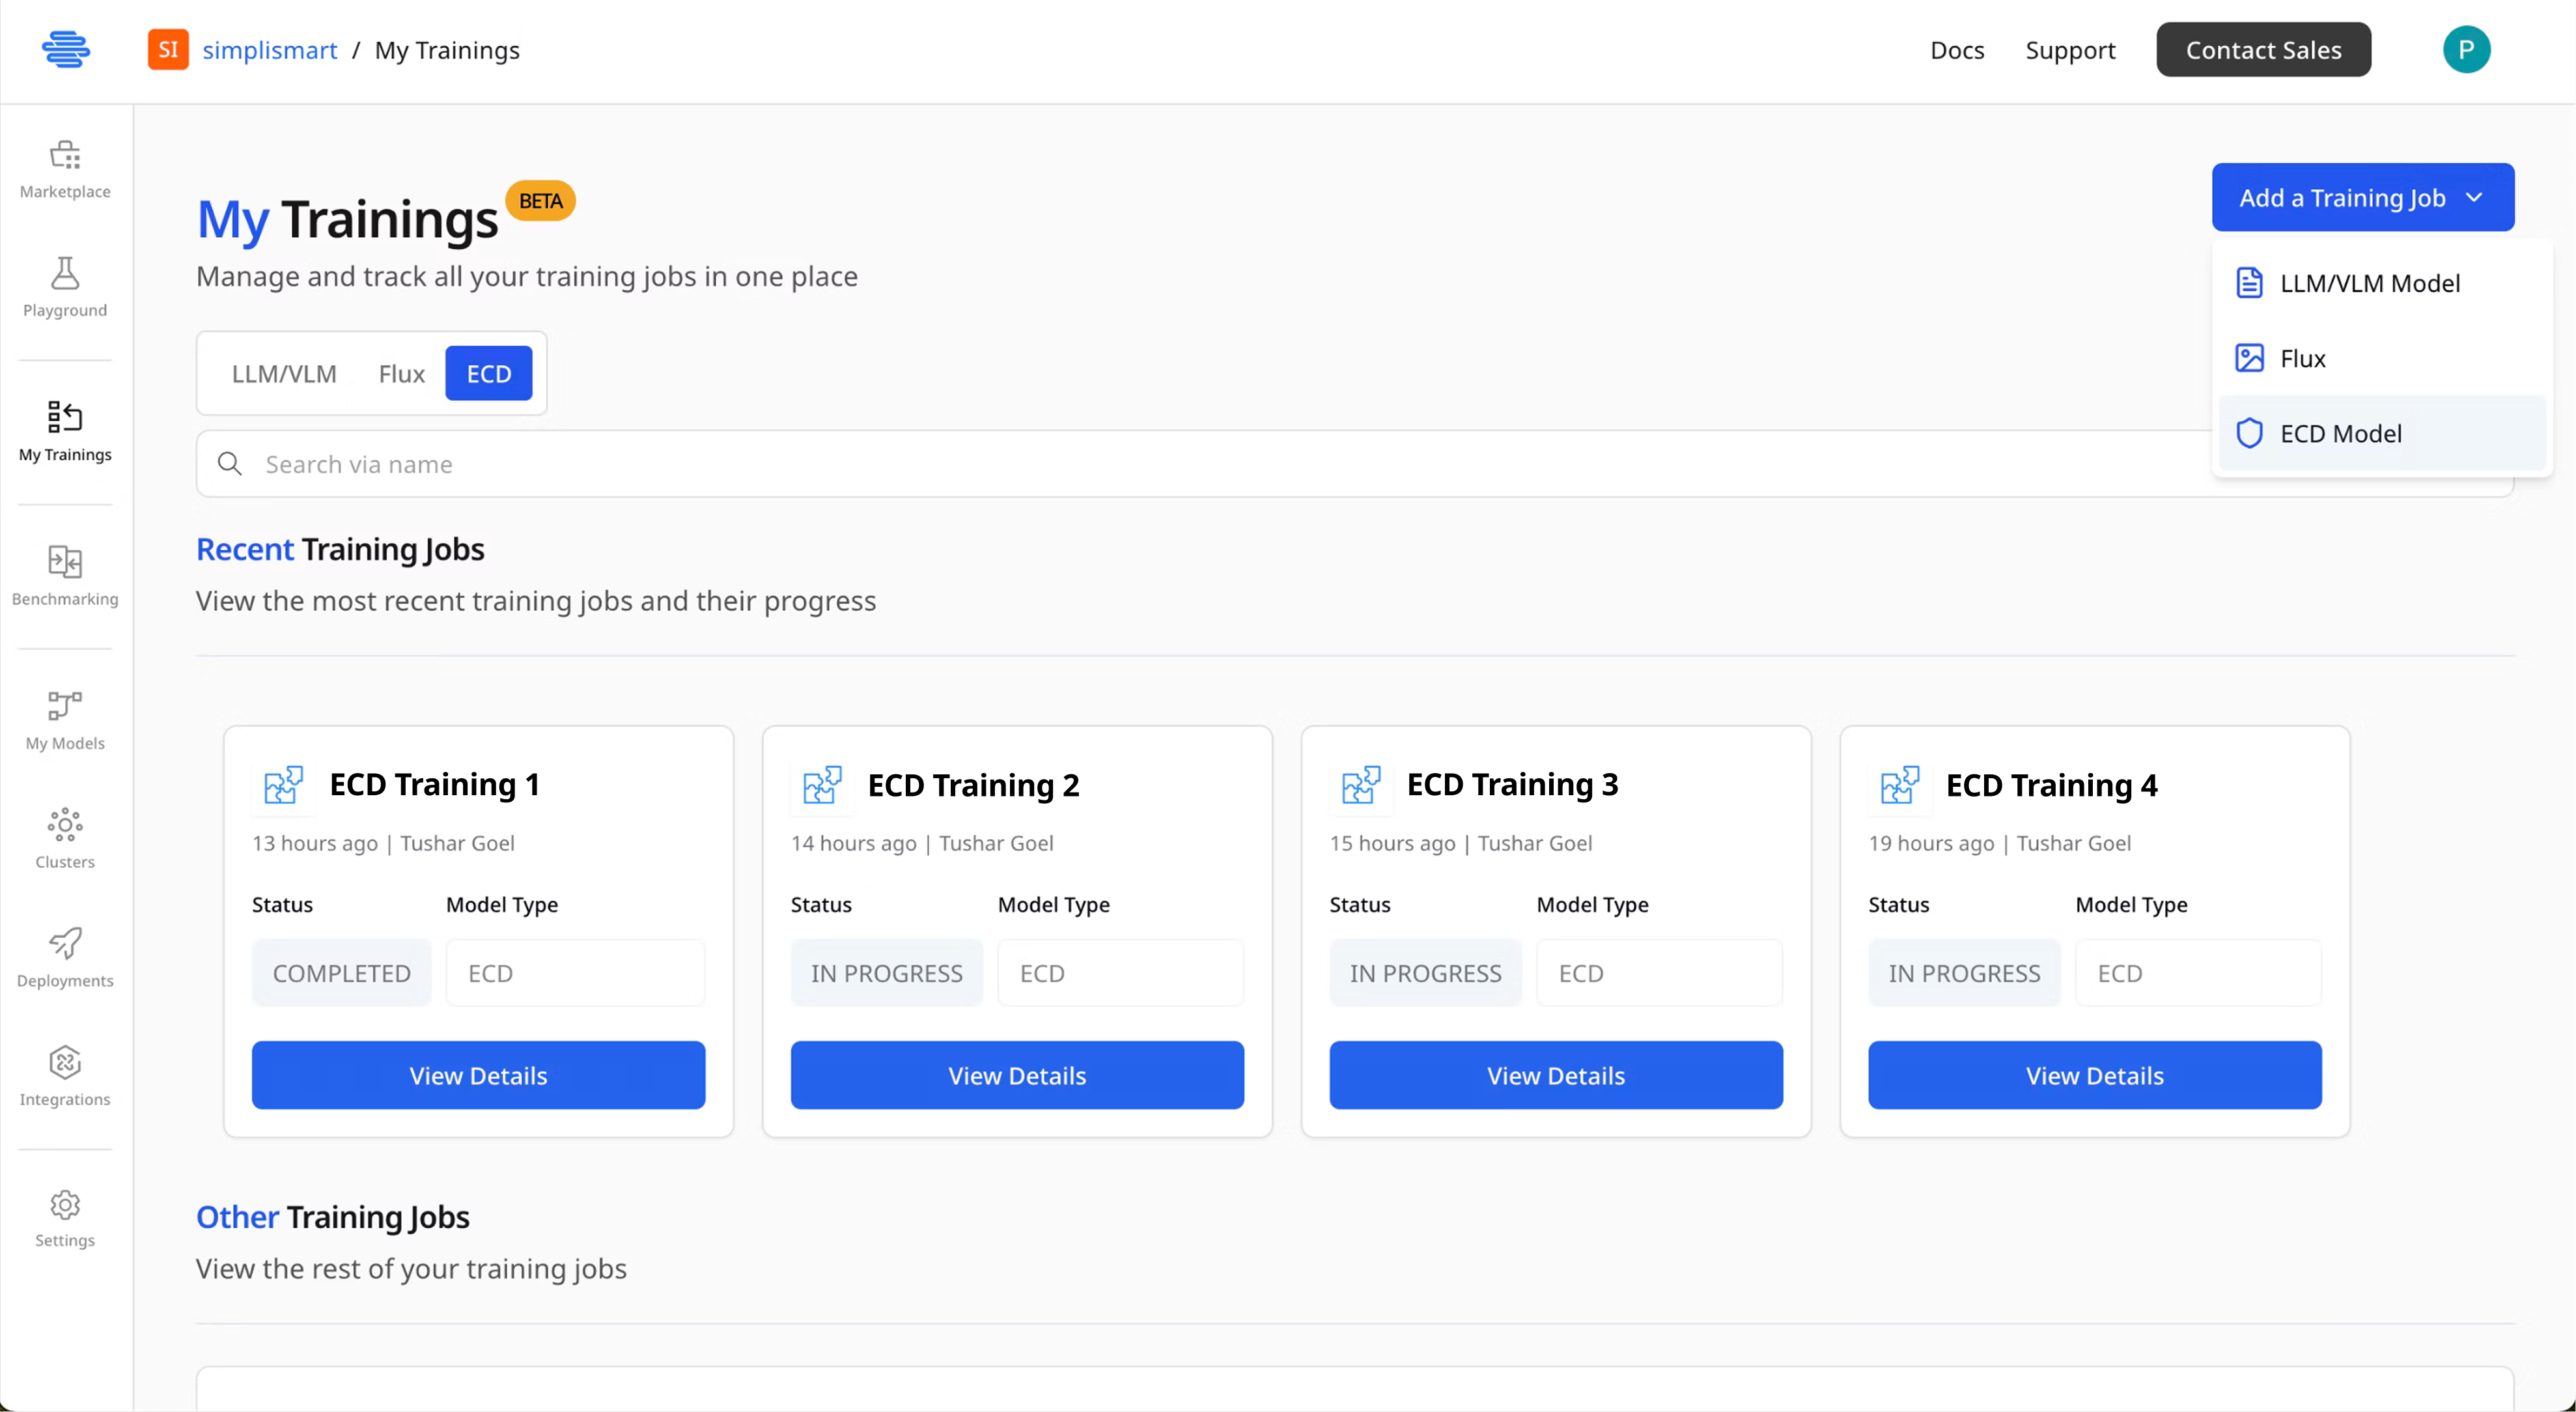
1. Navigate to **My Trainings** from the left sidebar
2. Click **Add a Training Job**
3. Select **ECD** as the model type from the available options
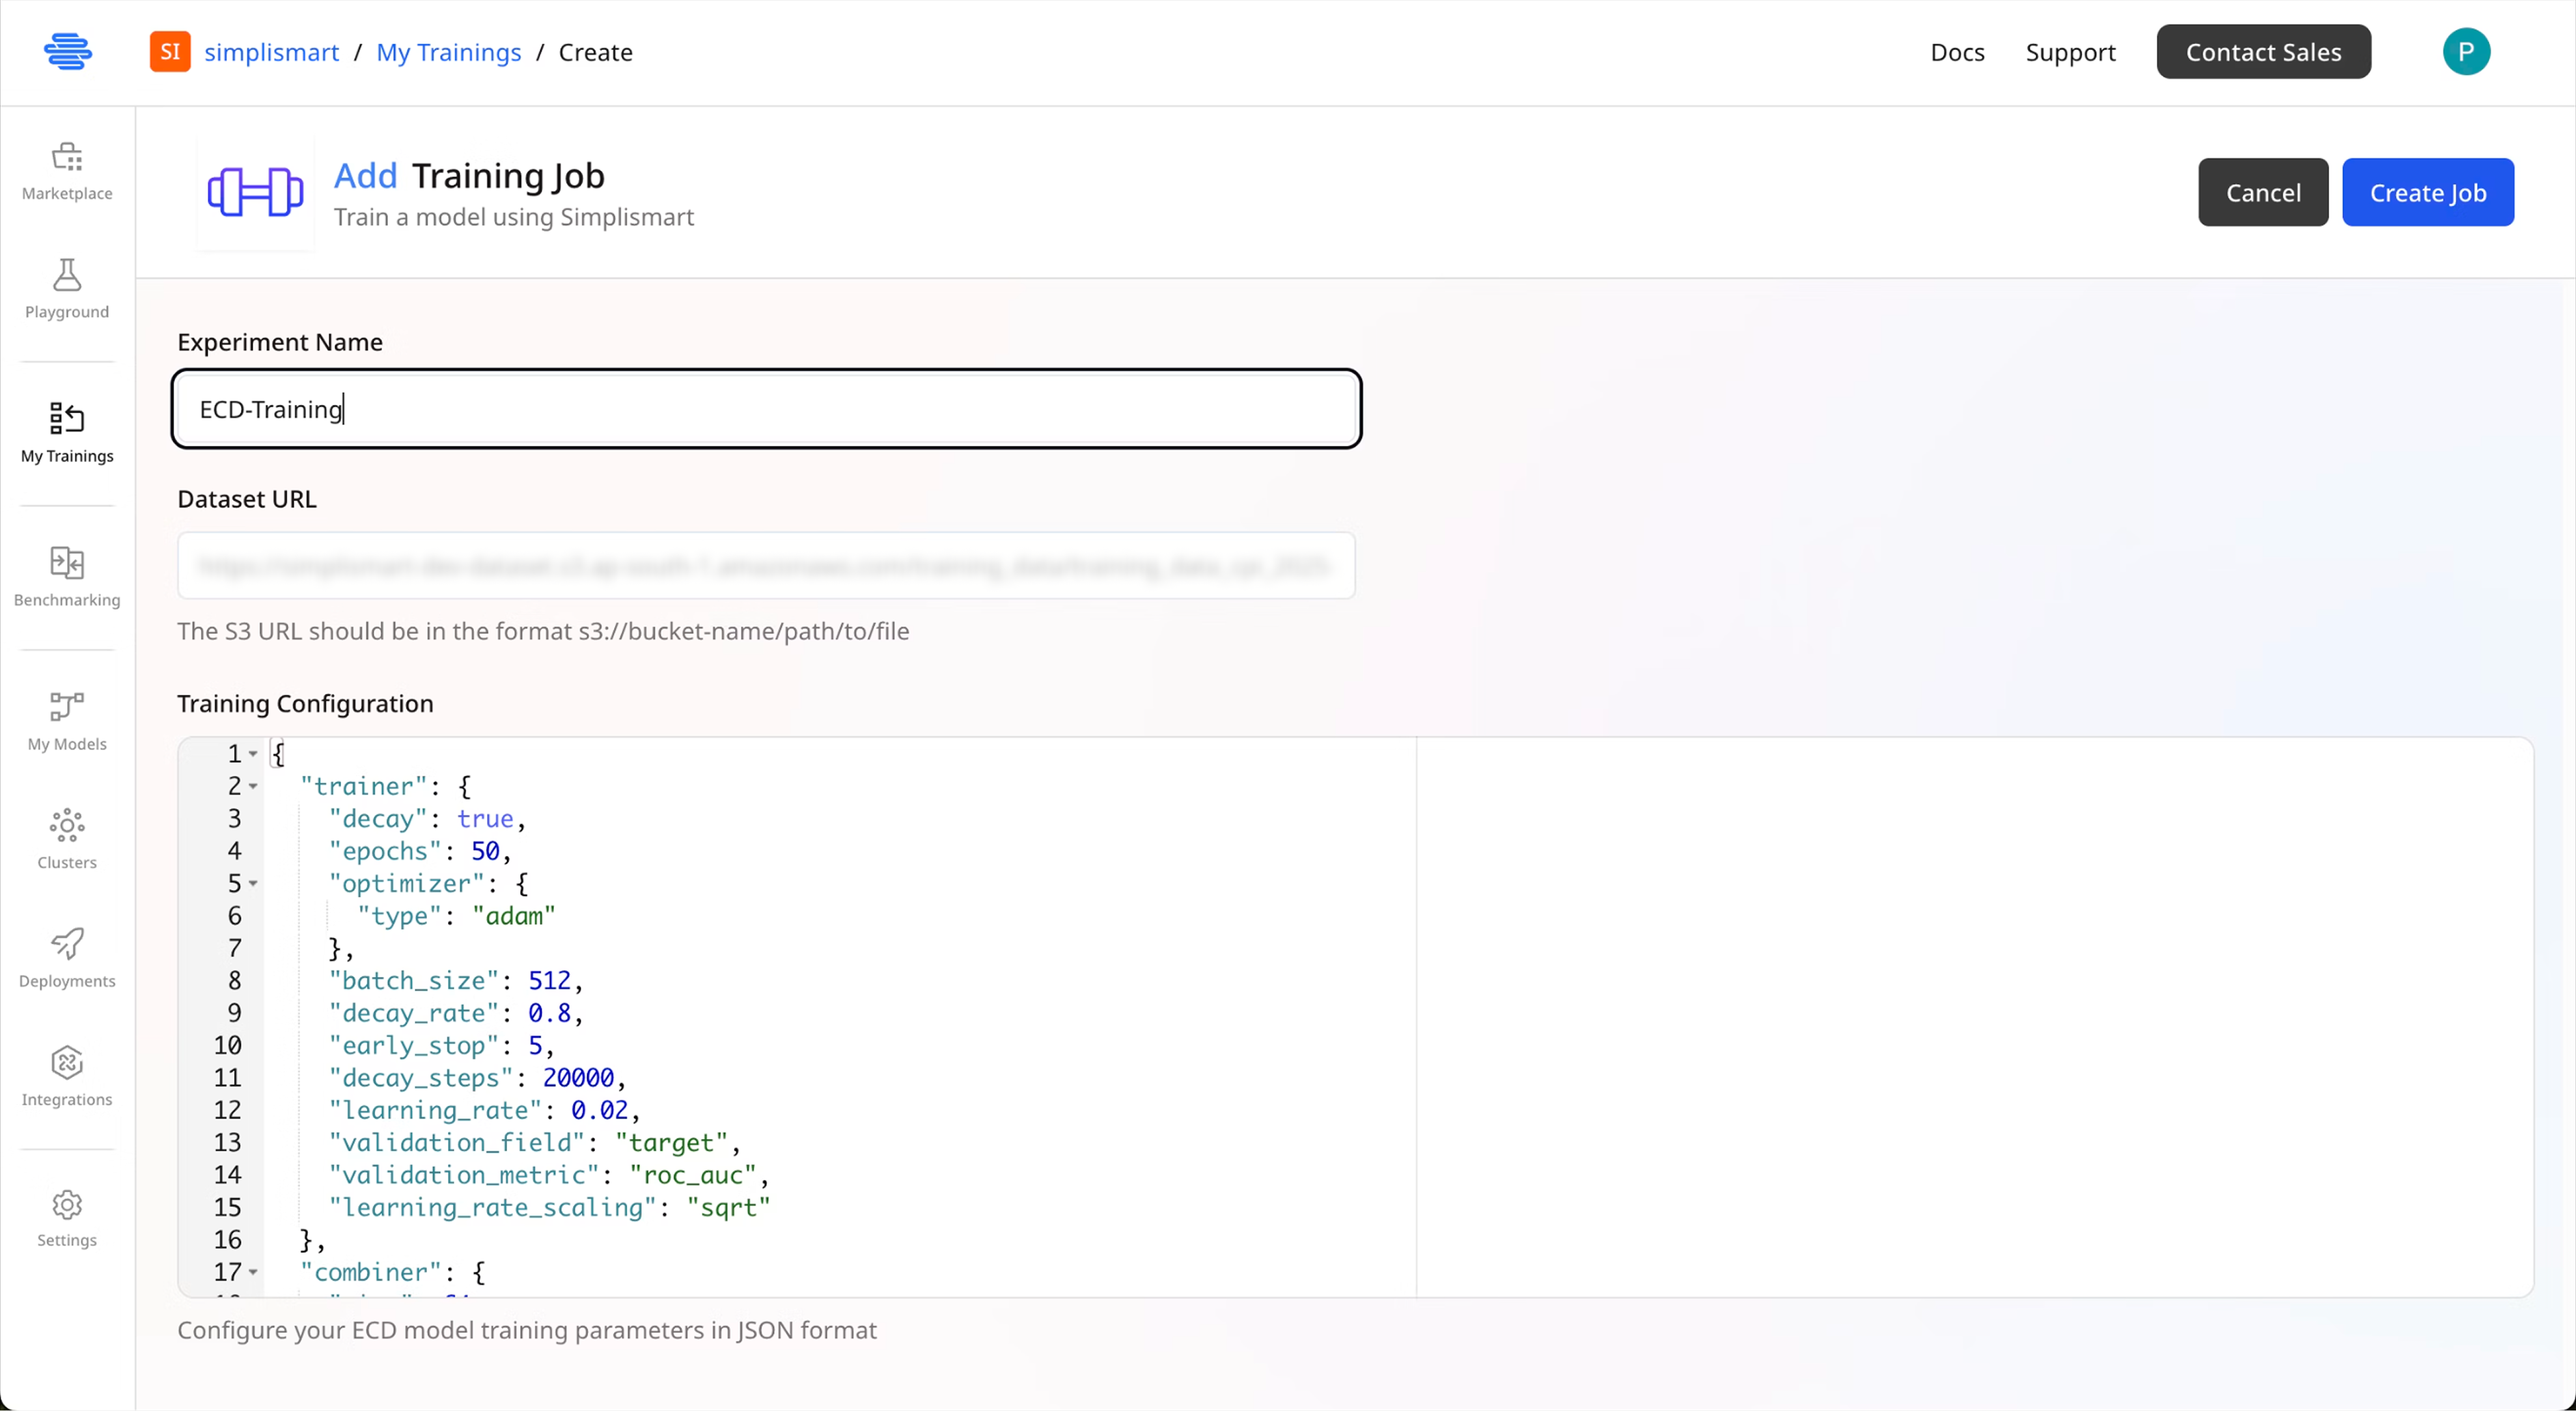
 Provide the following details:
1. **Experiment Name**: Enter a descriptive name for your training experiment
2. **Dataset URL**: Provide the publicly accessible URL to your dataset
3. **Training Configuration**: Add your ECD model configuration
See the [ECD Model Configuration Schema](./ecd-training-config-schema) section for detailed configuration options and examples.
4. Review all settings and click **Create Job** to start training
Provide the following details:
1. **Experiment Name**: Enter a descriptive name for your training experiment
2. **Dataset URL**: Provide the publicly accessible URL to your dataset
3. **Training Configuration**: Add your ECD model configuration
See the [ECD Model Configuration Schema](./ecd-training-config-schema) section for detailed configuration options and examples.
4. Review all settings and click **Create Job** to start training
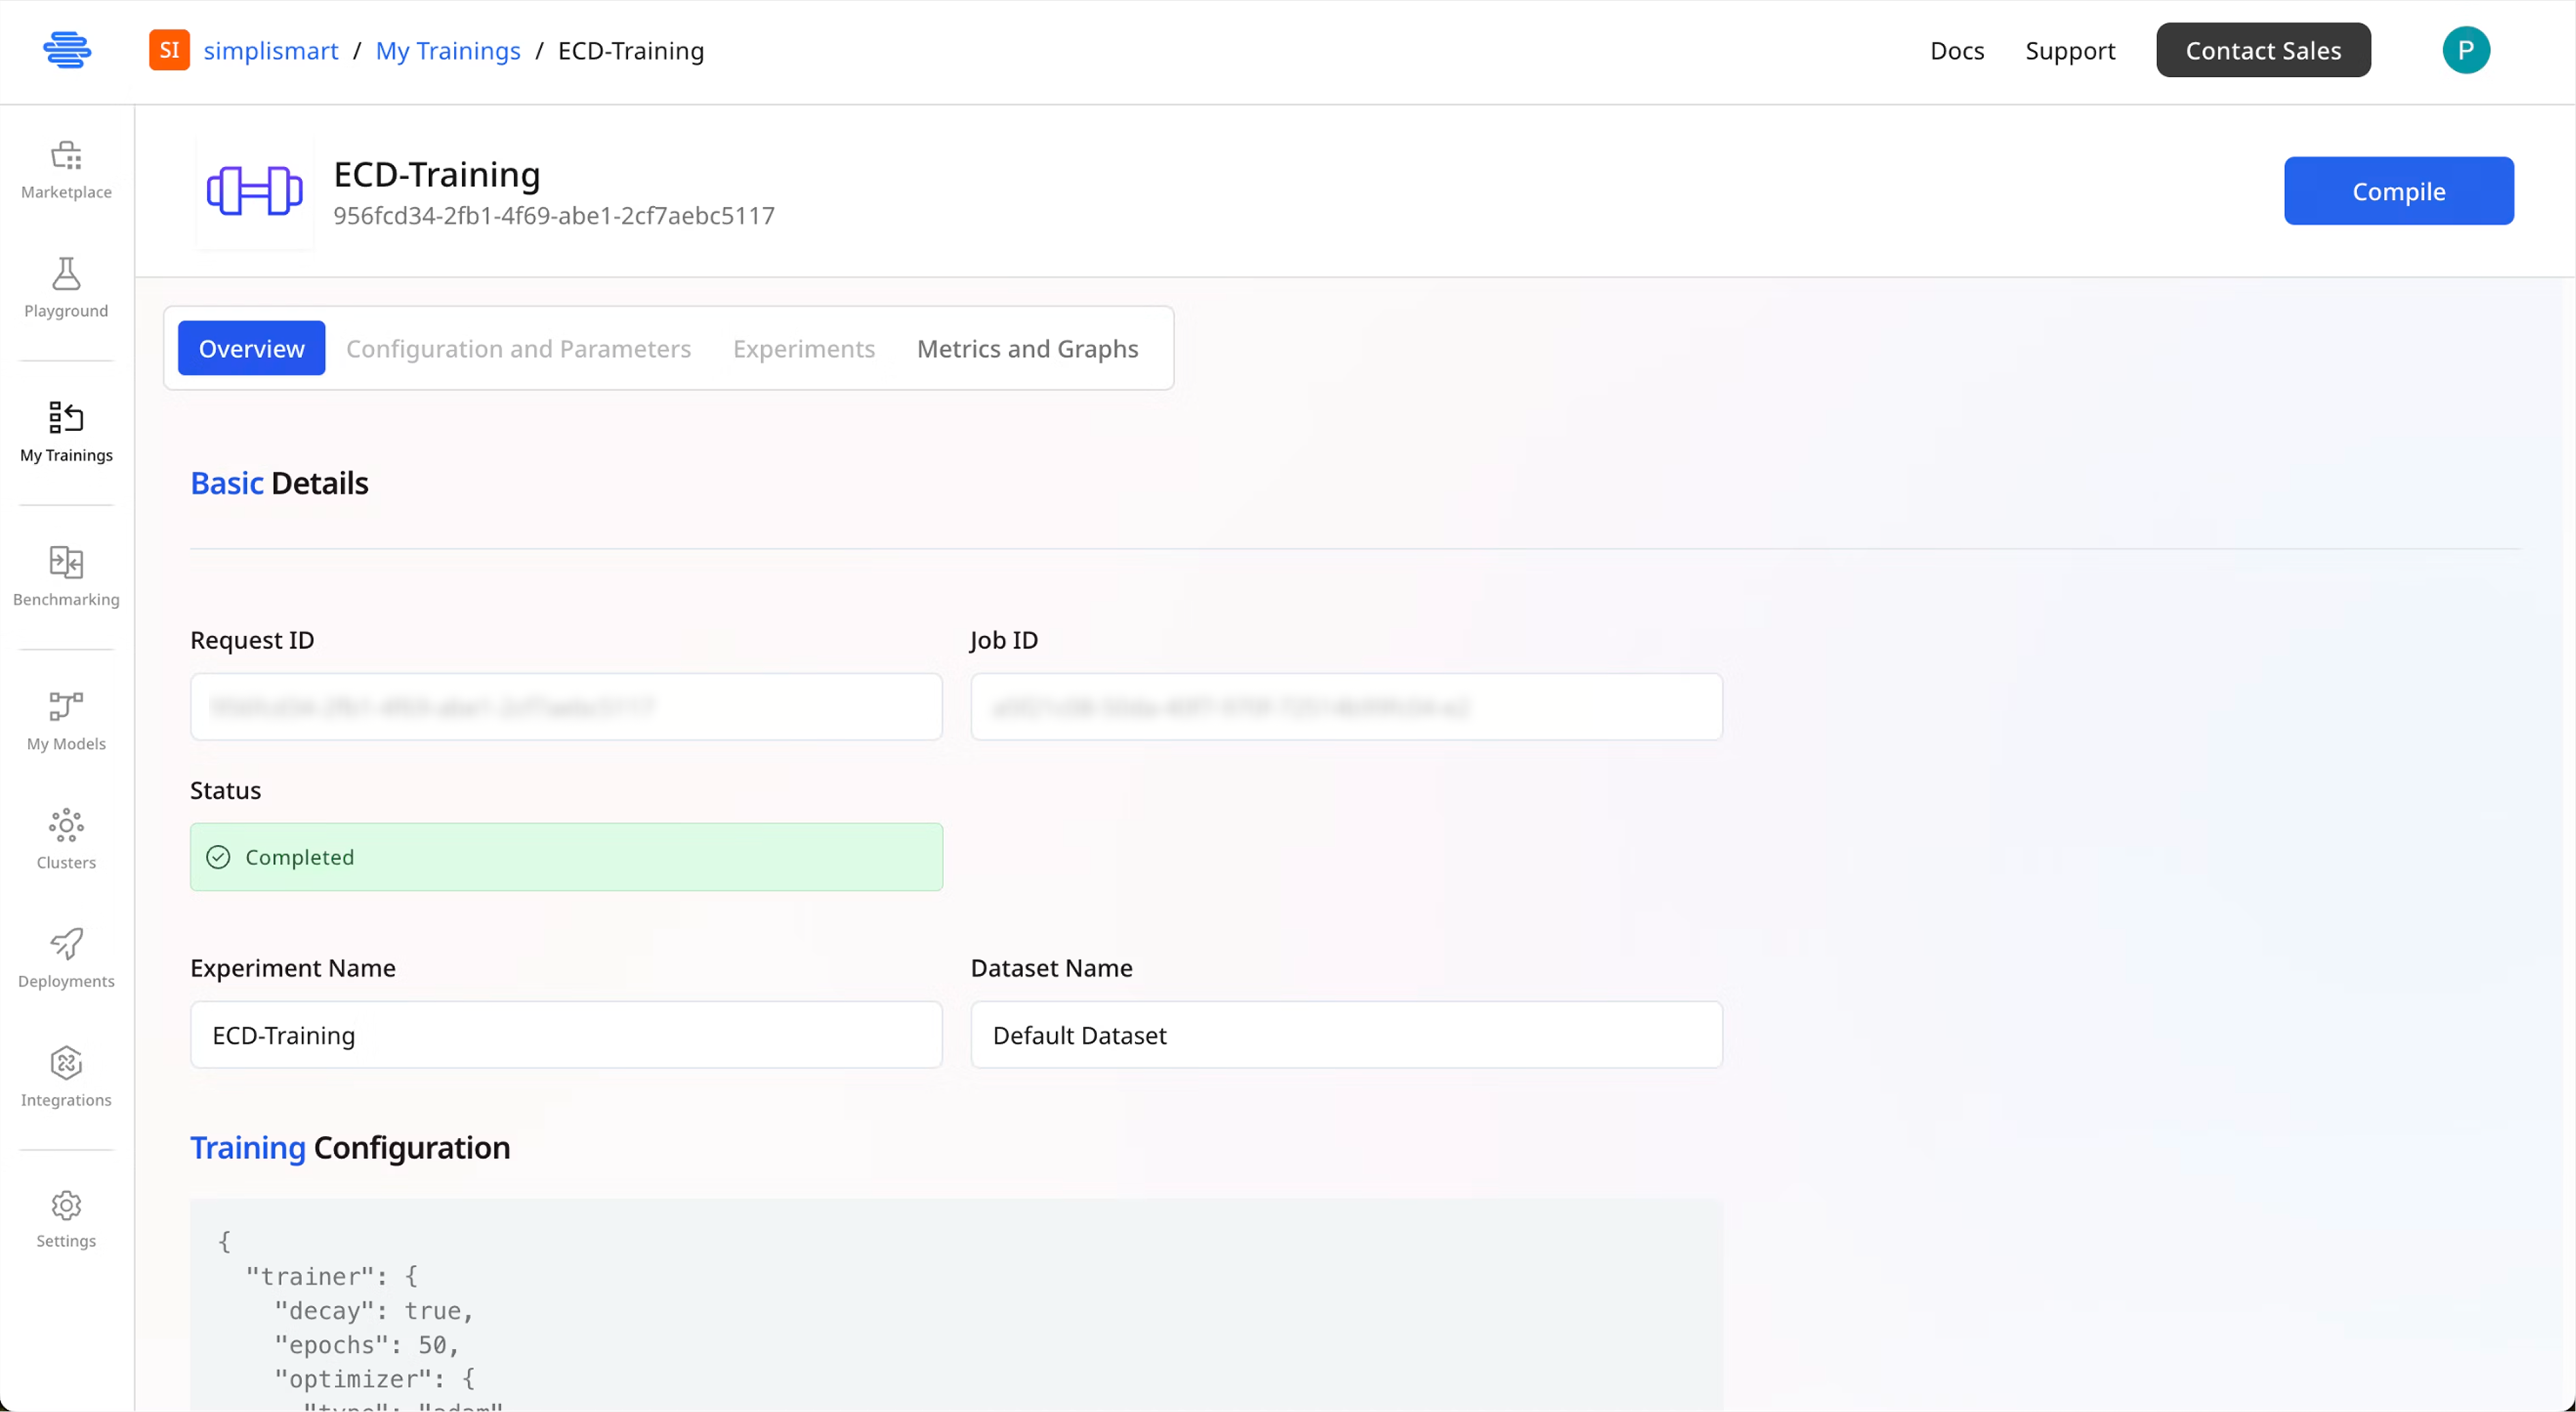
 Once submitted, your training job will begin processing. You can:
* Monitor training progress in real-time
* View training metrics and logs
* Track loss curves and validation performance
When training completes successfully, you'll see a **Compile** button.
## Compiling Your Trained Model
After training completes, compile your model to prepare it for deployment.
1. Click the **Compile** button on your completed training job
2. You'll be redirected to the model compilation page
3. The page shows your model ready to be added to `My Models`
Once submitted, your training job will begin processing. You can:
* Monitor training progress in real-time
* View training metrics and logs
* Track loss curves and validation performance
When training completes successfully, you'll see a **Compile** button.
## Compiling Your Trained Model
After training completes, compile your model to prepare it for deployment.
1. Click the **Compile** button on your completed training job
2. You'll be redirected to the model compilation page
3. The page shows your model ready to be added to `My Models`
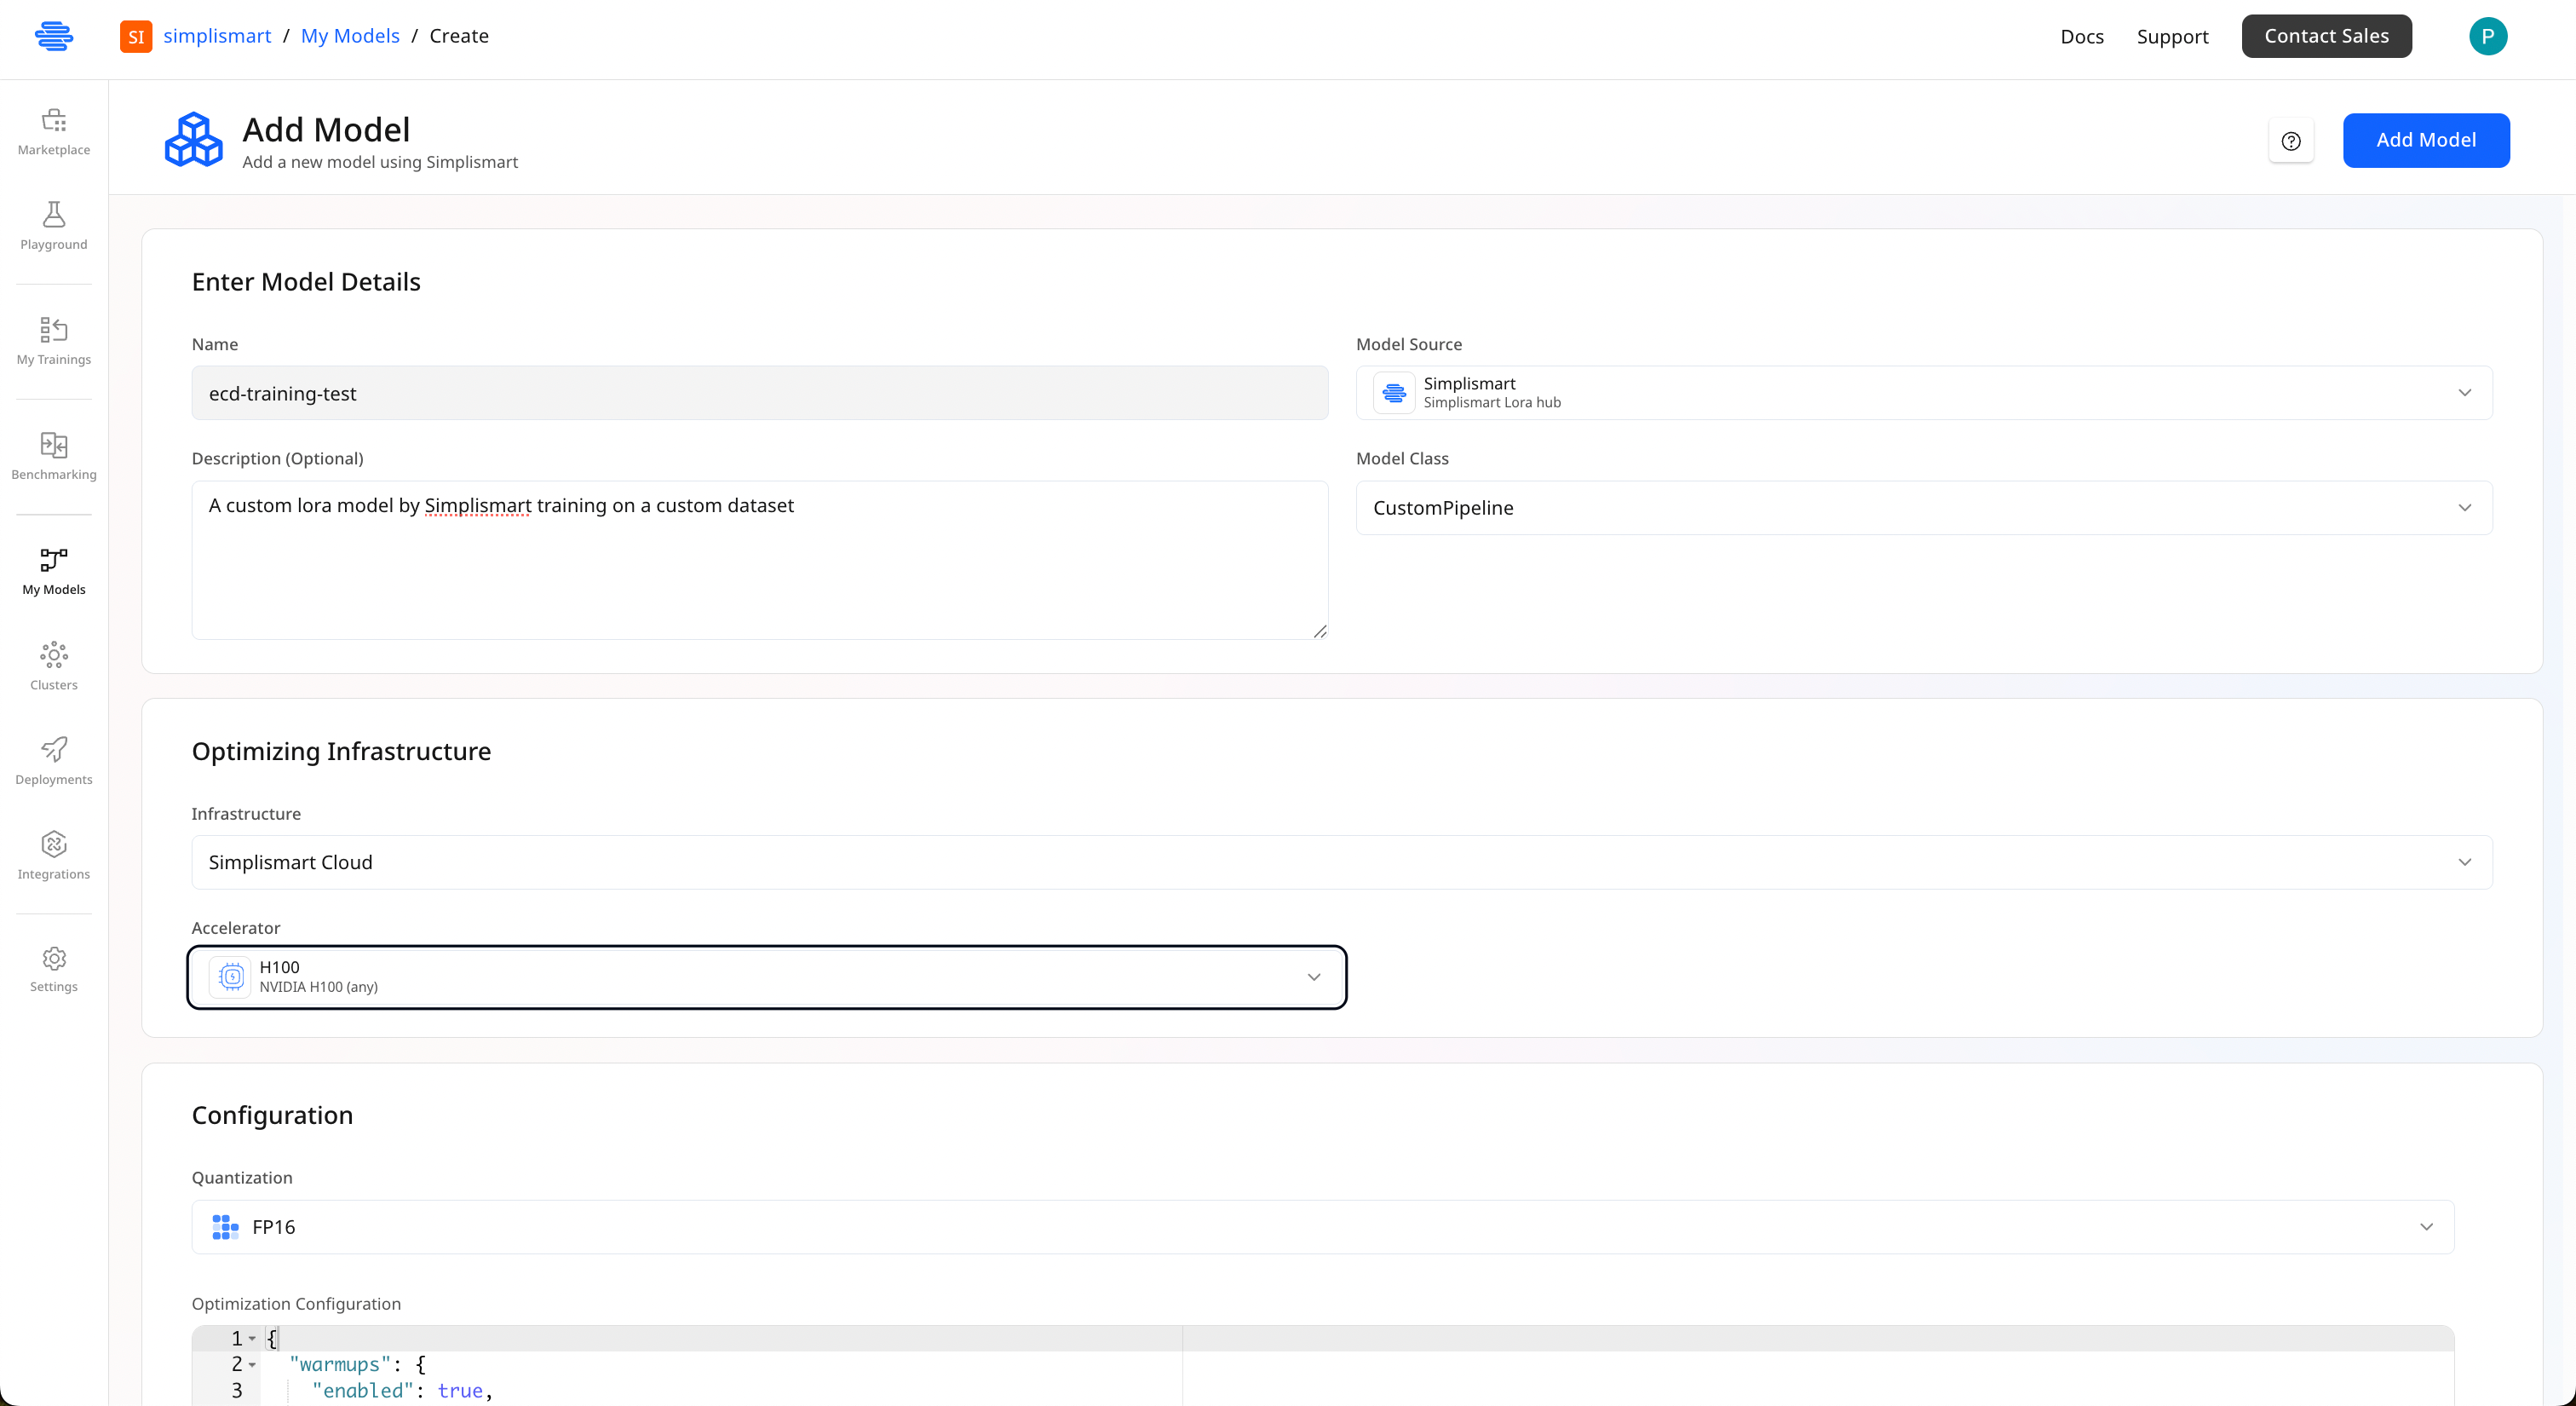
 Provide the following information:
1. **Model Name**: Enter a descriptive name for your compiled model
2. **Infrastructure**: Choose your deployment infrastructure:
* **Simplismart Cloud**: Deploy on Simplismart's managed infrastructure
* **Your Own Cloud**: Use your own infrastructure ([BYOC guide](/inference/bring-your-own-compute))
Most configuration options will be auto-populated based on your model class. Review them before proceeding.
3. Click **Add Model** to proceed with **Model Compilation**.
Provide the following information:
1. **Model Name**: Enter a descriptive name for your compiled model
2. **Infrastructure**: Choose your deployment infrastructure:
* **Simplismart Cloud**: Deploy on Simplismart's managed infrastructure
* **Your Own Cloud**: Use your own infrastructure ([BYOC guide](/inference/bring-your-own-compute))
Most configuration options will be auto-populated based on your model class. Review them before proceeding.
3. Click **Add Model** to proceed with **Model Compilation**.
 ## Deploying Your ECD Model
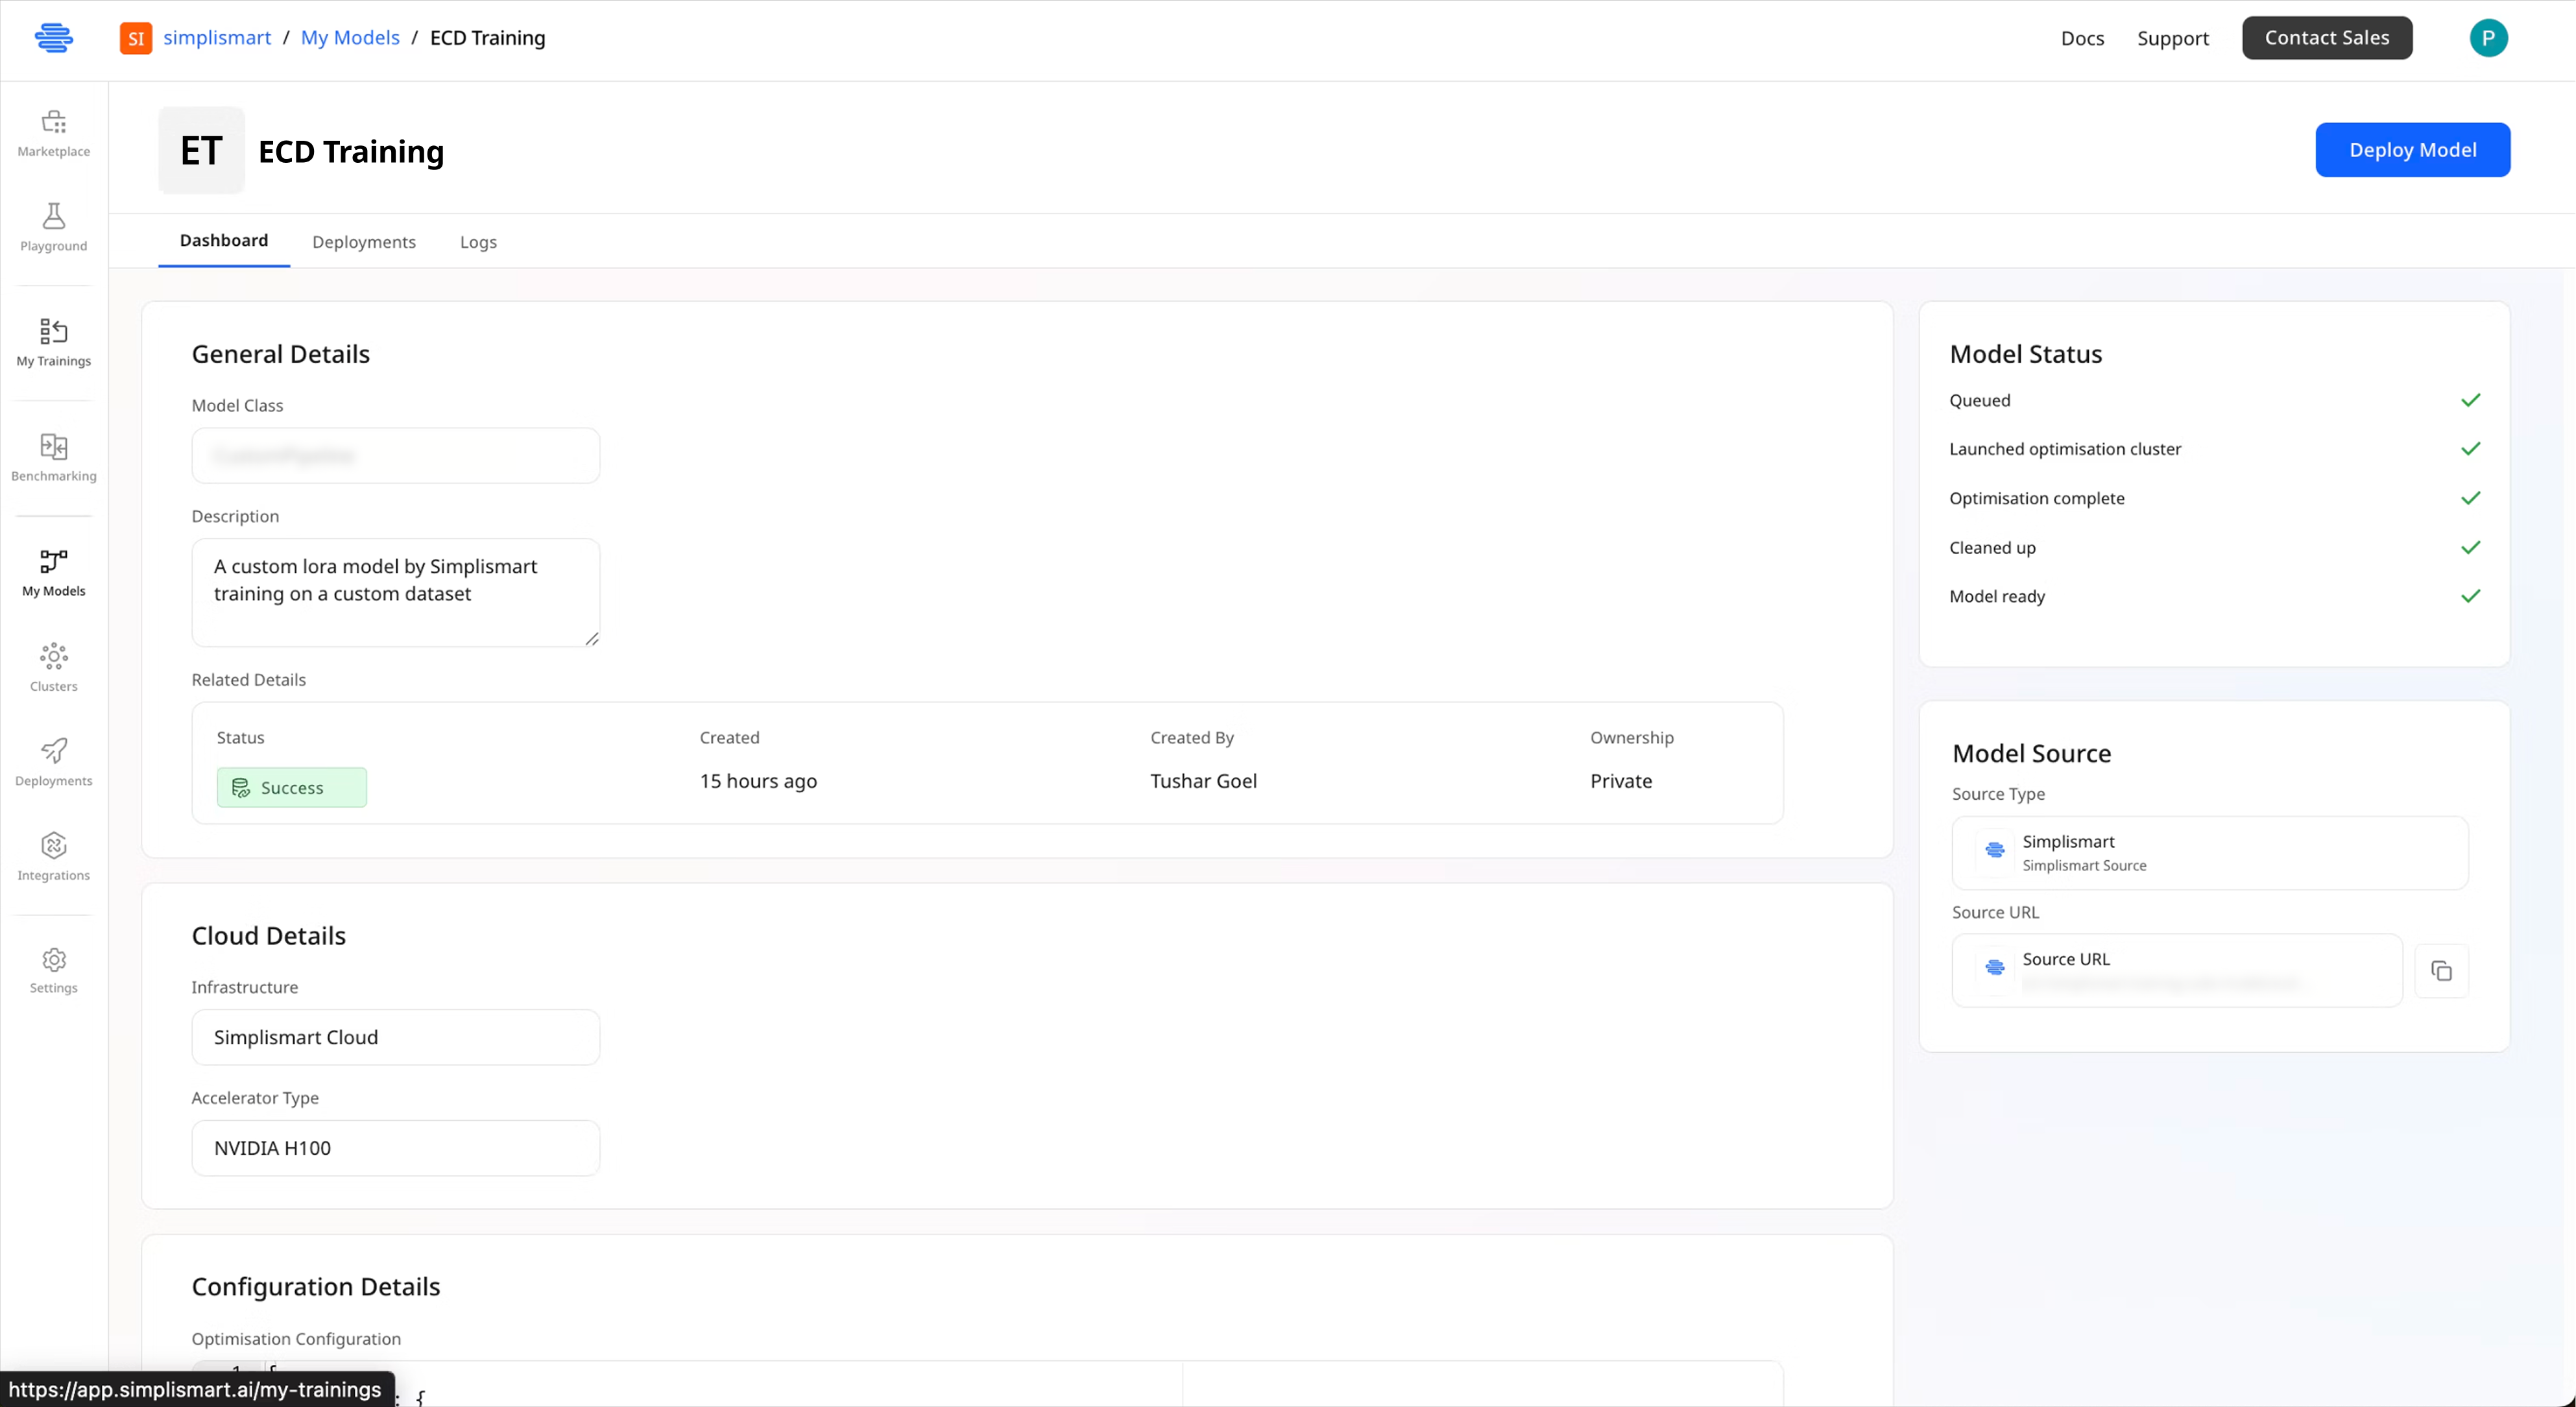
Once your model is compiled, click on `Deploy Model` button from the top right corner on the model page.
## Deploying Your ECD Model
Once your model is compiled, click on `Deploy Model` button from the top right corner on the model page.
 Go to Set up your deployment with these parameters:
### Basic Details
* **Deployment Name**: Choose a unique, descriptive name
* **Model**: Auto-populated with your compiled model
* **Cloud**: Select your infrastructure (Simplismart Cloud or your own)
* **Accelerator Type**: Choose the GPU type for inference\\
Go to Set up your deployment with these parameters:
### Basic Details
* **Deployment Name**: Choose a unique, descriptive name
* **Model**: Auto-populated with your compiled model
* **Cloud**: Select your infrastructure (Simplismart Cloud or your own)
* **Accelerator Type**: Choose the GPU type for inference\\
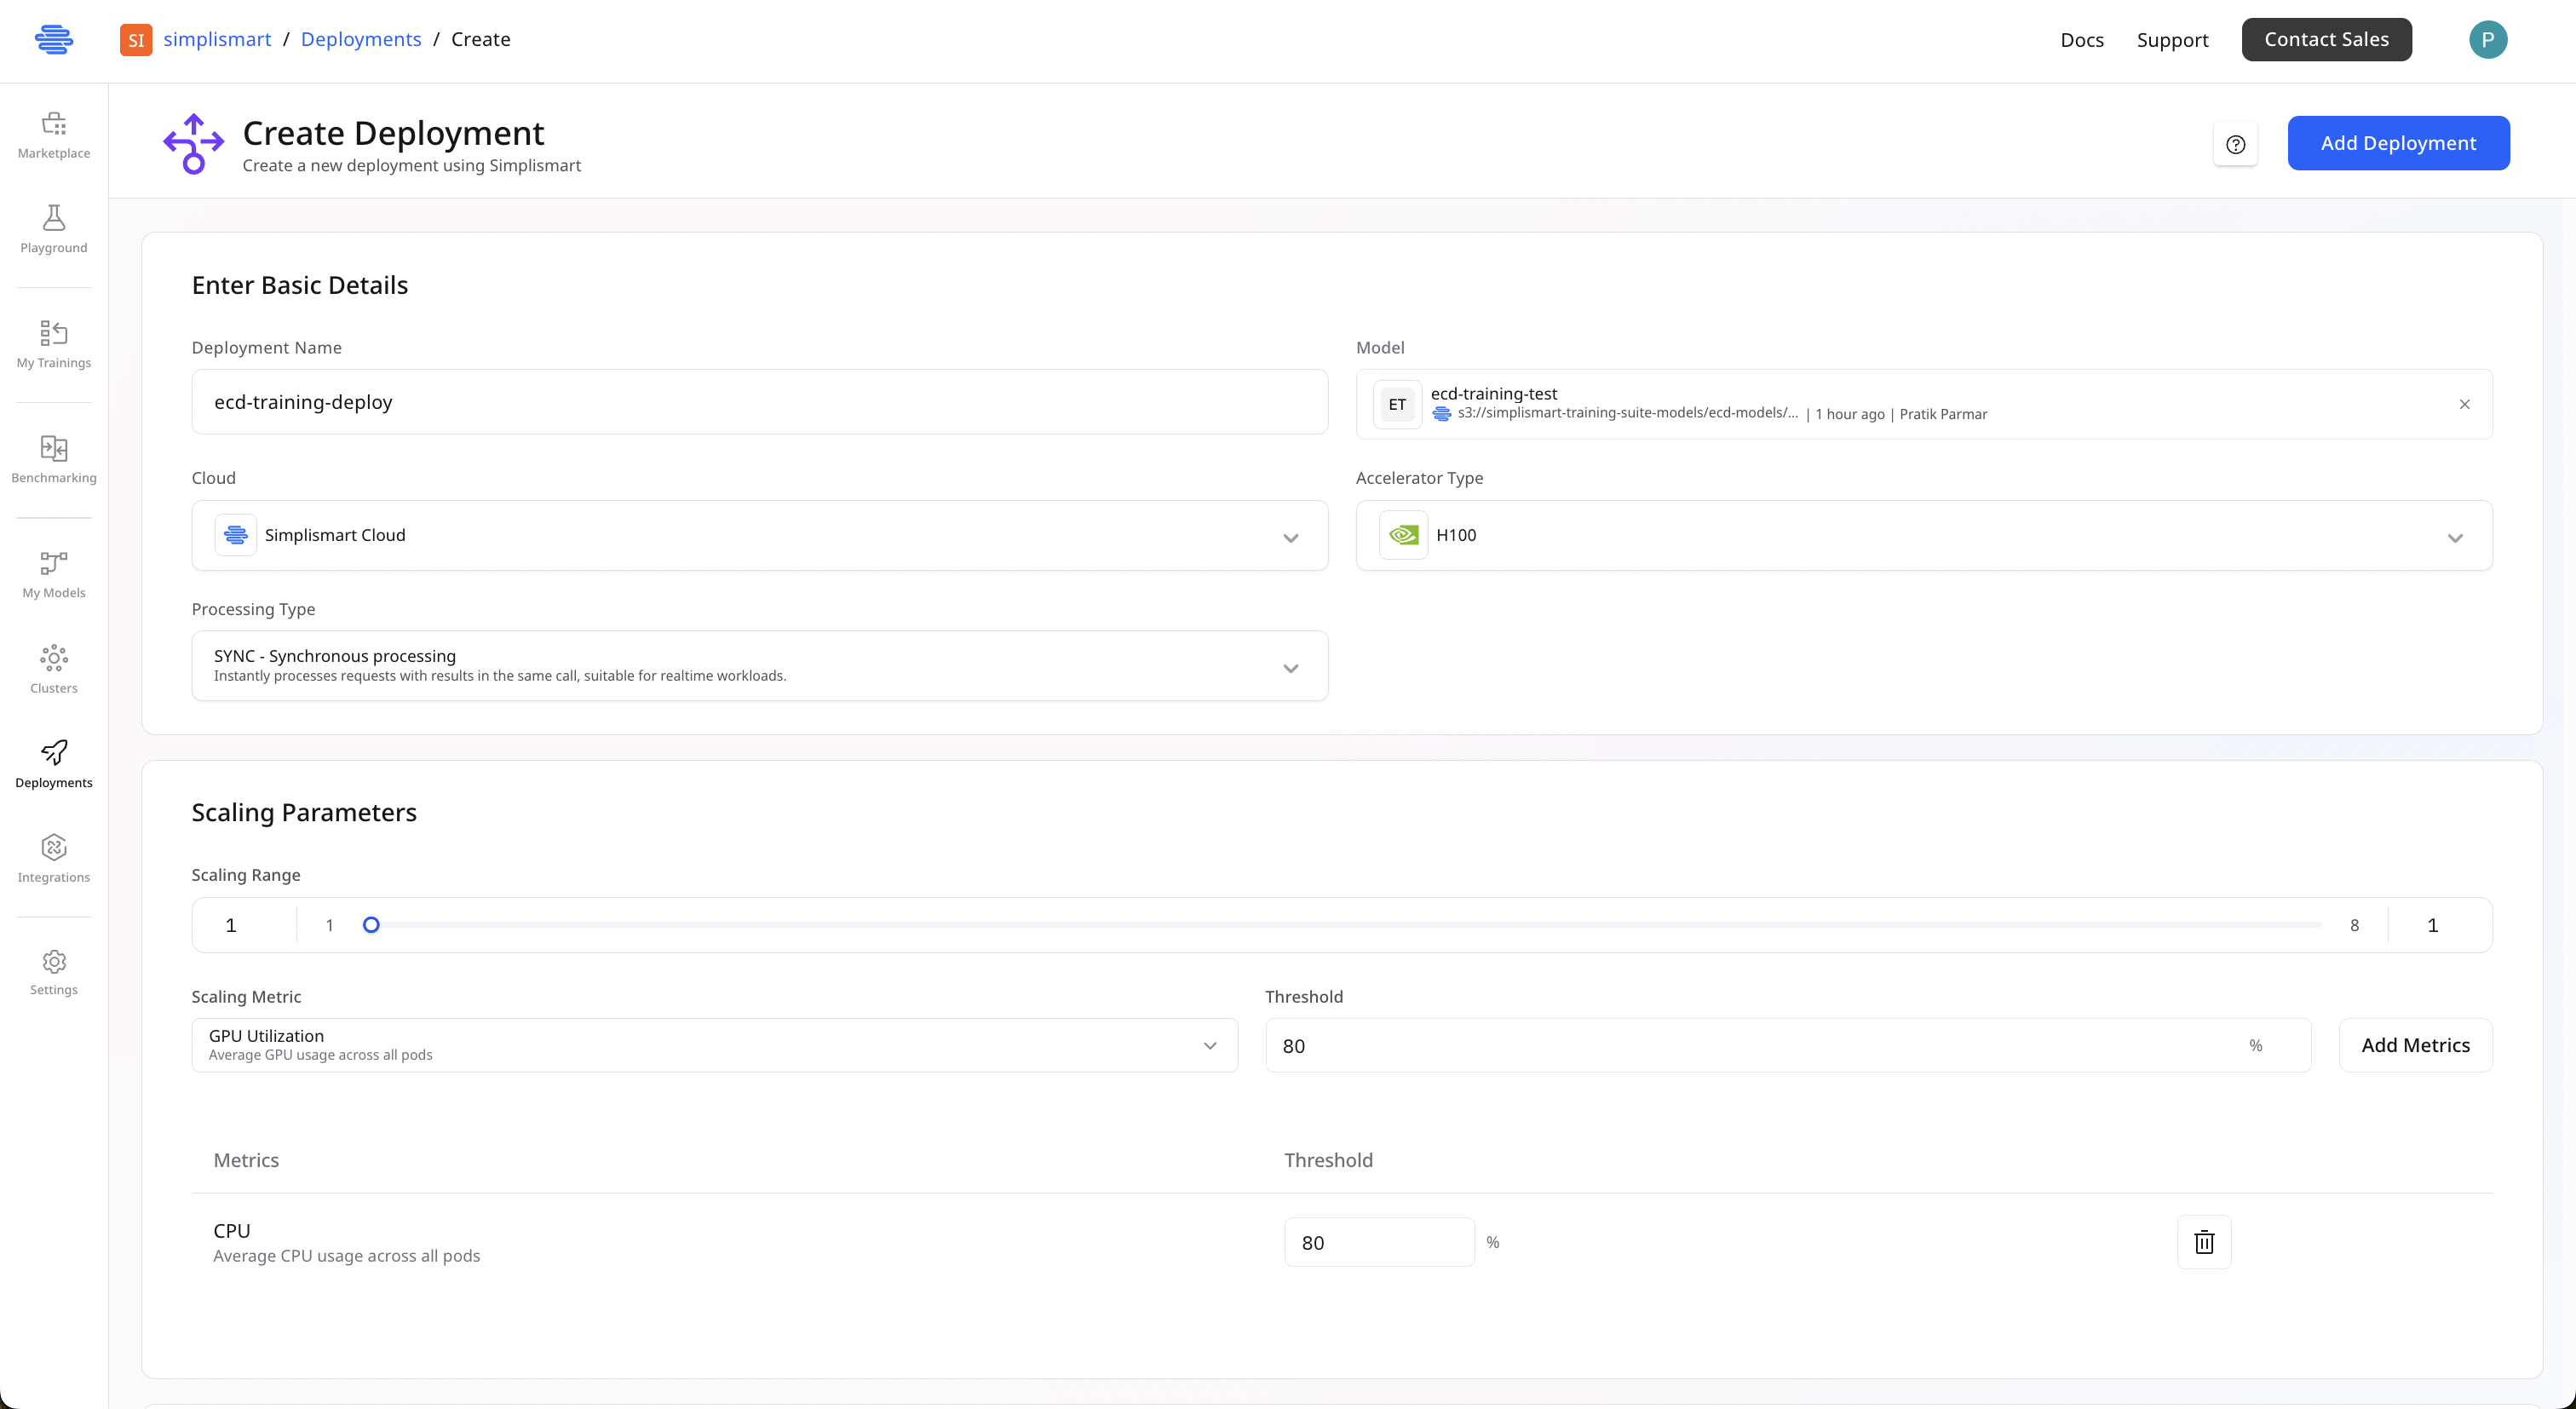 Configure auto-scaling to handle variable workloads:
### Scaling Range
* **Minimum**: 1 instance
* **Maximum**: Up to 8 instances (adjust based on your needs)
### Scaling Metrics
Add metrics that trigger scaling actions:
1. **GPU Utilization**: Set threshold at 80% to scale up
2. **CPU Utilization**: Set threshold at 80% for additional scaling control
Click **Add Metrics** to include additional scaling triggers.
Set appropriate thresholds to balance performance and cost. Too low may cause unnecessary scaling; too high may impact response times.
Organize your deployments with tags (optional but recommended):
Example tags:
* Key: `env`, Value: `staging`
* Key: `model-type`, Value: `ecd`
* Key: `version`, Value: `v1.0`
Tags help filter and manage deployments in production environments.
1. Review all configuration settings
2. Click **Add Deployment** to start the deployment process
3. Monitor the deployment status on the right side of the screen
The deployment typically takes a few minutes to complete.
Configure auto-scaling to handle variable workloads:
### Scaling Range
* **Minimum**: 1 instance
* **Maximum**: Up to 8 instances (adjust based on your needs)
### Scaling Metrics
Add metrics that trigger scaling actions:
1. **GPU Utilization**: Set threshold at 80% to scale up
2. **CPU Utilization**: Set threshold at 80% for additional scaling control
Click **Add Metrics** to include additional scaling triggers.
Set appropriate thresholds to balance performance and cost. Too low may cause unnecessary scaling; too high may impact response times.
Organize your deployments with tags (optional but recommended):
Example tags:
* Key: `env`, Value: `staging`
* Key: `model-type`, Value: `ecd`
* Key: `version`, Value: `v1.0`
Tags help filter and manage deployments in production environments.
1. Review all configuration settings
2. Click **Add Deployment** to start the deployment process
3. Monitor the deployment status on the right side of the screen
The deployment typically takes a few minutes to complete.
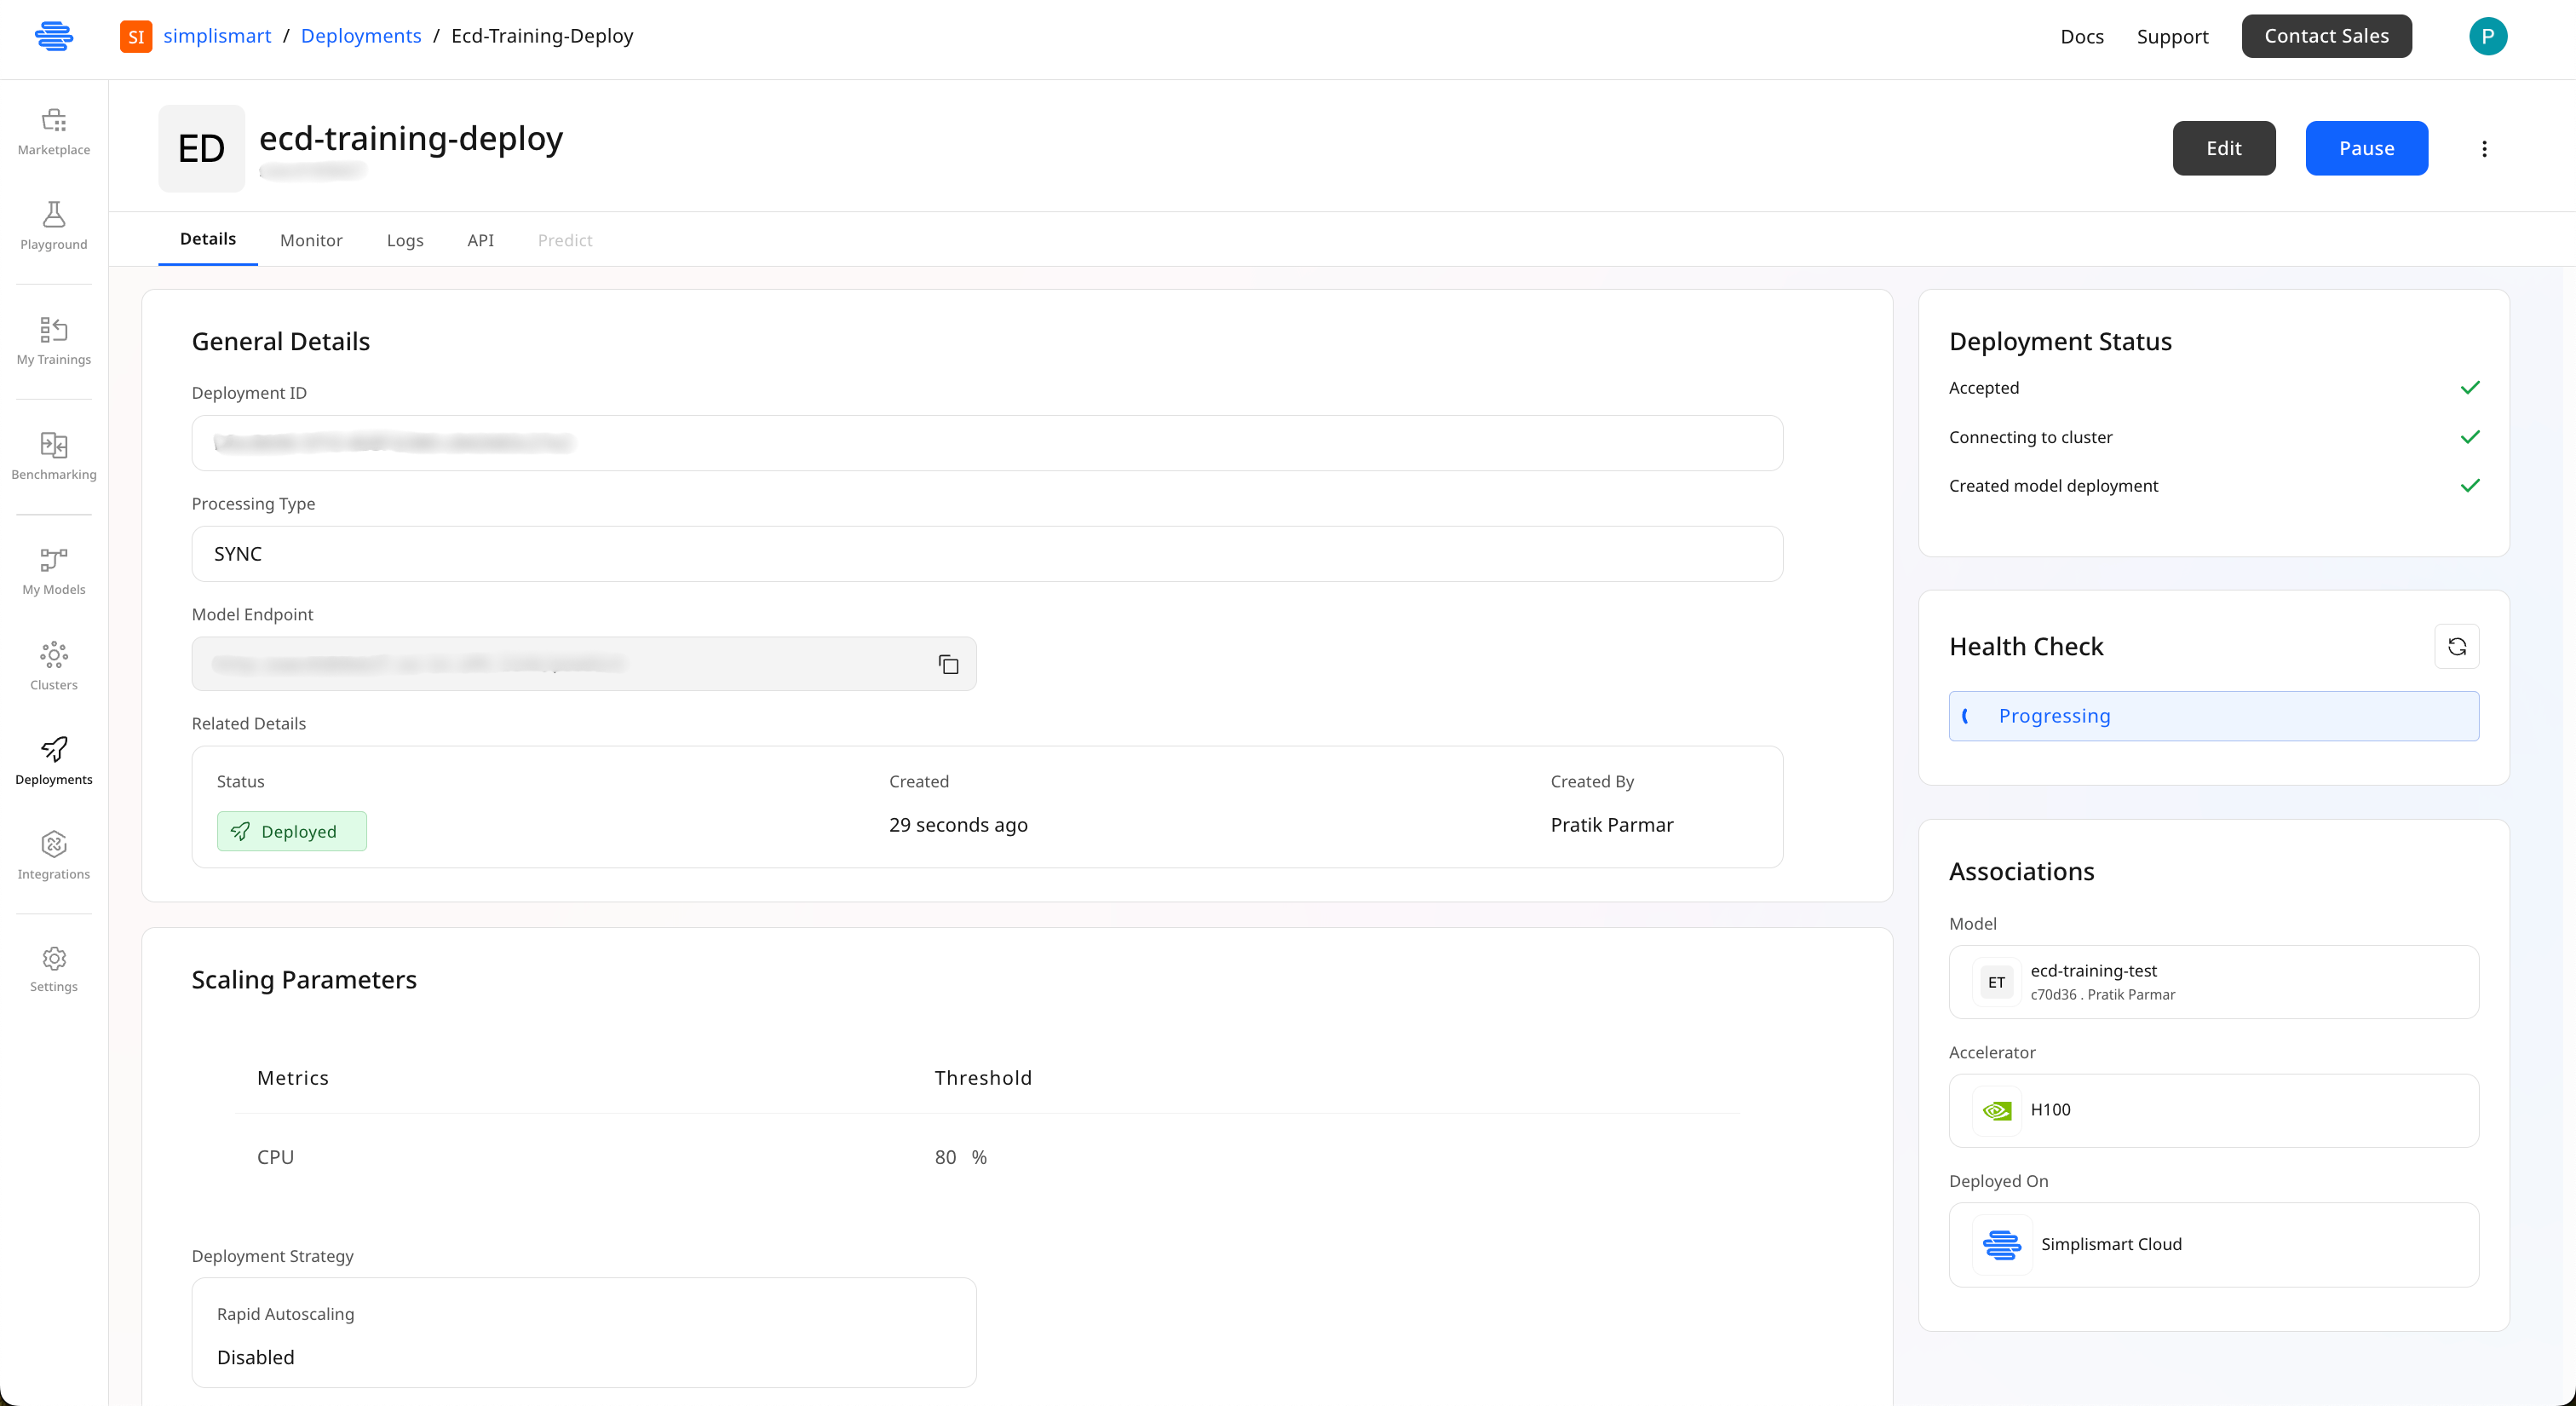 When the status shows **Deployed**, your model is ready to serve inference requests!
Once deployed, you can find your model endpoint:
1. Navigate to **Deployments** in the left sidebar
2. Click on your deployment name
3. In the **Details** tab, find the **Model Endpoint** URL
4. Copy this endpoint to use in your applications
When the status shows **Deployed**, your model is ready to serve inference requests!
Once deployed, you can find your model endpoint:
1. Navigate to **Deployments** in the left sidebar
2. Click on your deployment name
3. In the **Details** tab, find the **Model Endpoint** URL
4. Copy this endpoint to use in your applications