> ## Documentation Index
> Fetch the complete documentation index at: https://docs.simplismart.ai/llms.txt
> Use this file to discover all available pages before exploring further.
# Create a Contact Point
> Configure notification channels for your Simplismart deployment alerts
A contact point is a named, reusable notification destination. Each contact point can contain one or more **integrations**, individual channel configurations such as an email address, a Slack webhook, a Microsoft Teams connector, a PagerDuty integration, or a VictorOps endpoint. When an alert fires, notifications are sent through every integration attached to the linked contact point.
## Create a contact point
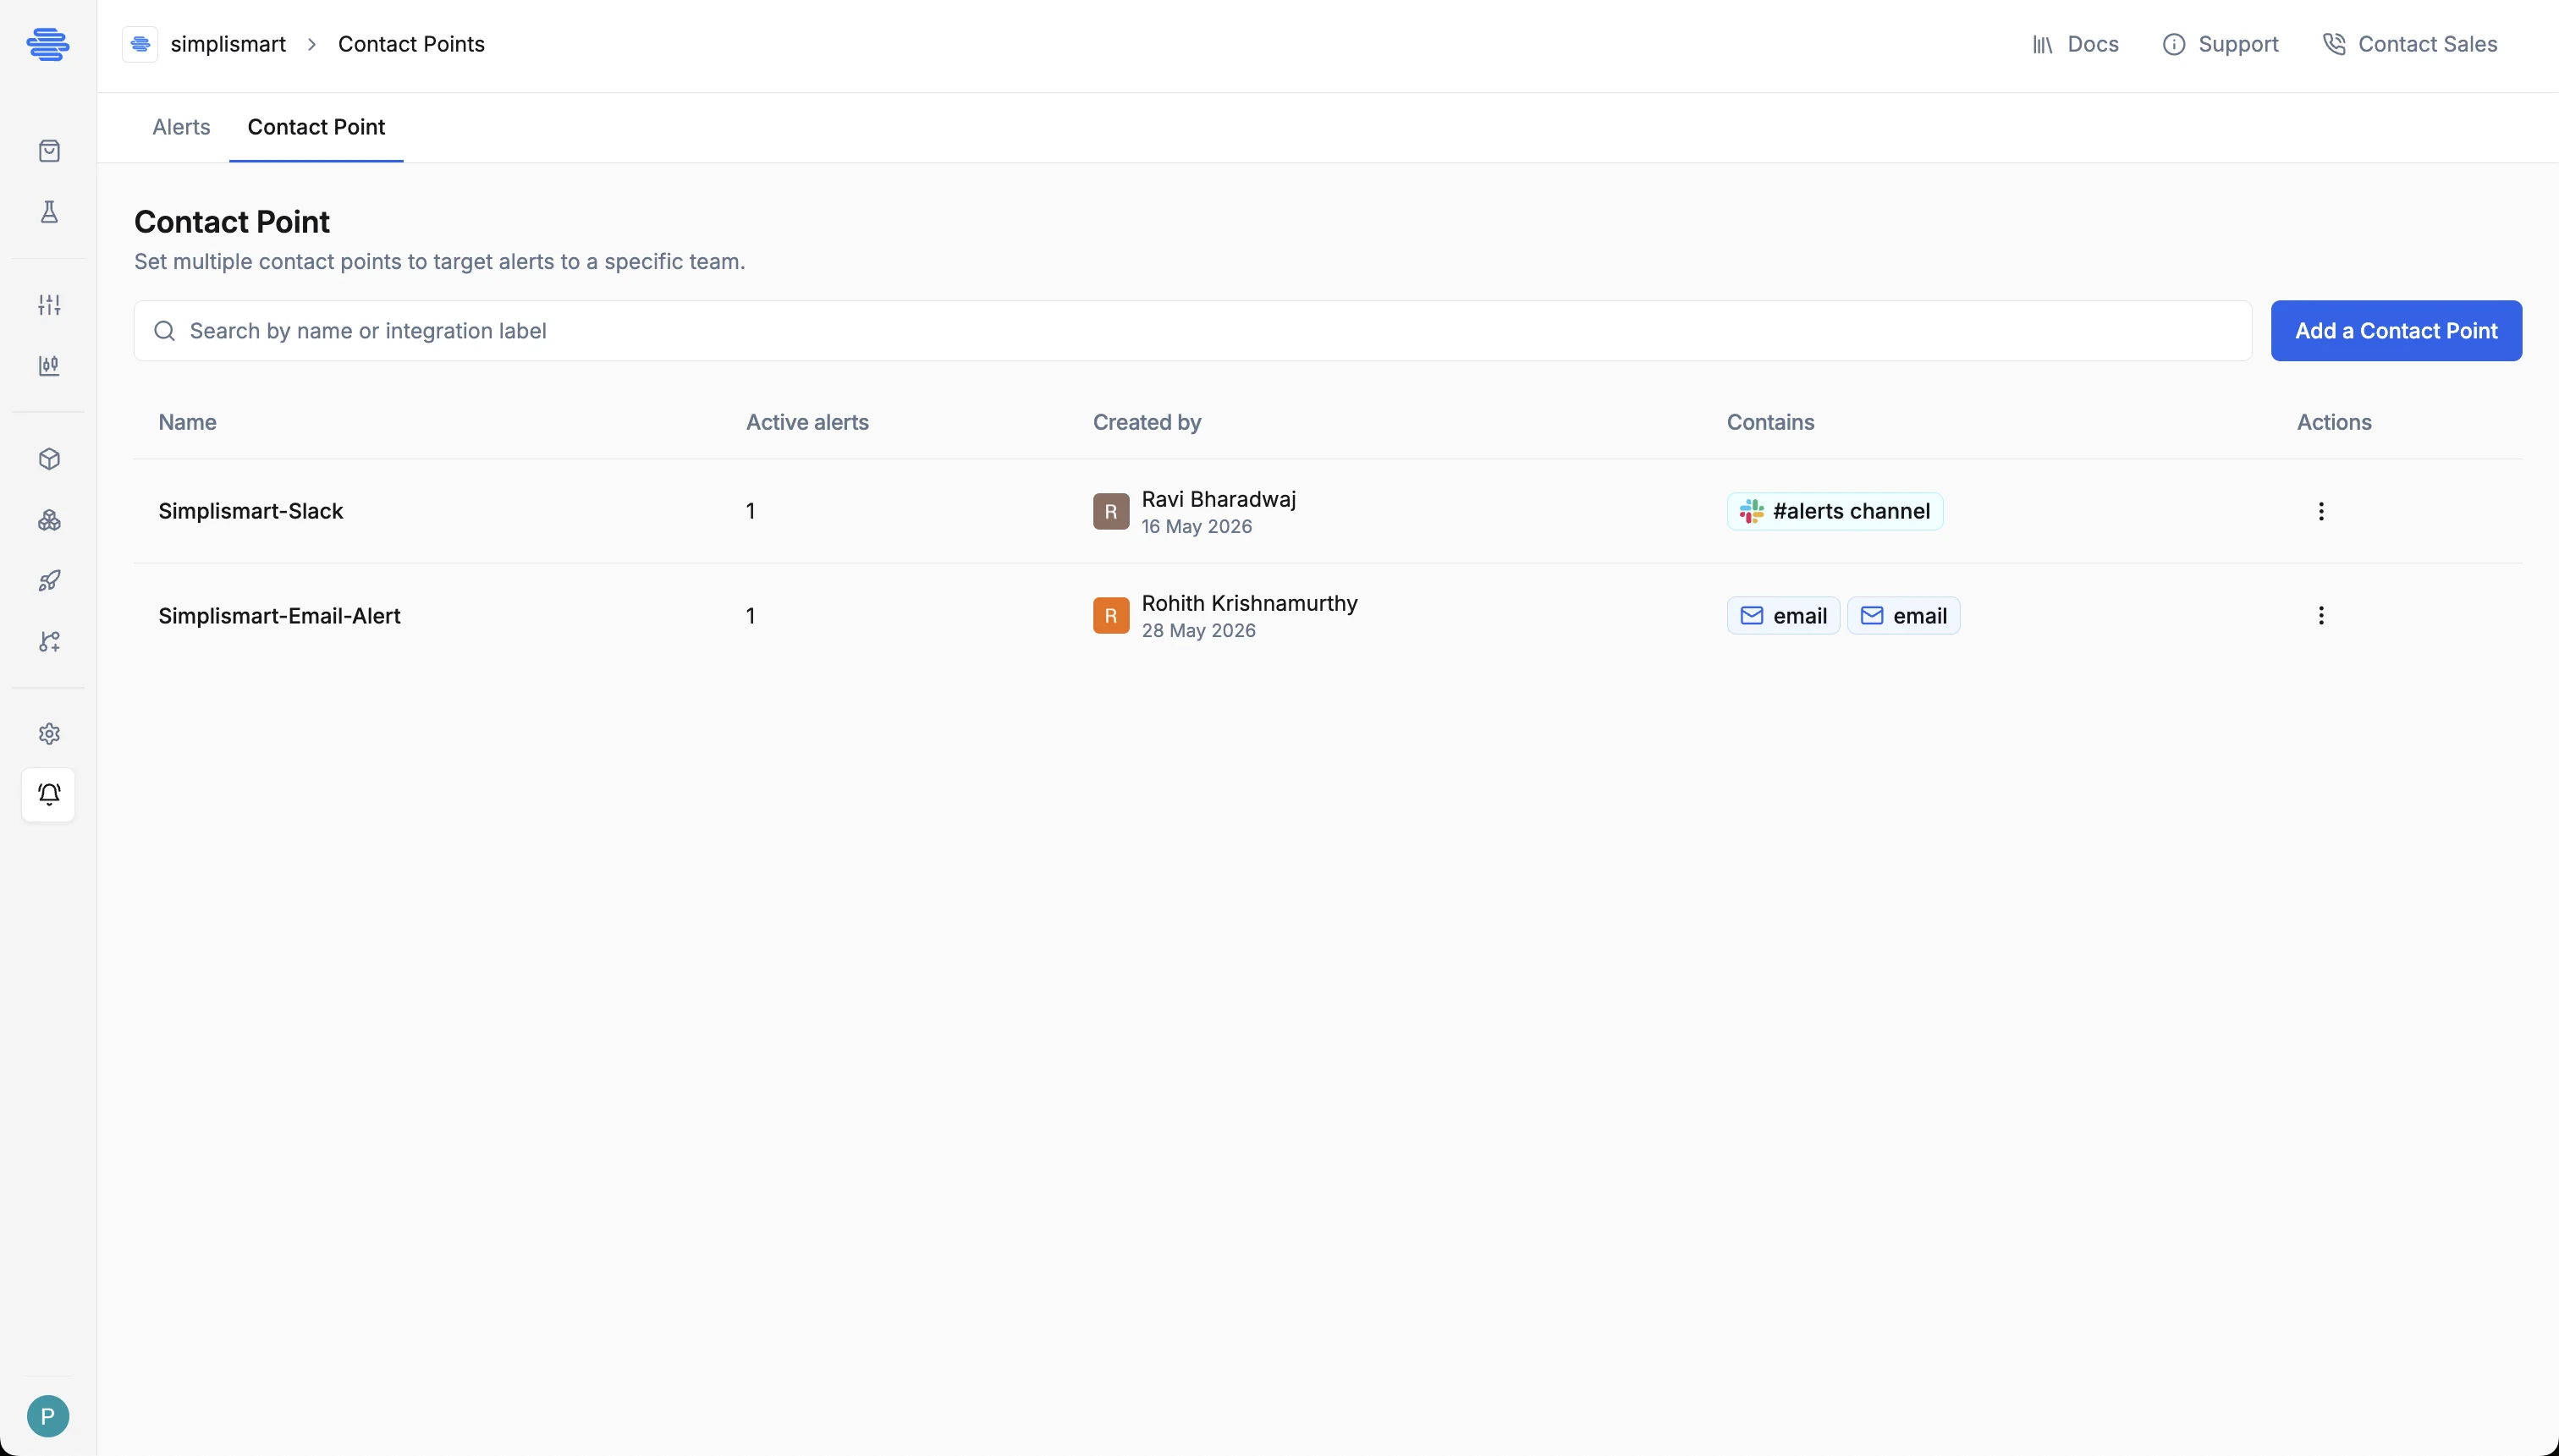
In the sidebar, go to **Alerting** and click the **Contact Point** tab. You'll see all existing contact points for your organisation. Click **Add a Contact Point**.
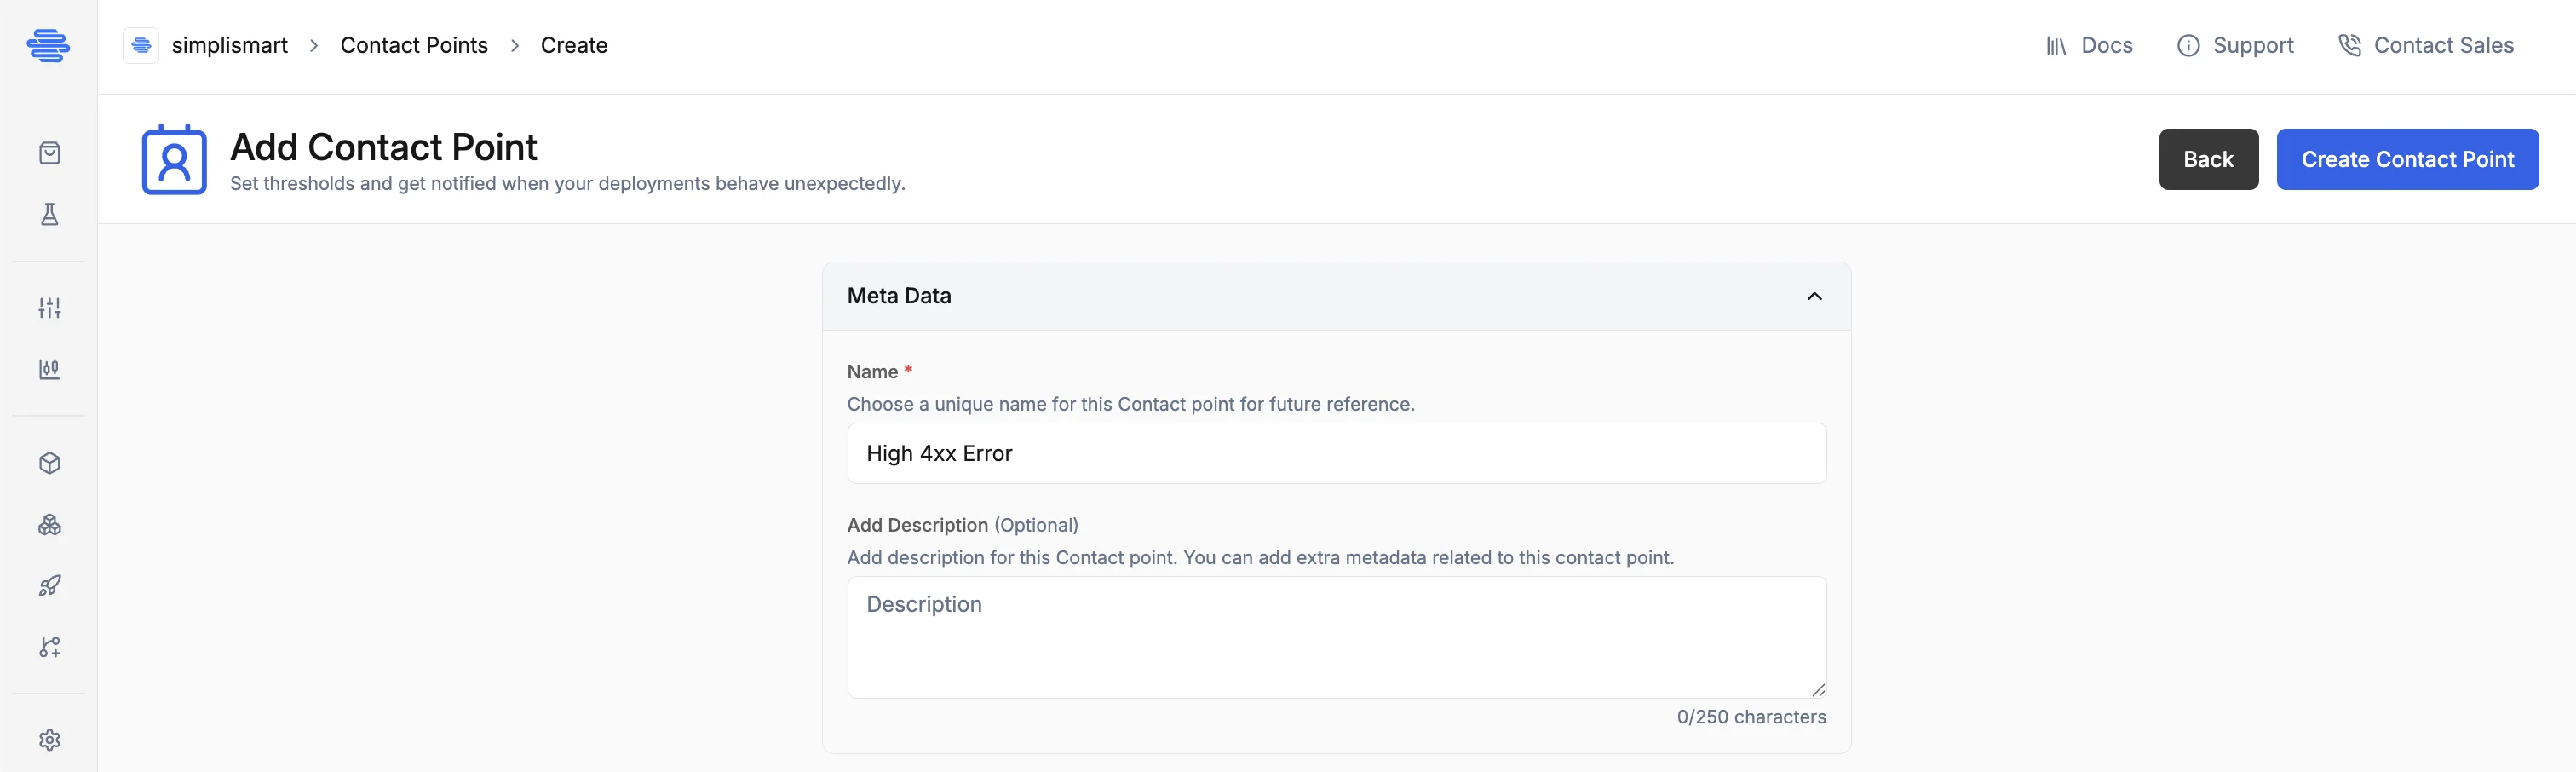
 Provide a unique **Name** for the contact point and an optional **Description** for additional context.
 Click **Add Integration** and select a channel type (Email, Slack, Teams, PagerDuty, or VictorOps). Fill in the required fields and click **Save**. See the **[Supported channel types](/observability/alerting/contact-points#supported-channel-types)** section below for detailed setup instructions per channel.
You can add multiple integrations to a single contact point, all of them will be notified when an alert fires.
Click **Create Contact Point**.
## Supported channel types
Send notifications to one or more email addresses
Post notifications to a Slack channel via incoming webhook
Post notifications to a Teams channel via incoming webhook
Create PagerDuty incidents when alerts fire
Send alert notifications to VictorOps (Splunk On-Call) via REST endpoint
{ /*
Send an HTTP request to any custom endpoint
*/ }
## Edit a contact point
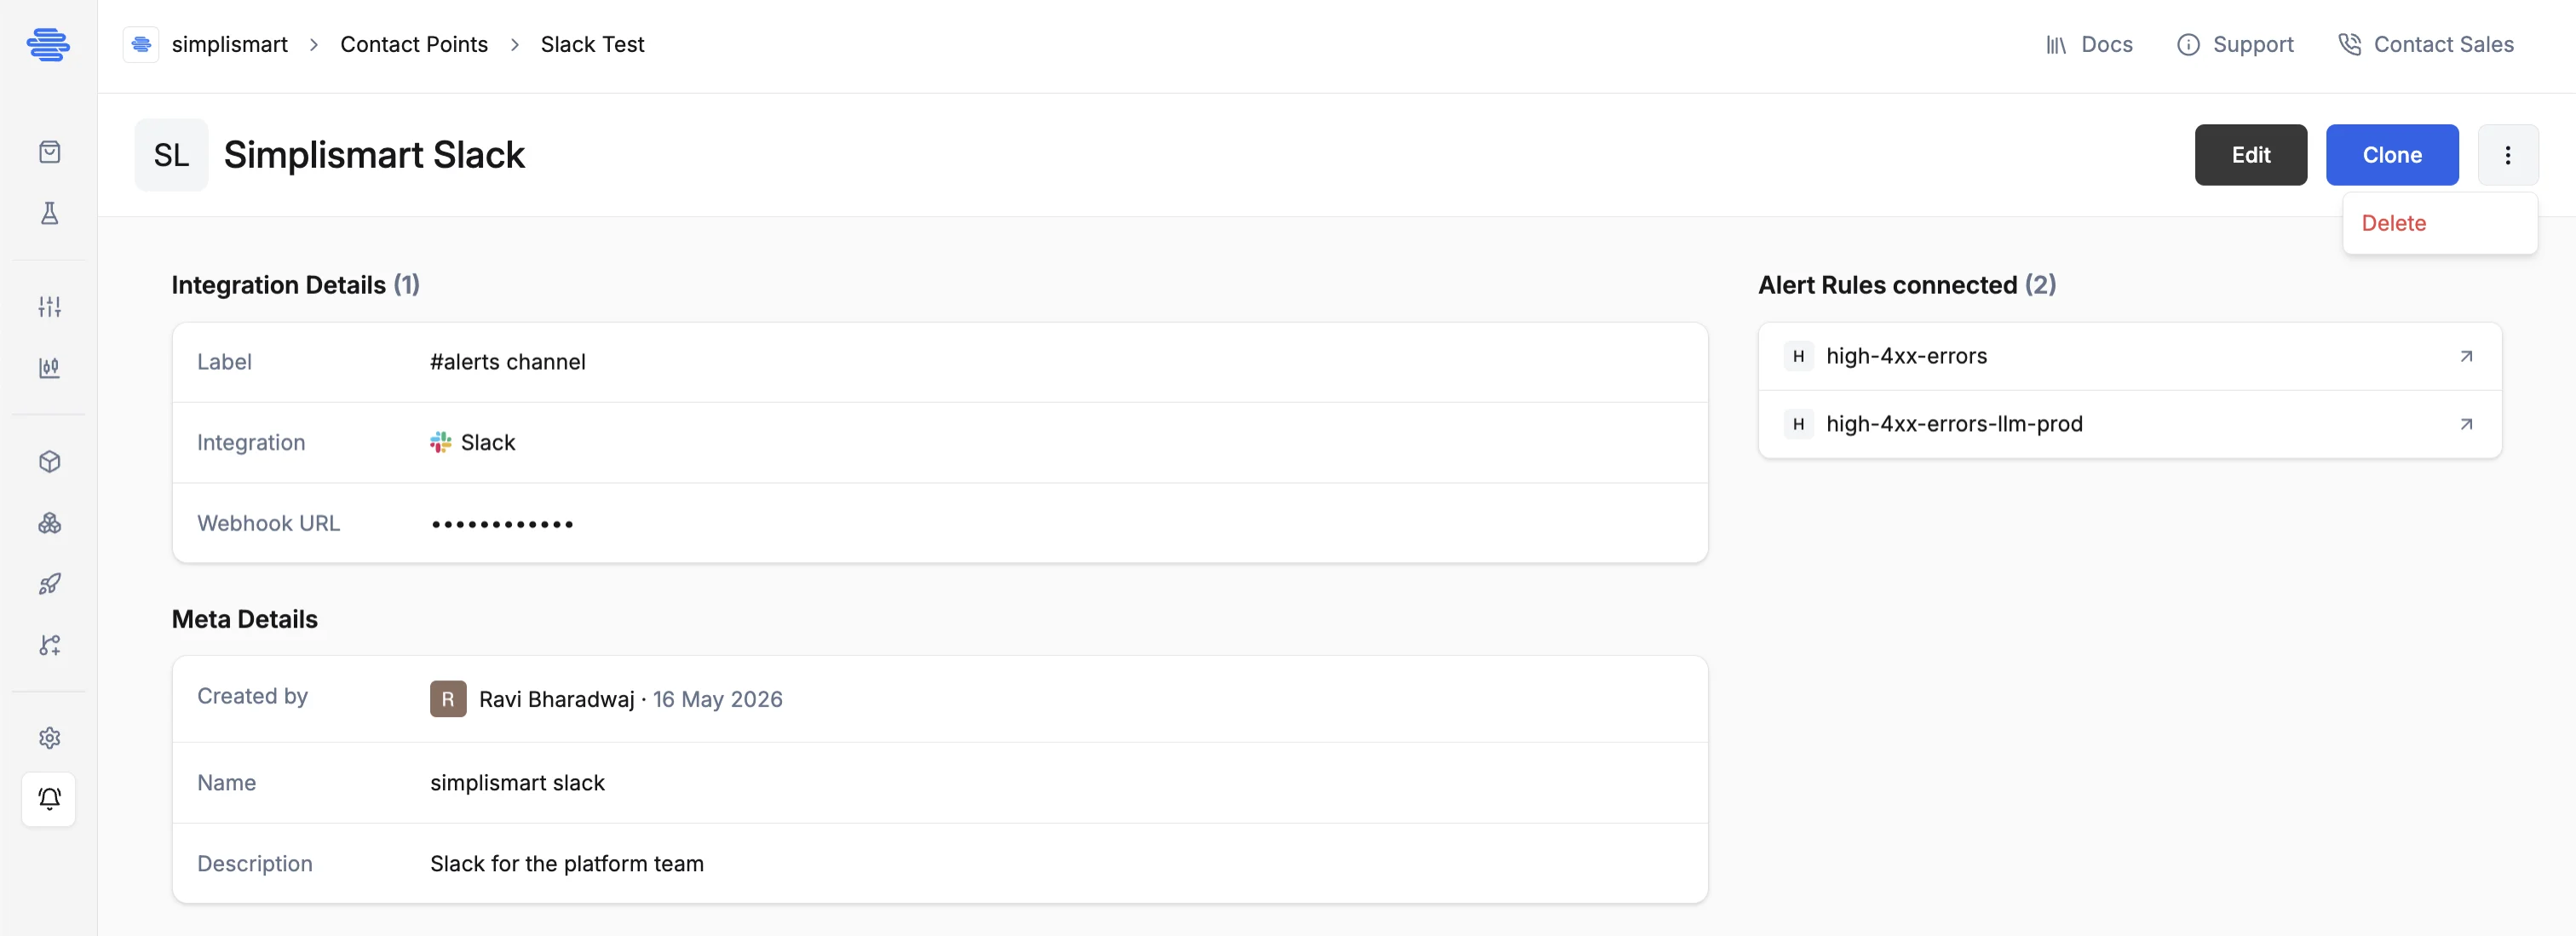
Open the contact point and click **Edit** in the top-right corner. Update the fields you want to change and save.
Sensitive fields such as webhook URLs and API keys are masked after saving. Leave them blank when editing to keep the existing value; fill them in only if you want to replace them.
## Delete a contact point
Open the contact point, click the **⋮** menu in the top-right corner, and select **Delete**.
Before deleting, check the **Alert Rules connected** panel on the right side of the detail page, it lists every alert rule currently using this contact point. A contact point cannot be deleted while it is linked to alert rules. Remove or reassign those rules first, then delete.
Click **Add Integration** and select a channel type (Email, Slack, Teams, PagerDuty, or VictorOps). Fill in the required fields and click **Save**. See the **[Supported channel types](/observability/alerting/contact-points#supported-channel-types)** section below for detailed setup instructions per channel.
You can add multiple integrations to a single contact point, all of them will be notified when an alert fires.
Click **Create Contact Point**.
## Supported channel types
Send notifications to one or more email addresses
Post notifications to a Slack channel via incoming webhook
Post notifications to a Teams channel via incoming webhook
Create PagerDuty incidents when alerts fire
Send alert notifications to VictorOps (Splunk On-Call) via REST endpoint
{ /*
Send an HTTP request to any custom endpoint
*/ }
## Edit a contact point
Open the contact point and click **Edit** in the top-right corner. Update the fields you want to change and save.
Sensitive fields such as webhook URLs and API keys are masked after saving. Leave them blank when editing to keep the existing value; fill them in only if you want to replace them.
## Delete a contact point
Open the contact point, click the **⋮** menu in the top-right corner, and select **Delete**.
Before deleting, check the **Alert Rules connected** panel on the right side of the detail page, it lists every alert rule currently using this contact point. A contact point cannot be deleted while it is linked to alert rules. Remove or reassign those rules first, then delete.