> ## Documentation Index
> Fetch the complete documentation index at: https://docs.simplismart.ai/llms.txt
> Use this file to discover all available pages before exploring further.
# E2E Cluster Import Prerequisites
## Importing a Kubernetes Cluster from E2E Cloud
This page outlines the steps and requirements to create and import a Kubernetes cluster from the E2E cloud onto the Simplismart platform. Follow these steps to ensure your cluster is set up correctly and all necessary tooling is deployed.
## Basic Cluster Set-up & Requirements
Before importing your cluster, please ensure that it meets the following prerequisites:
## Steps to Create a Kubernetes Cluster
### 1. Navigate to the Compute Dashboard
* Go to the E2E Cloud dashboard.
* Select the Kubernetes section.
***
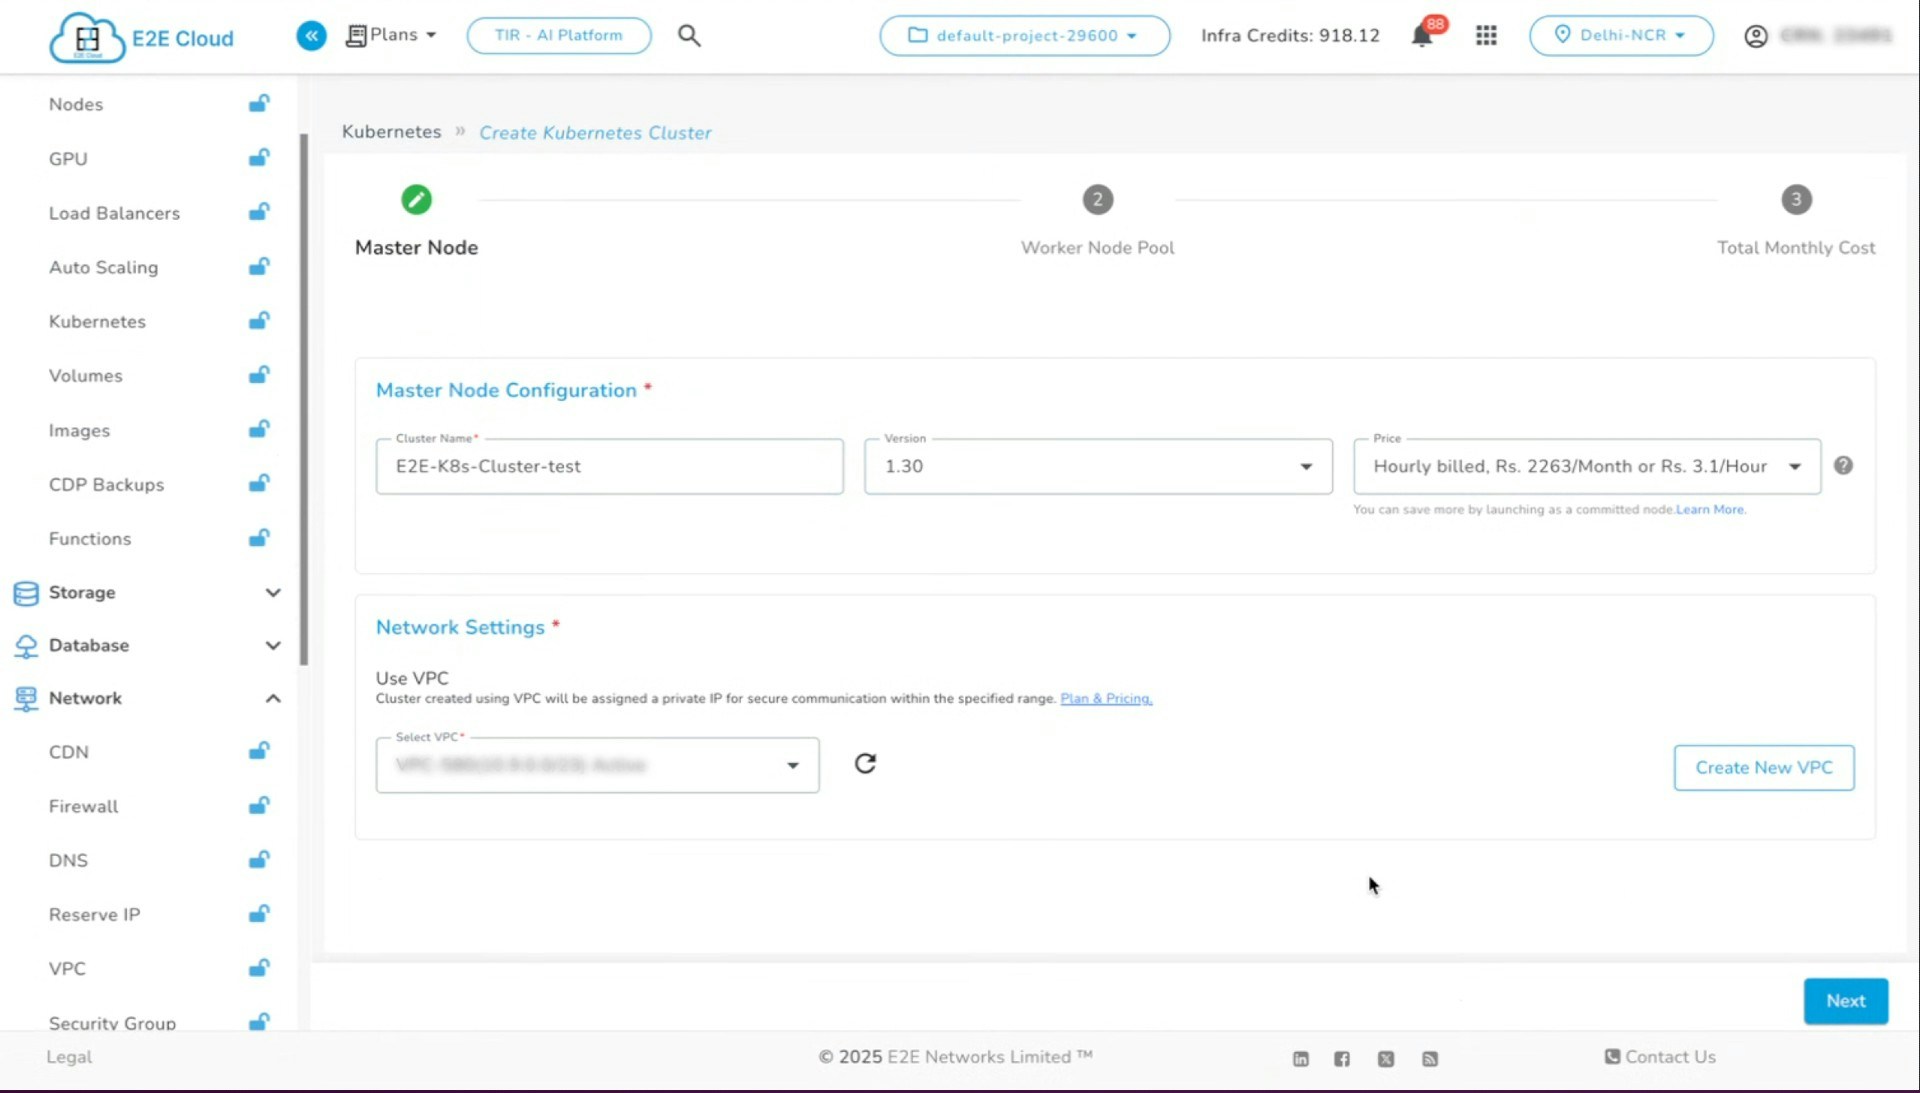
### 2. Create a New Kubernetes Cluster
* Click on **Get Started**.
* Enter a cluster name (e.g., `test-cluster`).
* Select an existing **VPC** or create a new one if necessary.
 ***
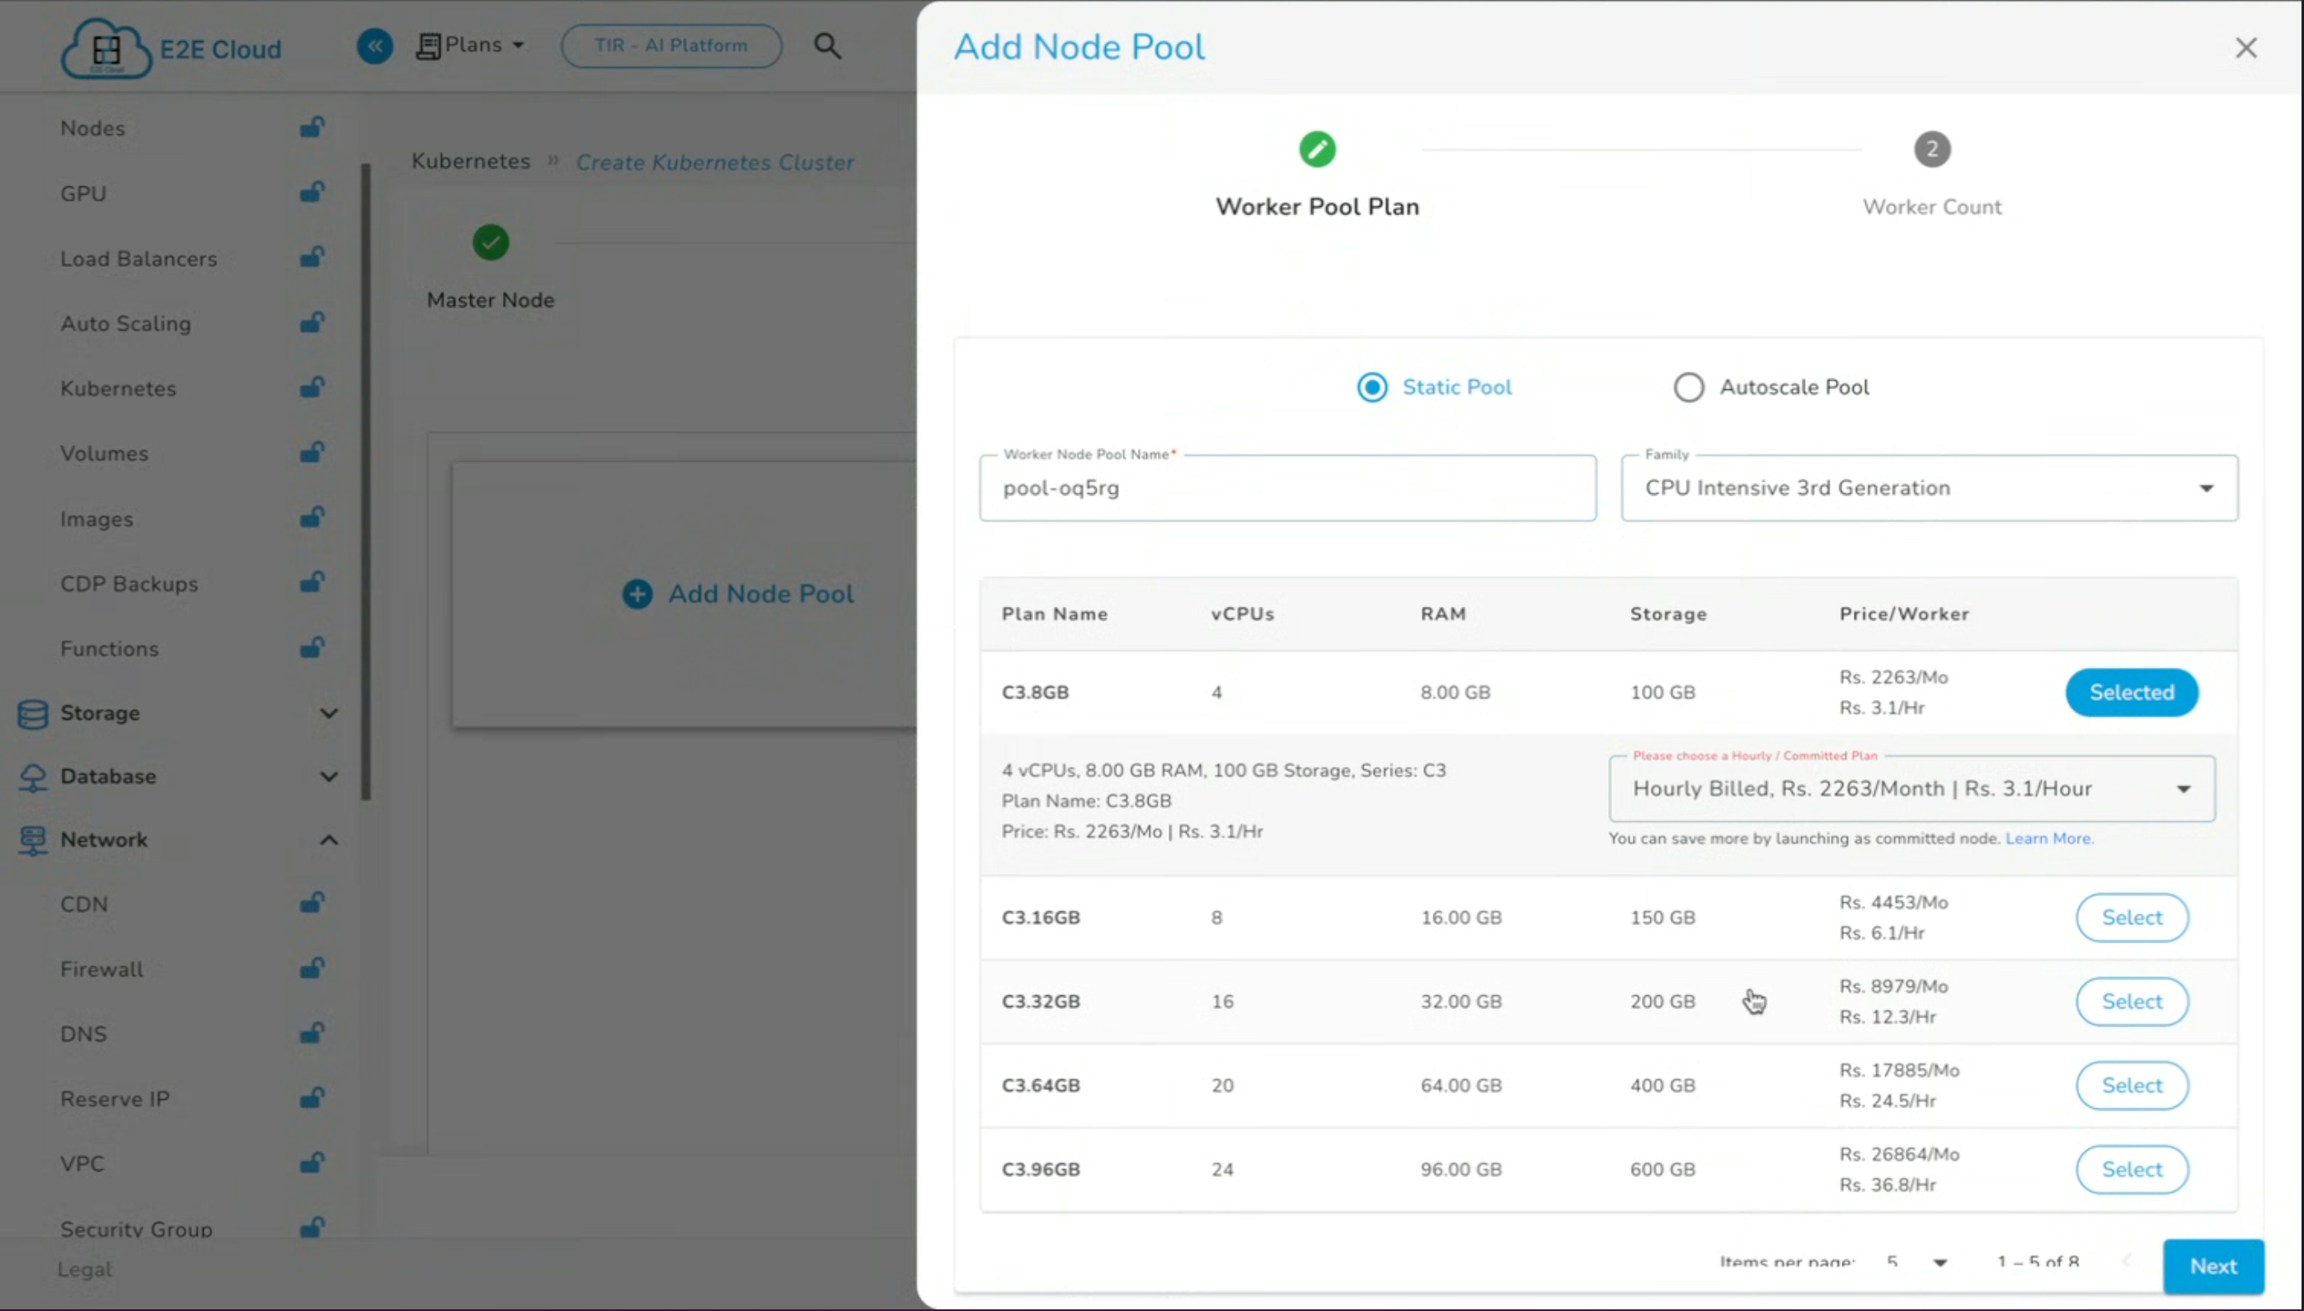
### 3. Add a Node Pool
* Click on **Add Node Pool**.
* Choose a node configuration (e.g., 3.32 GB, 1516, 32 RAM).
* **Node Labels:** Label every node in the cluster to indicate its node group. Use the following format for each node’s label:
```yaml theme={null}
simplismart.ai/node-group-name:
```
* Replace `` with the appropriate group name for the node.
***
### 3. Add a Node Pool
* Click on **Add Node Pool**.
* Choose a node configuration (e.g., 3.32 GB, 1516, 32 RAM).
* **Node Labels:** Label every node in the cluster to indicate its node group. Use the following format for each node’s label:
```yaml theme={null}
simplismart.ai/node-group-name:
```
* Replace `` with the appropriate group name for the node.
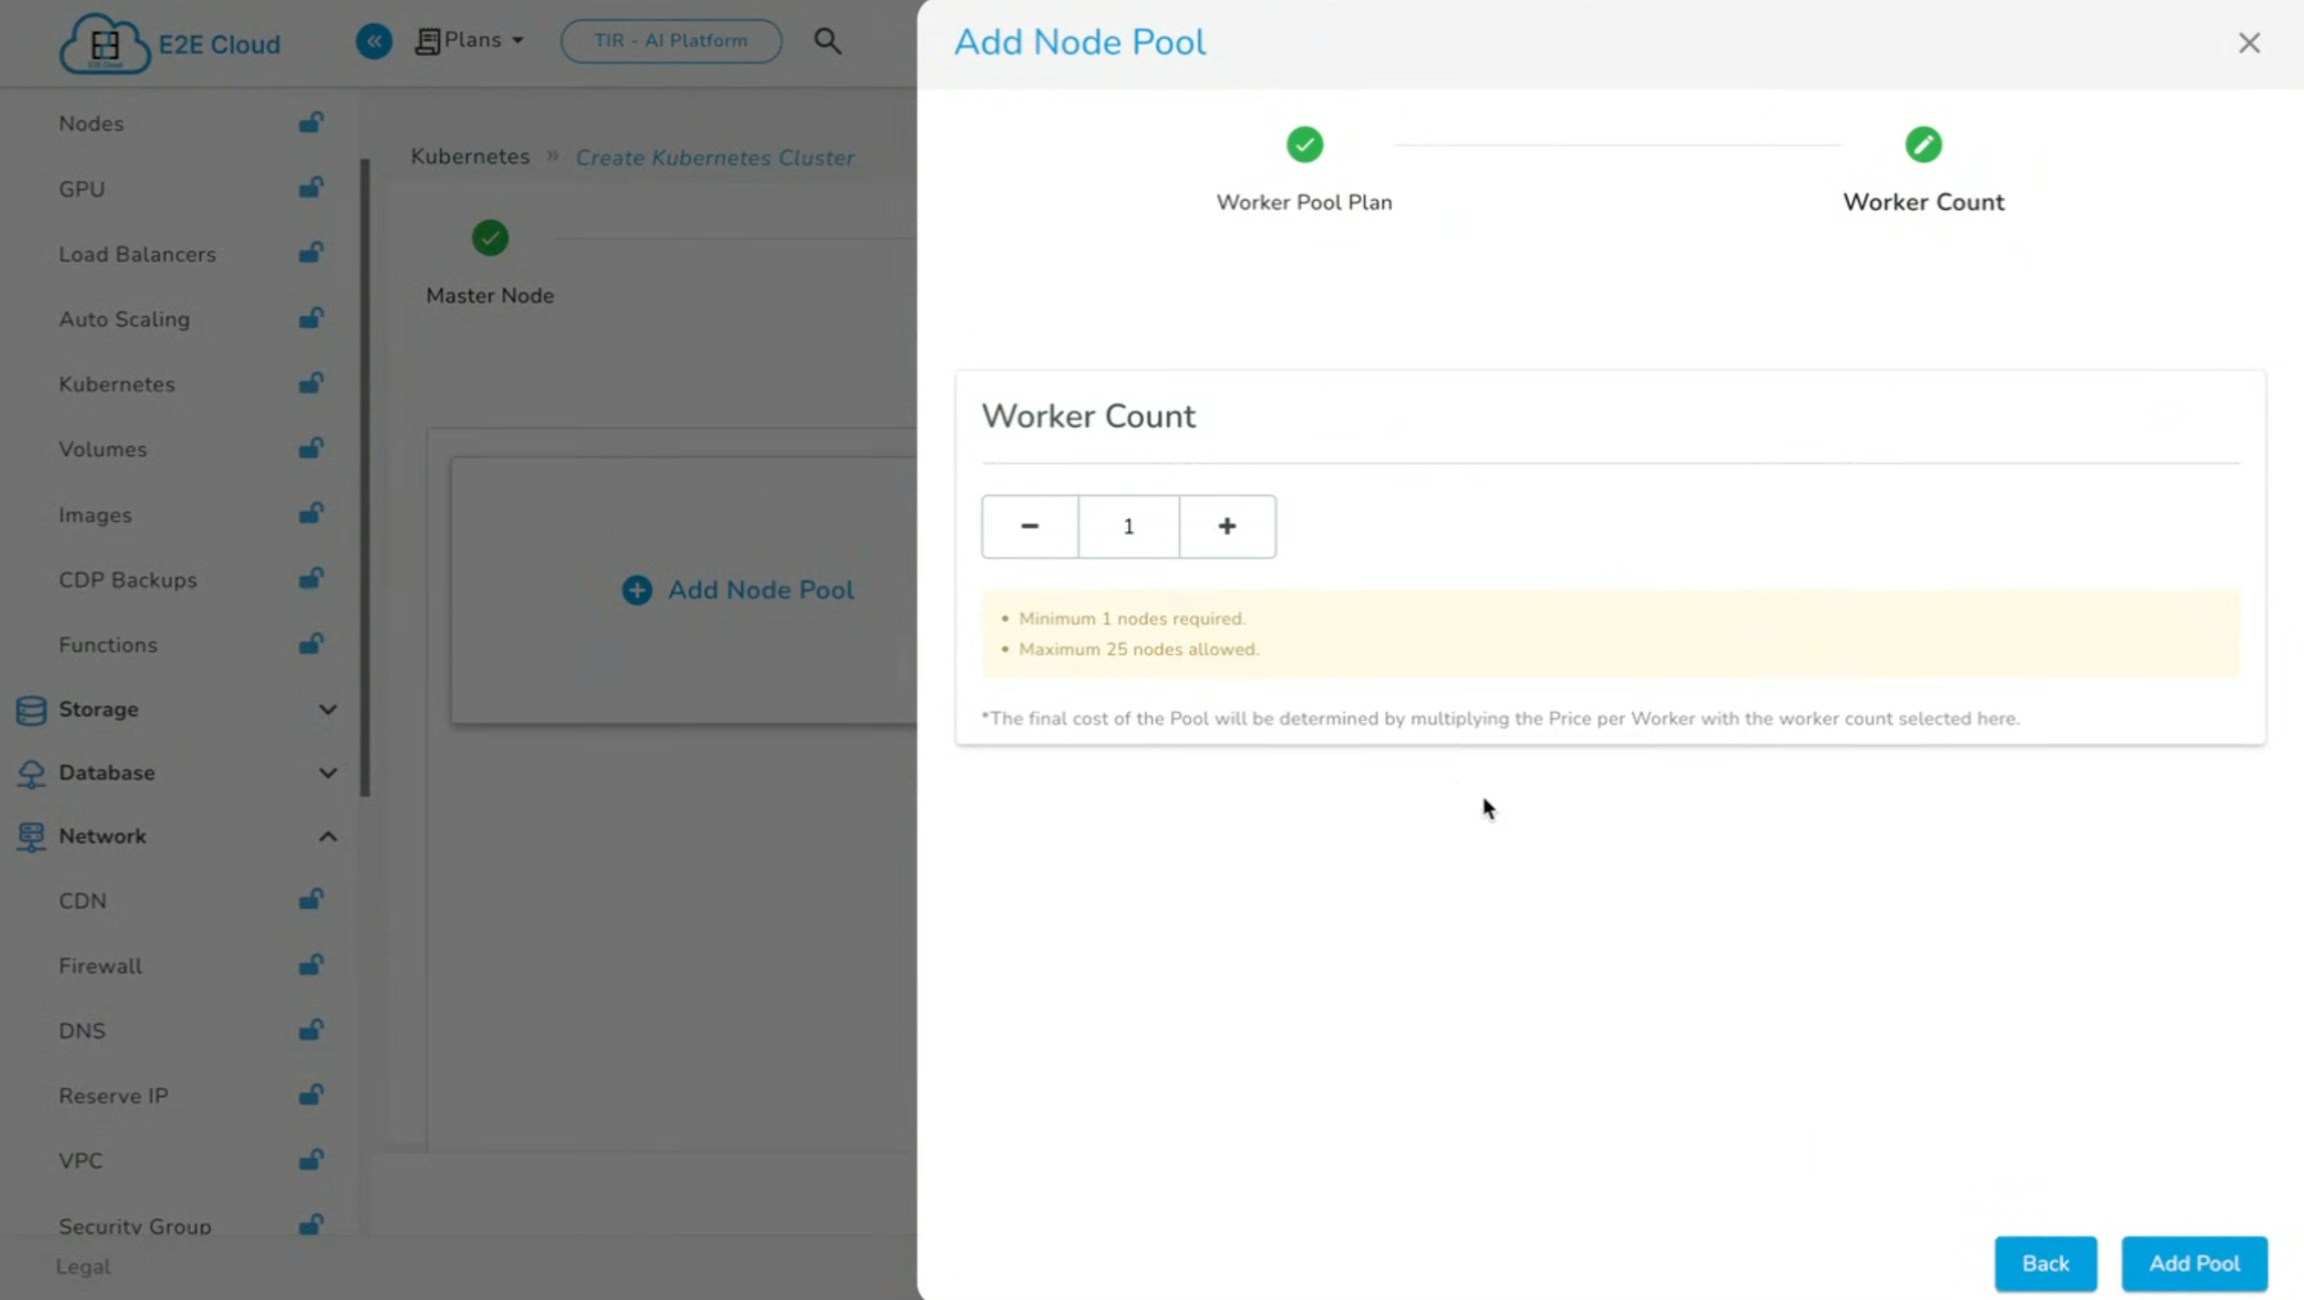
 * Specify the worker count (number of nodes required).
* (Optional) Add a GPU pool if required (e.g., GDC A100).
* Specify the worker count (number of nodes required).
* (Optional) Add a GPU pool if required (e.g., GDC A100).
 For clusters that include **GPU nodes**, verify that the *NVIDIA daemon set* is deployed. This ensures proper management and scheduling of GPU resources.
***
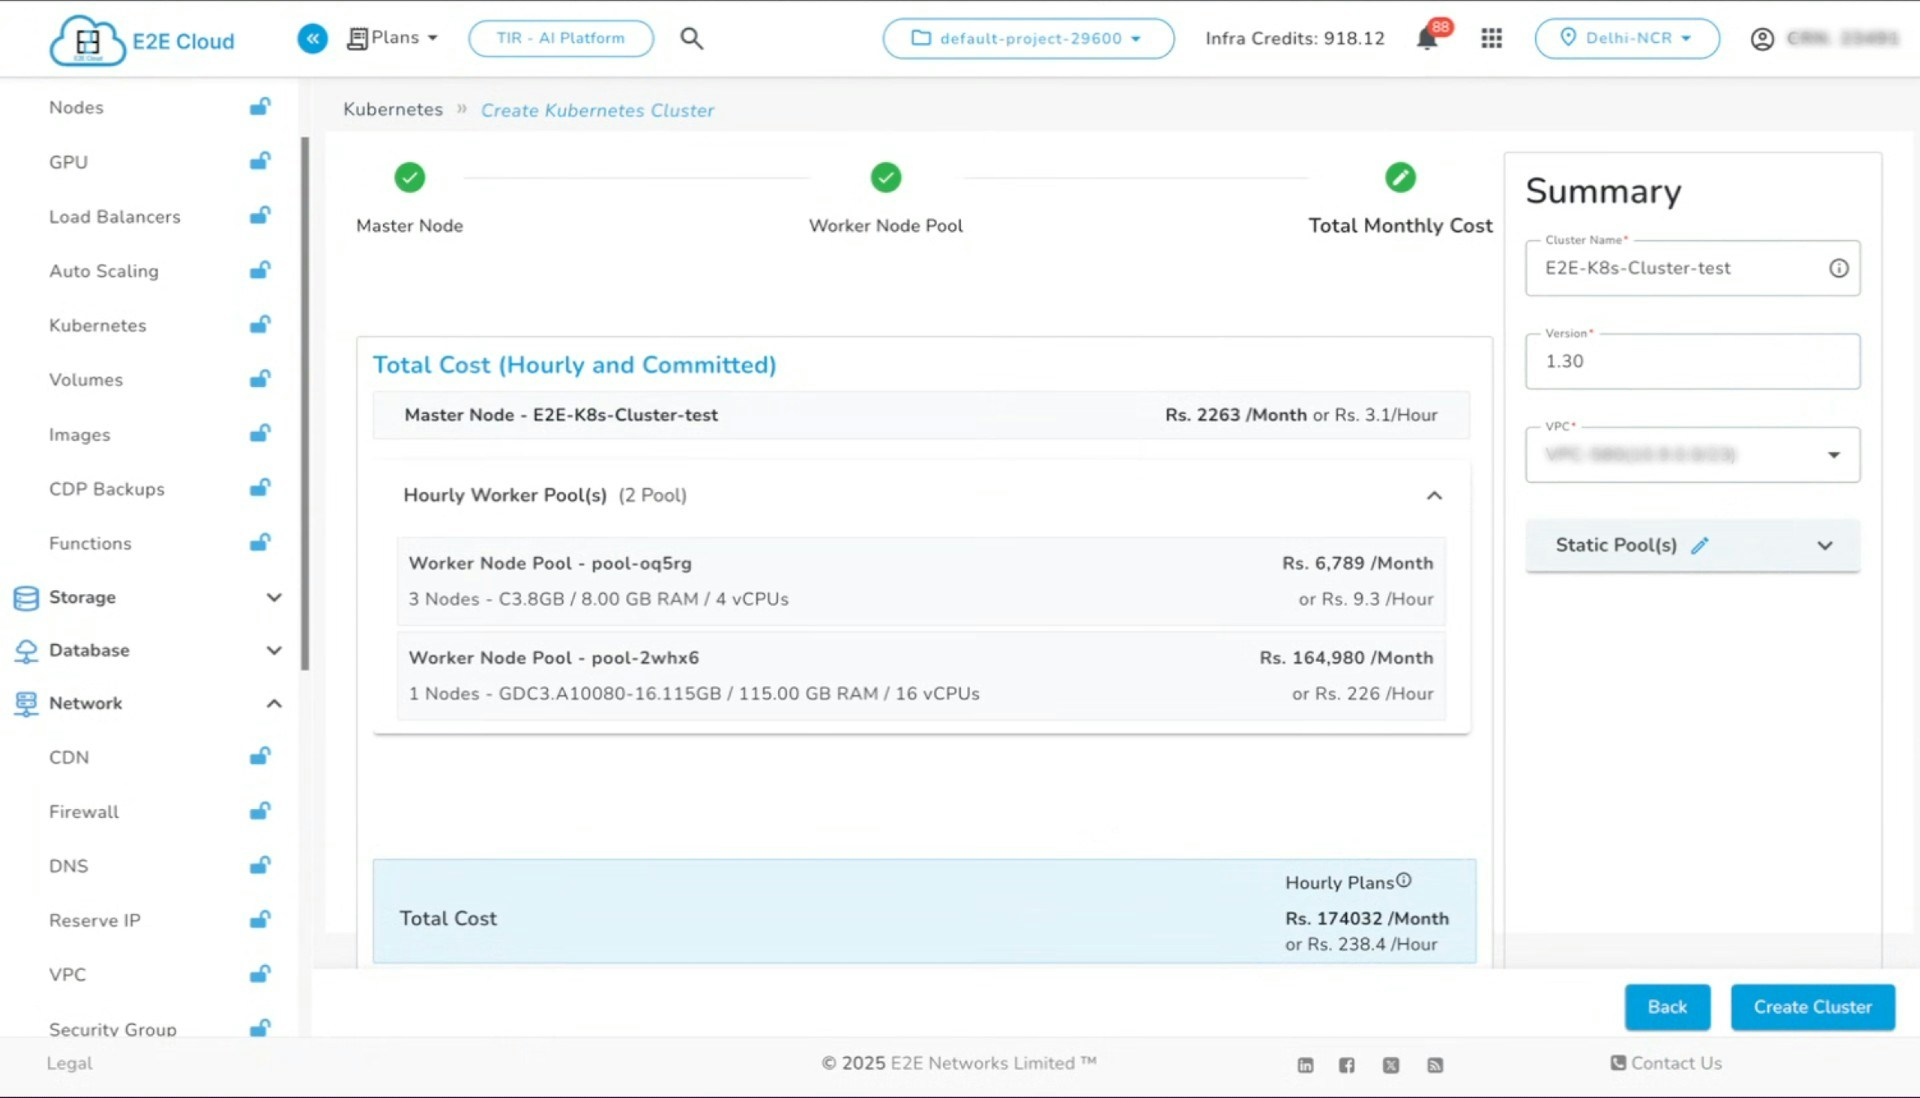
### **4. Create the Cluster**
* Click on **Create Cluster**.
* The cluster creation process generally takes approximately **15-20 minutes**.
For clusters that include **GPU nodes**, verify that the *NVIDIA daemon set* is deployed. This ensures proper management and scheduling of GPU resources.
***
### **4. Create the Cluster**
* Click on **Create Cluster**.
* The cluster creation process generally takes approximately **15-20 minutes**.
 The cluster should include **at least one node pool** with a minimum of **one CPU**.
### Configuring Storage (Optional)
If volume mount is needed, please follow the below steps:
* While the cluster is being created, navigate to the **Storage** section.
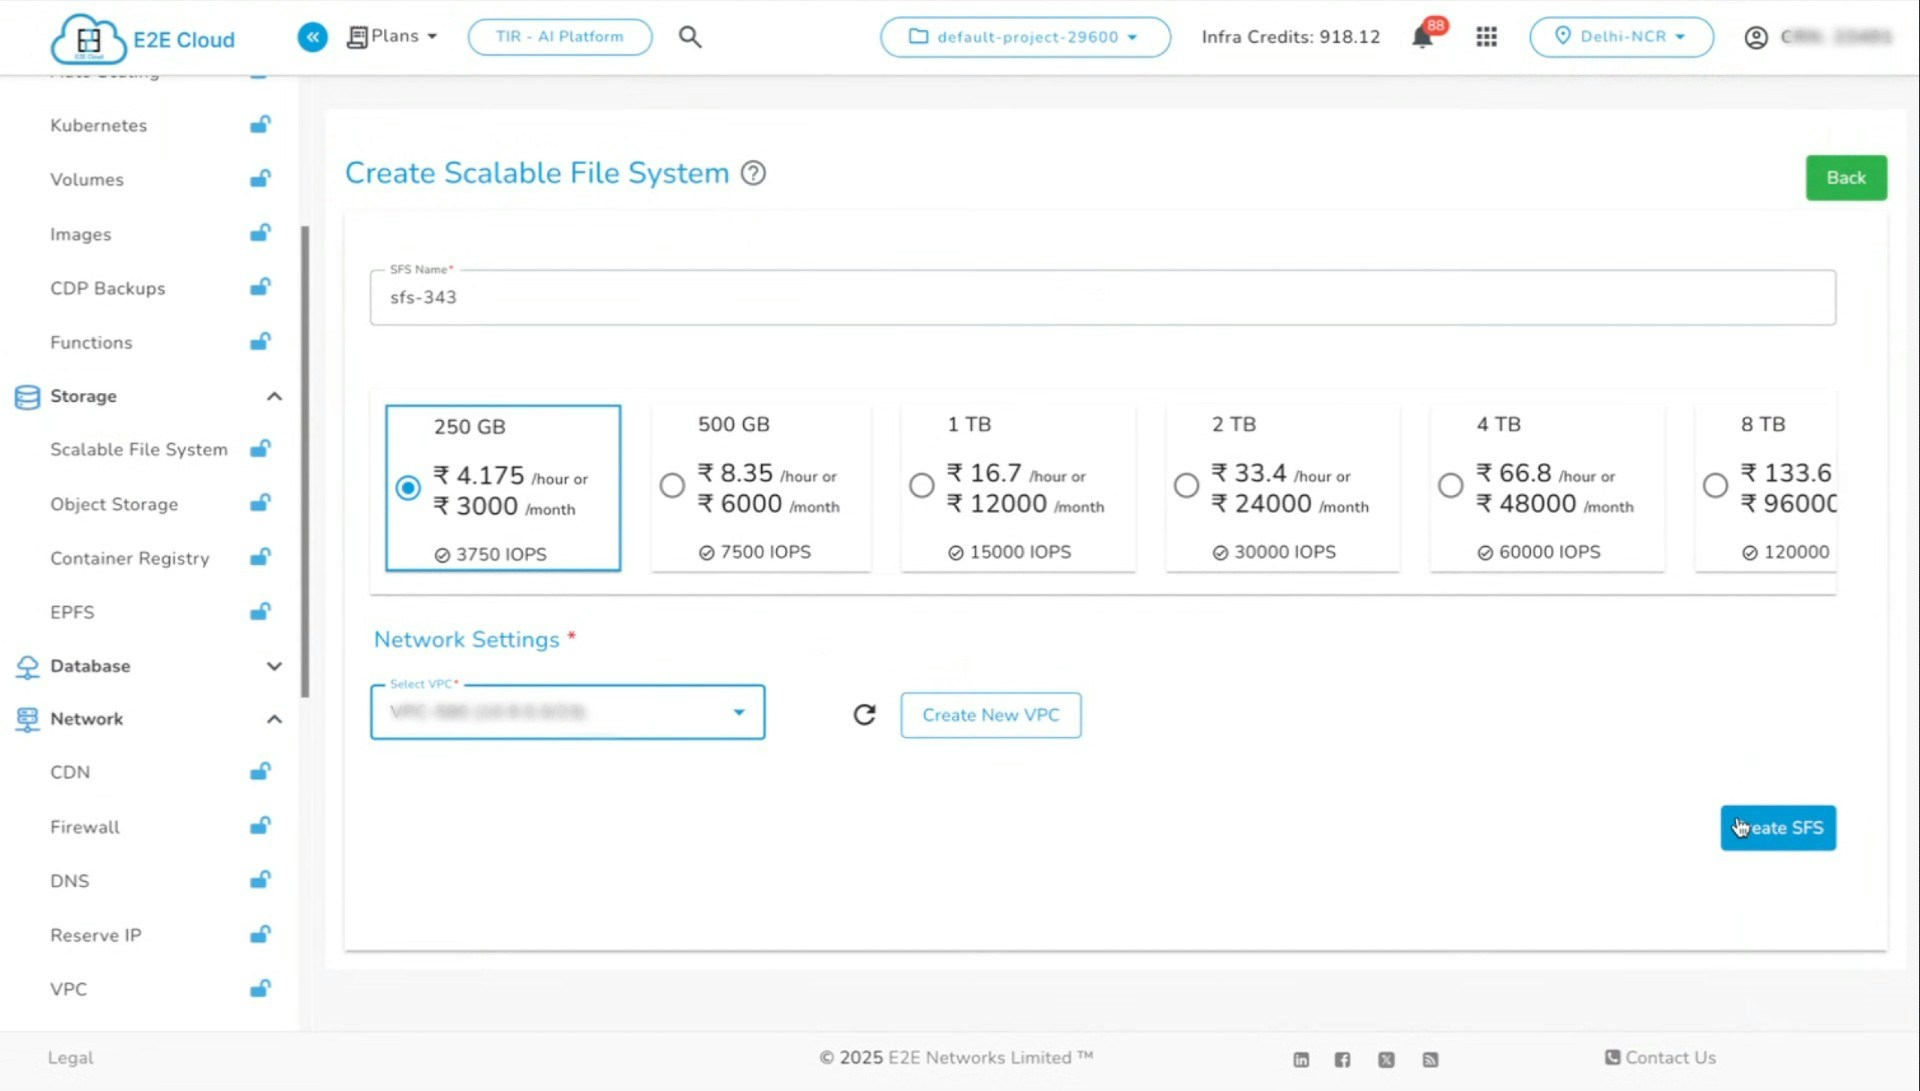
* Go to **Scalable File System (SFS)**.
* Click **Create**.
* Select the same **VPC** as the cluster.
* Specify the required **storage size**.
* Click **Create SFS**.
The cluster should include **at least one node pool** with a minimum of **one CPU**.
### Configuring Storage (Optional)
If volume mount is needed, please follow the below steps:
* While the cluster is being created, navigate to the **Storage** section.
* Go to **Scalable File System (SFS)**.
* Click **Create**.
* Select the same **VPC** as the cluster.
* Specify the required **storage size**.
* Click **Create SFS**.
 * Grant `[all]` access permissions.
* Retrieve the **IP address** of the volume and keep it handy.
***
### Post-Creation Steps
Once the cluster is created, add **Load Balancer IP (LBIP)** and **Persistent Volume Claim (PVC)**.
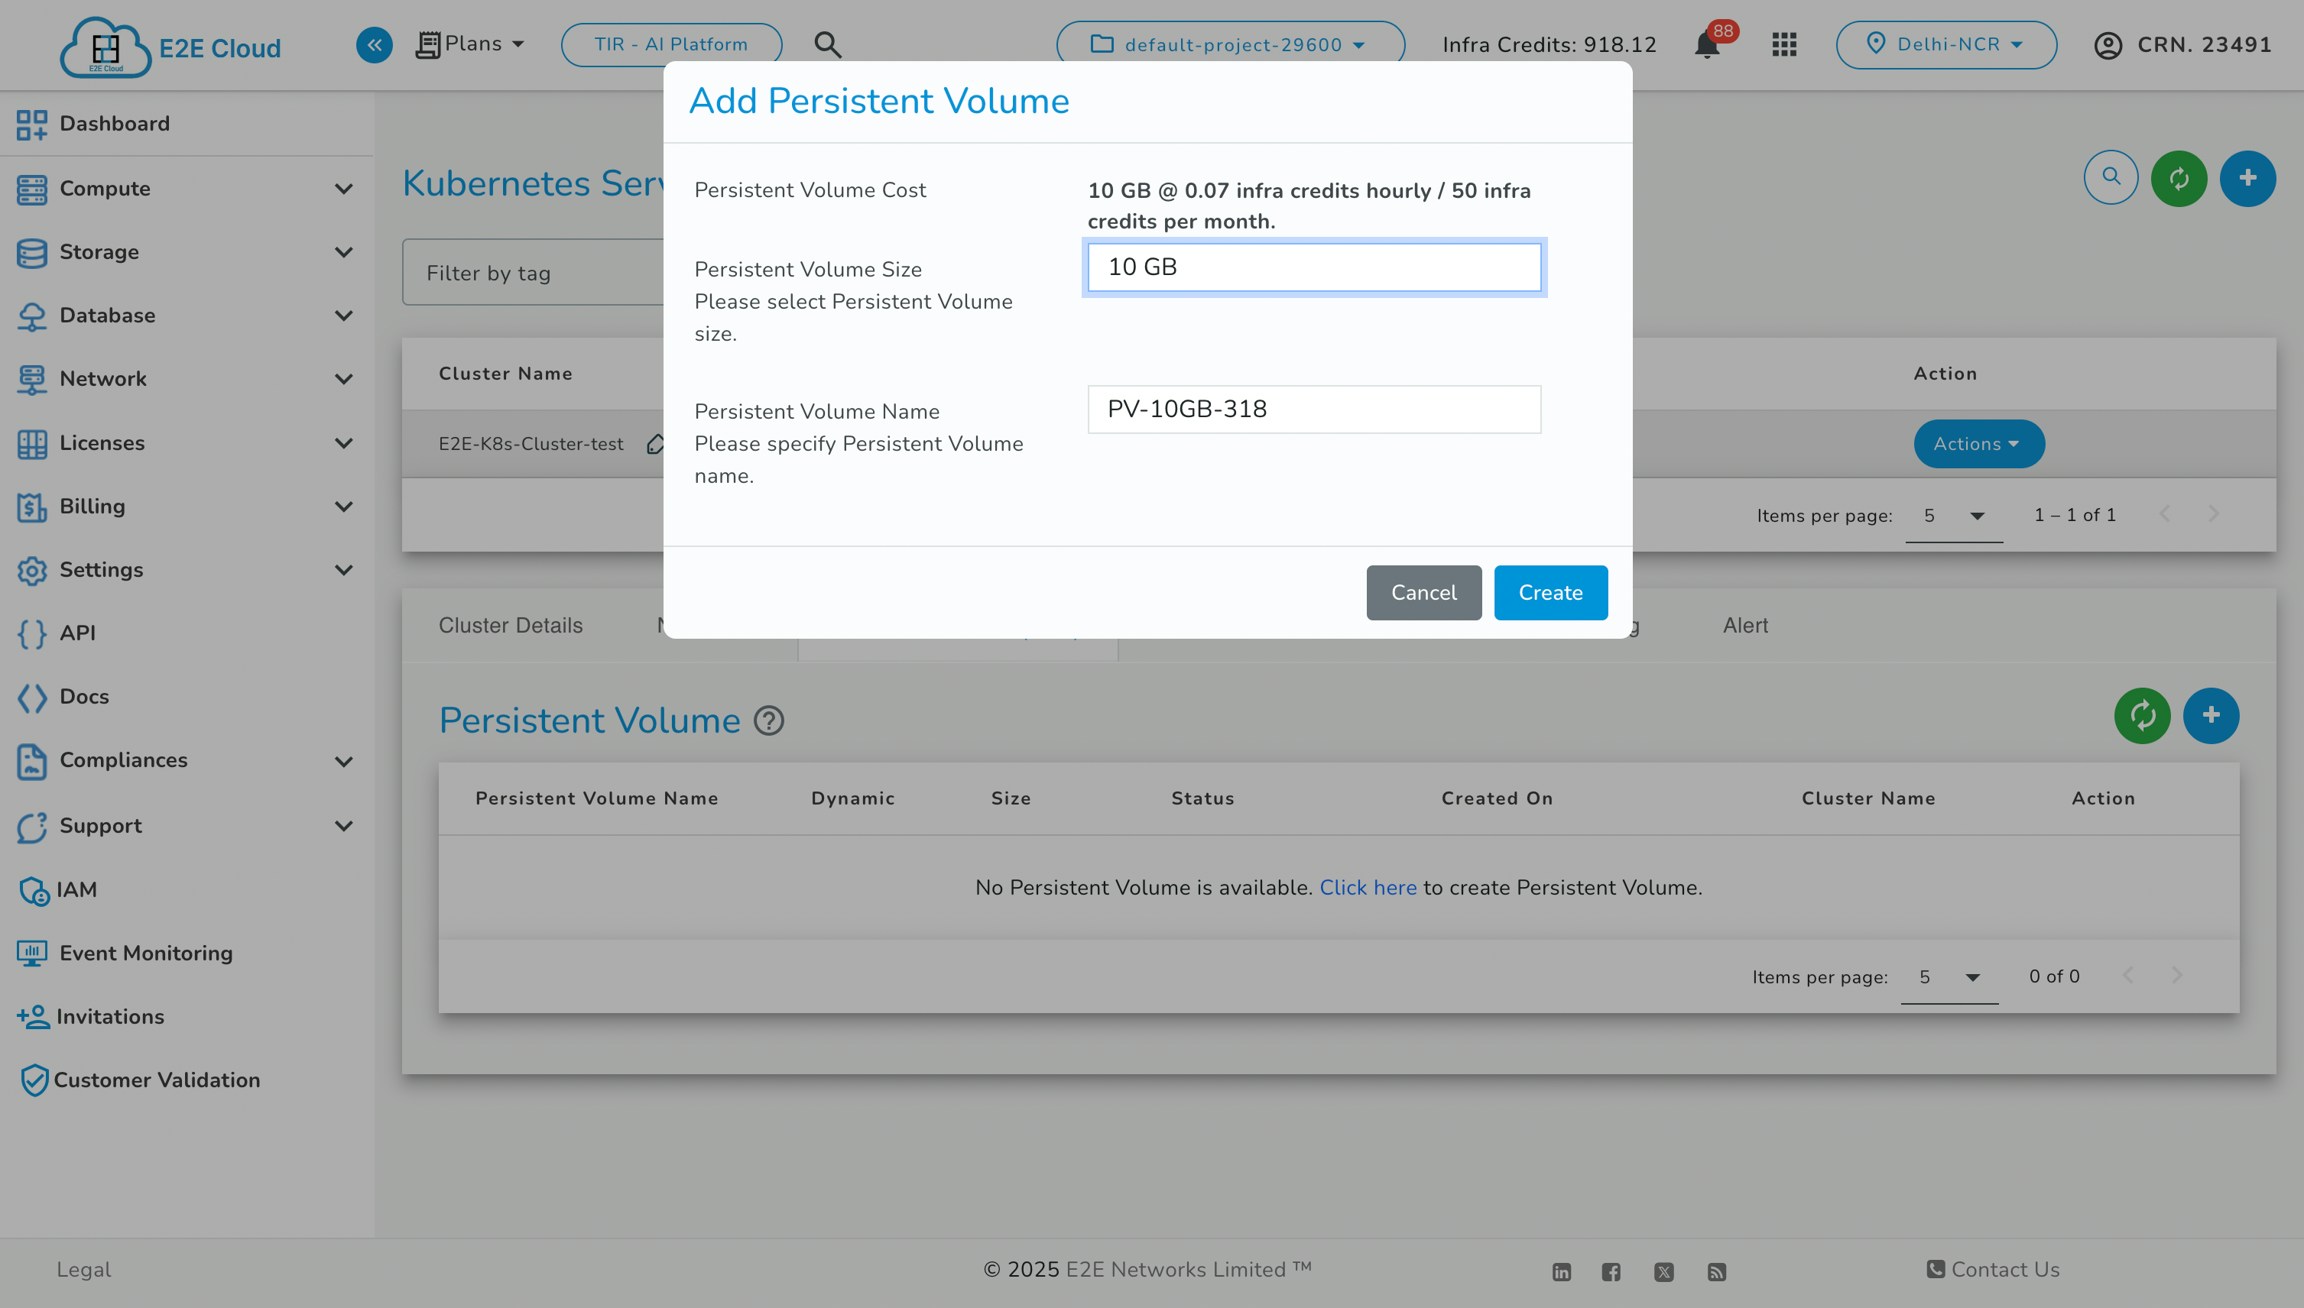
* Create a Persistent Volume Claim (PVC) in your cluster:
* Grant `[all]` access permissions.
* Retrieve the **IP address** of the volume and keep it handy.
***
### Post-Creation Steps
Once the cluster is created, add **Load Balancer IP (LBIP)** and **Persistent Volume Claim (PVC)**.
* Create a Persistent Volume Claim (PVC) in your cluster:
 * Update the storage class to Default by adding this annotation to the storage class manifest:
```yaml theme={null}
storageclass.kubernetes.io/is-default-class":"true"
```
* Or alternatively, run this command to update the storage class:
```bash theme={null}
kubectl patch storageclass -p '{"metadata": {"annotations":{"storageclass.kubernetes.io/is-default-class":"true"}}}'
```
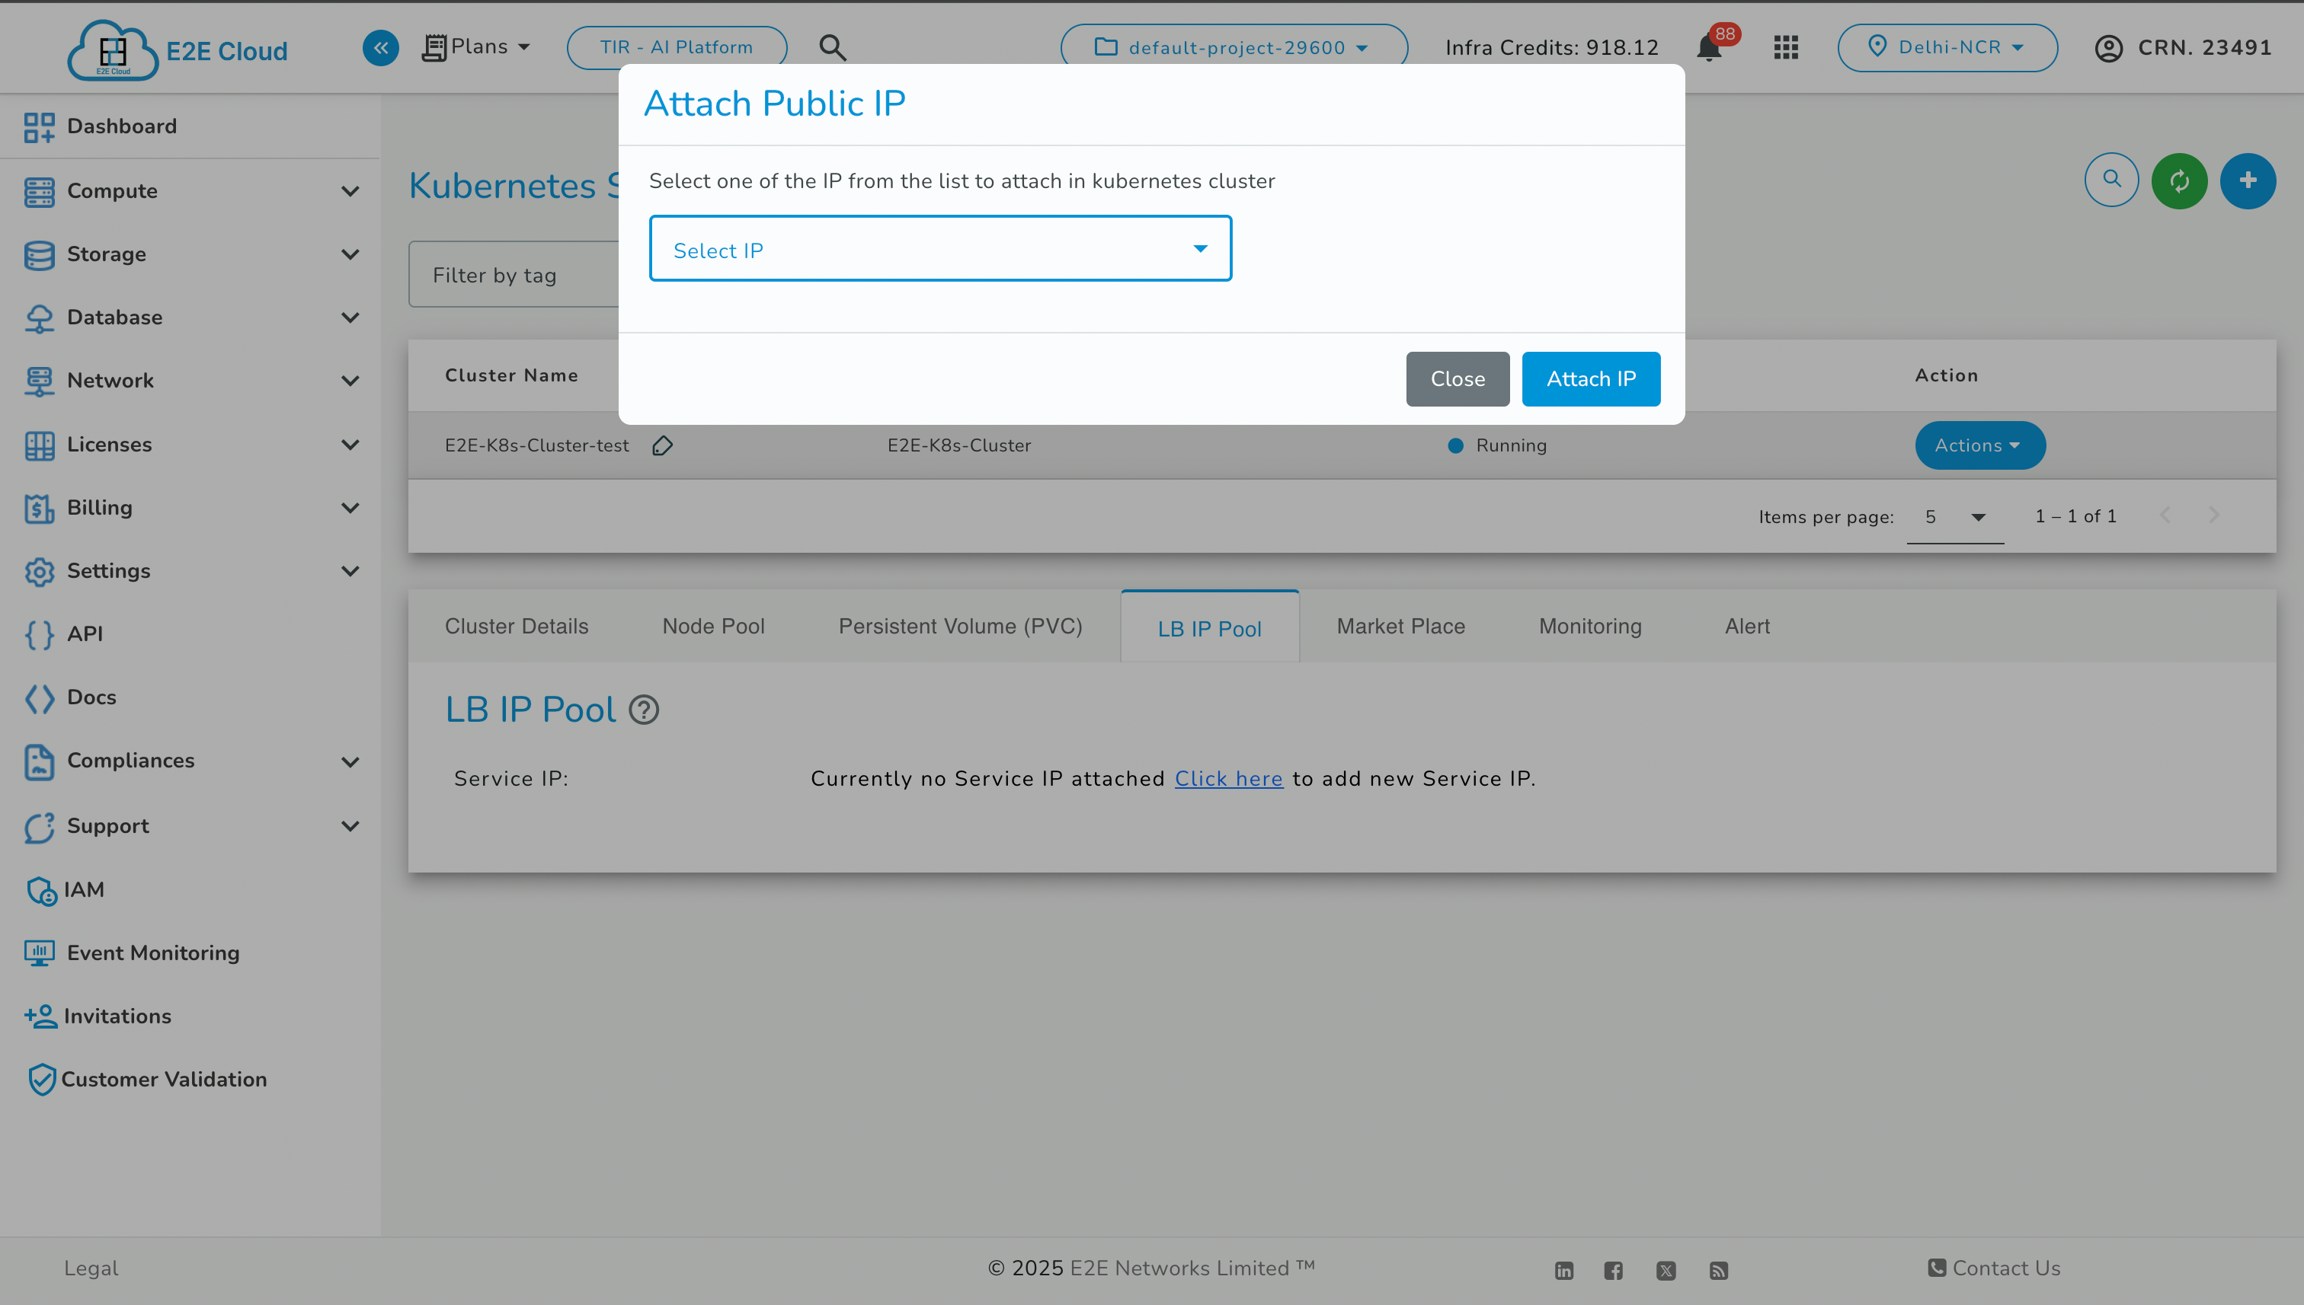
* Allocate a Load Balancer (LB) IP pool to manage inbound traffic:
* Update the storage class to Default by adding this annotation to the storage class manifest:
```yaml theme={null}
storageclass.kubernetes.io/is-default-class":"true"
```
* Or alternatively, run this command to update the storage class:
```bash theme={null}
kubectl patch storageclass -p '{"metadata": {"annotations":{"storageclass.kubernetes.io/is-default-class":"true"}}}'
```
* Allocate a Load Balancer (LB) IP pool to manage inbound traffic:
 Once you have completed the above steps and your cluster has been successfully created, please follow these steps to [import your cluster](/model-suite/clusters/import-cluster/import-kubernetes-cluster).