> ## Documentation Index
> Fetch the complete documentation index at: https://docs.simplismart.ai/llms.txt
> Use this file to discover all available pages before exploring further.
# Create a Cluster
> Learn how to create a cluster on your own cloud using Simplismart, configure compute resources, and prepare for model deployments.
Through the [**Clusters**](https://app.simplismart.ai/clusters) section, you can efficiently manage your compute resources, allowing for optimal allocation and monitoring of your computational power.
## **Enter Basic Details**
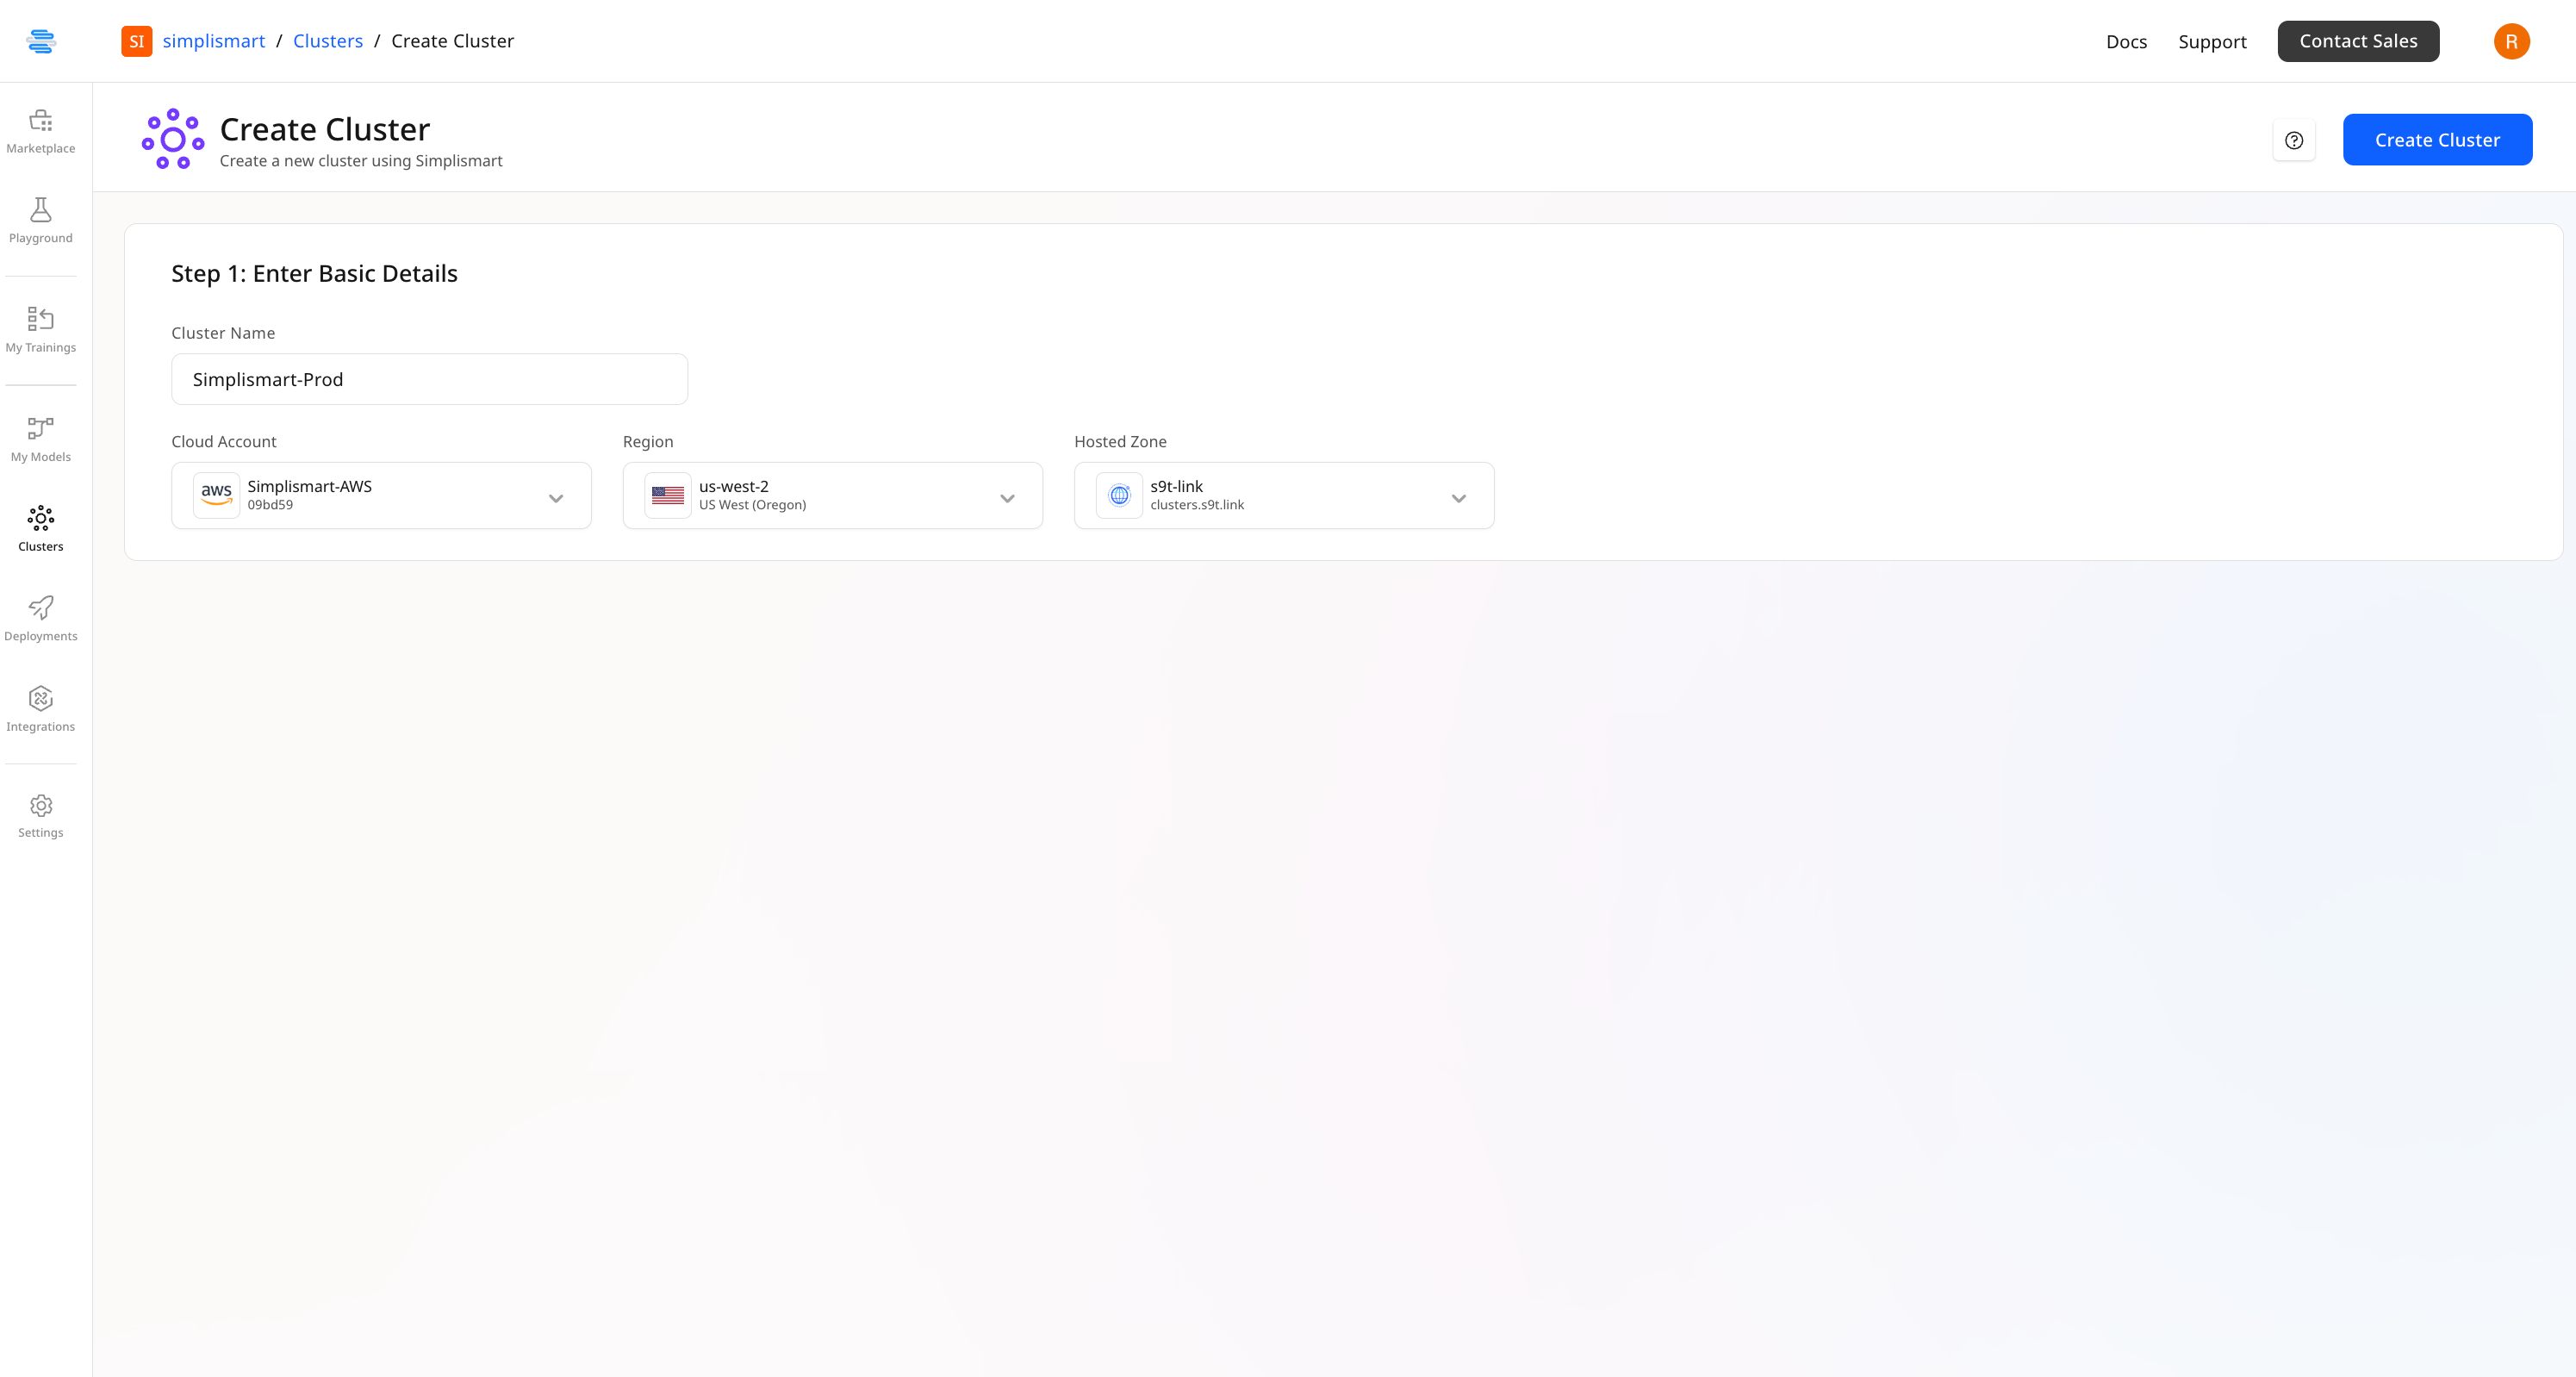
* **Name**: Provide a name for your cluster. This name will become your cluster slug.
* **Cloud Account**: Select the cloud account where the cluster will be created.
* **Region**: Choose the region for your cluster.
* **Hosted Zone**: Select the appropriate hosted zone.
After entering all the necessary details, click on the **Create Cluster** button to create the cluster.
 ***
## Node Group Addition
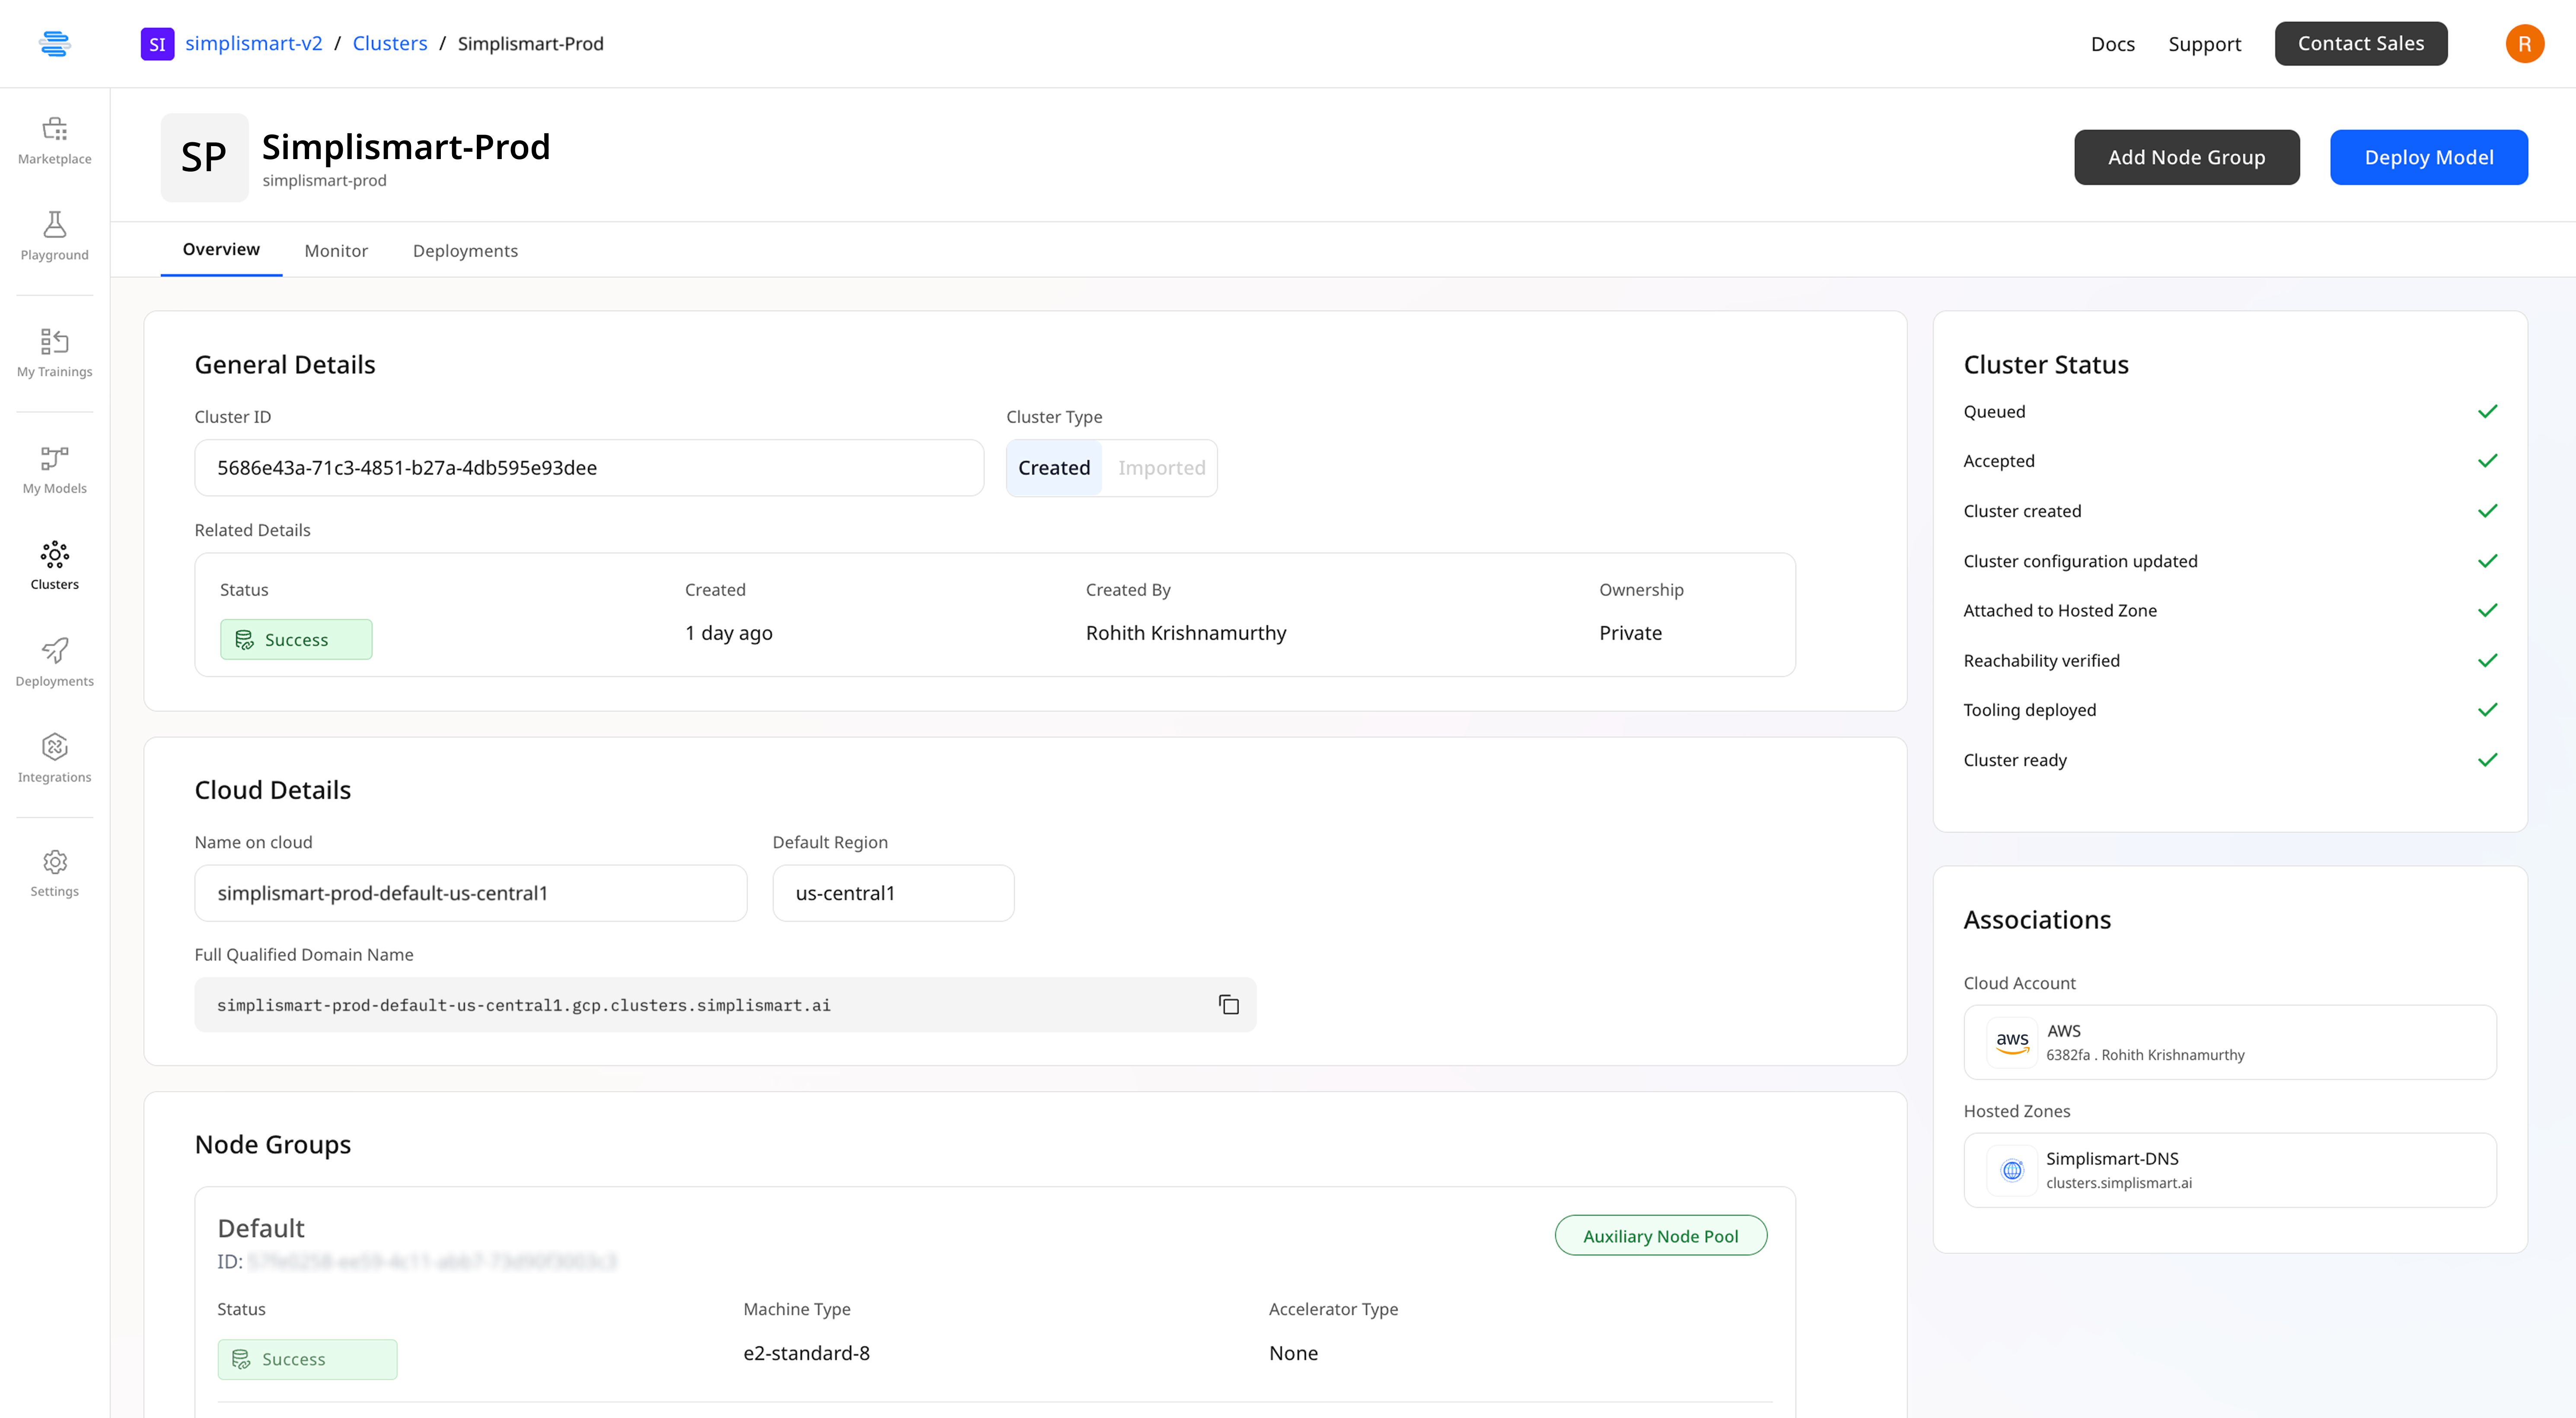
* When you see the **Success** status, it means your cluster including the **Auxiliary node pool** is fully provisioned, allowing you to move forward with creating a **Node Group**.
***
## Node Group Addition
* When you see the **Success** status, it means your cluster including the **Auxiliary node pool** is fully provisioned, allowing you to move forward with creating a **Node Group**.
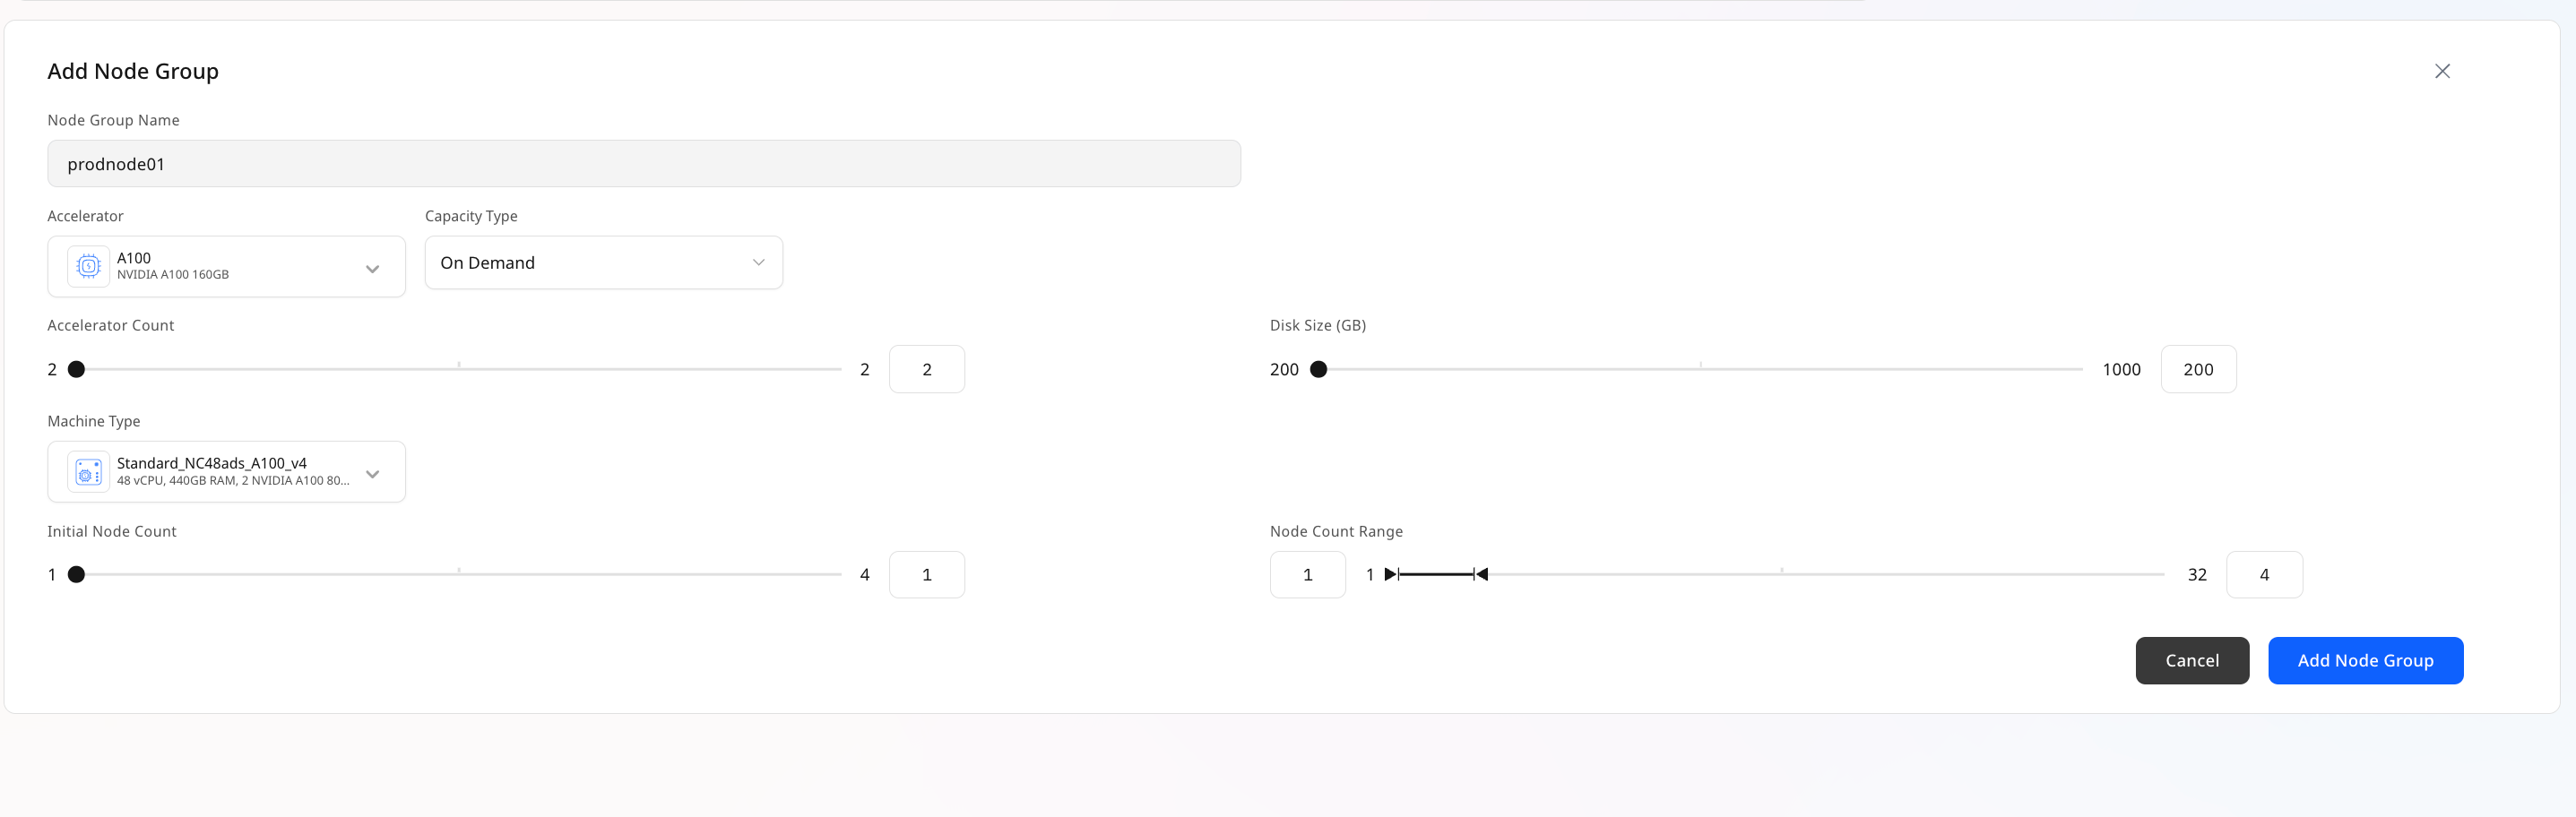
 * Click on the **Add Node Group** button on the top-right.
* **Name**: Provide a descriptive name for your node group.
* **Accelerator**: Select the appropriate accelerator for your workloads.
* **Capacity Type:** You can choose the node to be a **On Demand** instance or a **Spot instance**.
* **Machine Type**: Choose the machine size that meets your performance requirements.
* **Scaling Configuration**: Define the minimum and maximum number of nodes.
* Click on the **Add Node Group** button on the top-right.
* **Name**: Provide a descriptive name for your node group.
* **Accelerator**: Select the appropriate accelerator for your workloads.
* **Capacity Type:** You can choose the node to be a **On Demand** instance or a **Spot instance**.
* **Machine Type**: Choose the machine size that meets your performance requirements.
* **Scaling Configuration**: Define the minimum and maximum number of nodes.
 ***
## **Viewing Cluster Details**
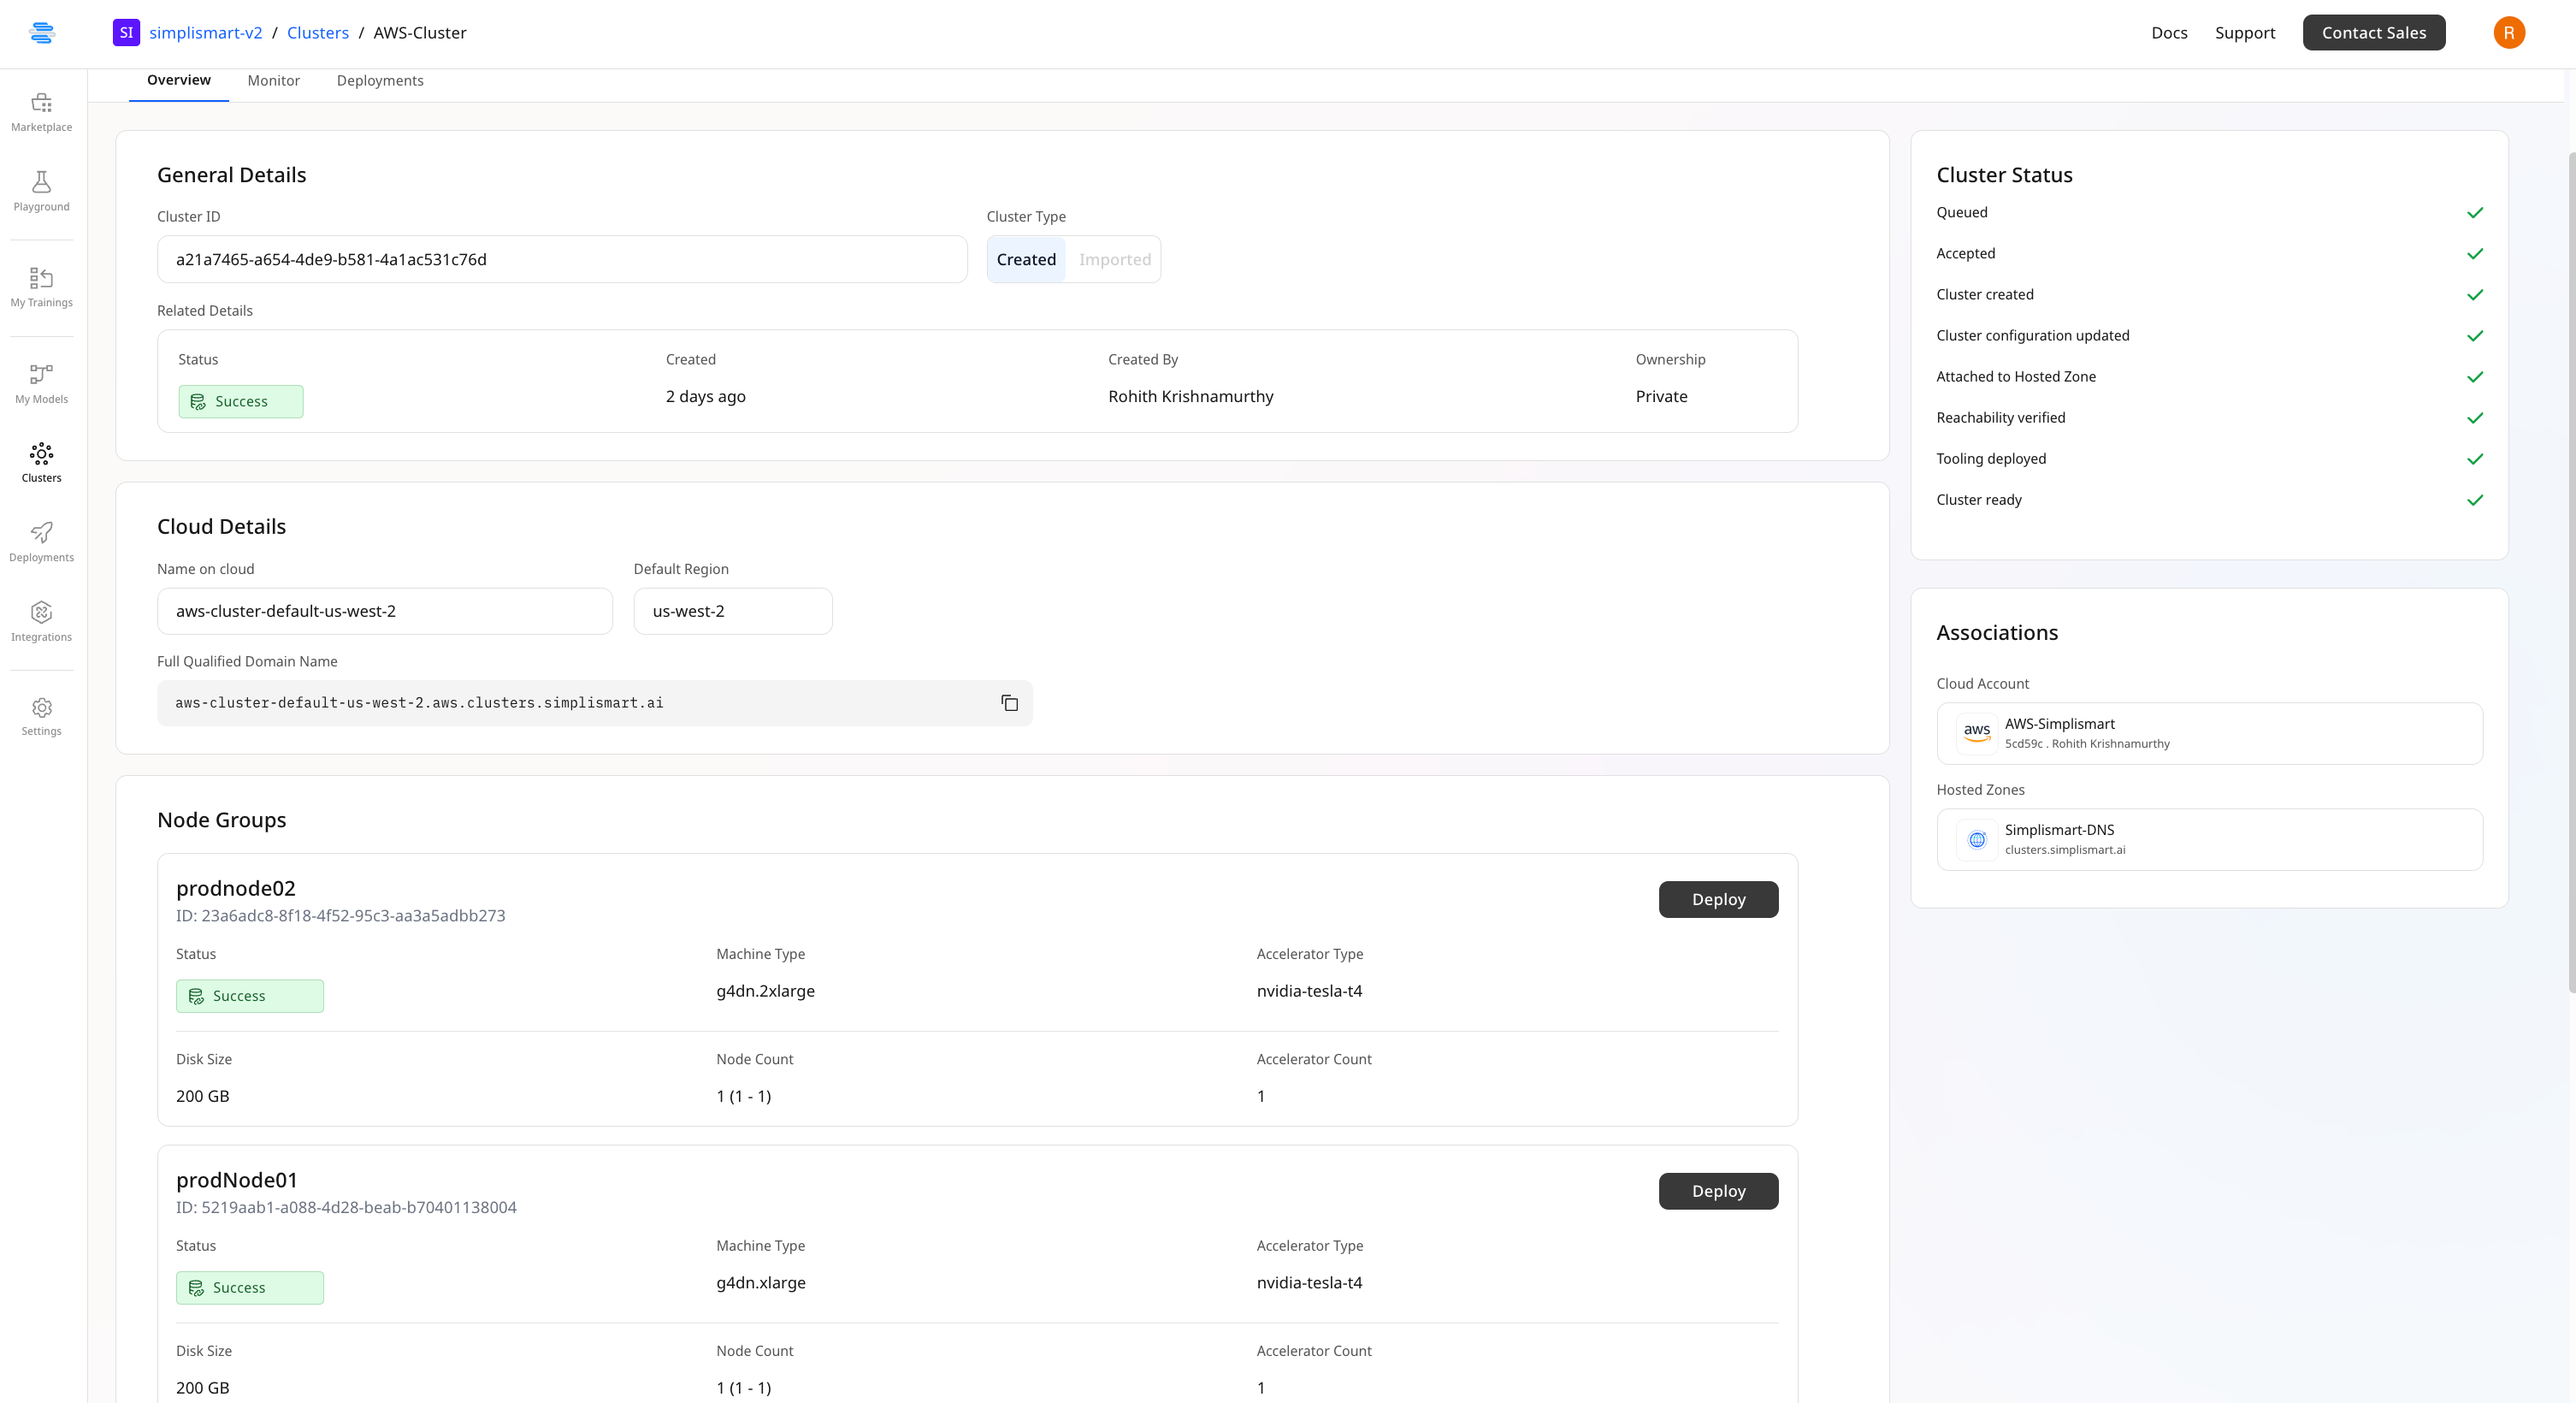
* The status will show `success` once the node group is successfully created and the cluster is now ready for use.
* Once the **Node Group** is created, you can view its information by clicking on the **Overview** tab.
* Click on the **Deploy** button to deploy the model to the node. You can find the deployment page [here](/model-suite/deployments/creating-a-deployment).
***
## **Viewing Cluster Details**
* The status will show `success` once the node group is successfully created and the cluster is now ready for use.
* Once the **Node Group** is created, you can view its information by clicking on the **Overview** tab.
* Click on the **Deploy** button to deploy the model to the node. You can find the deployment page [here](/model-suite/deployments/creating-a-deployment).
 ***
## **Monitoring your cluster**
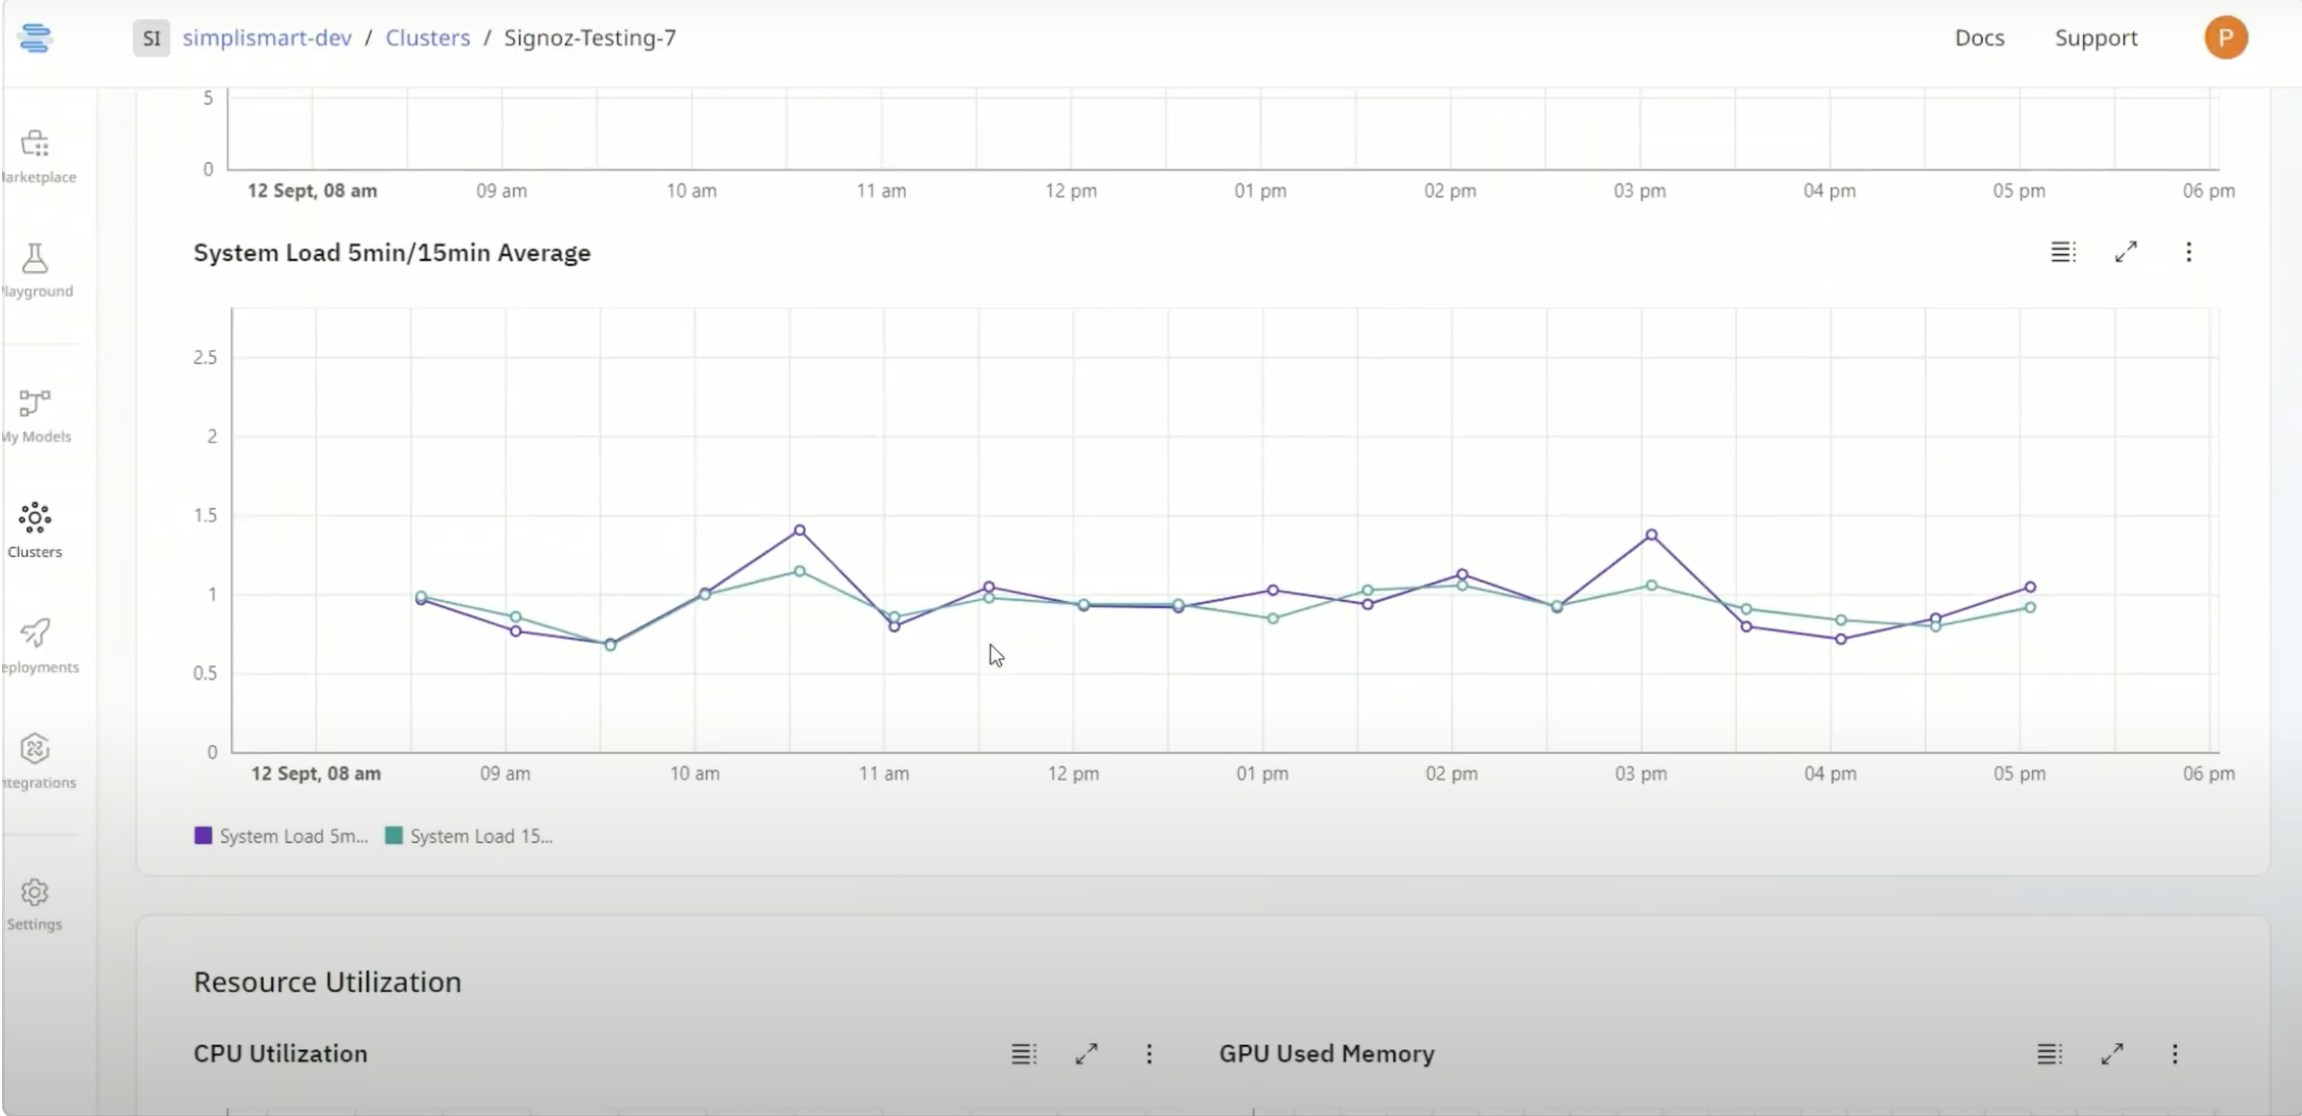
You can track the overall usage and performance of your cluster to ensure optimal operation, by clicking on the **Monitor** tab.
***
## **Monitoring your cluster**
You can track the overall usage and performance of your cluster to ensure optimal operation, by clicking on the **Monitor** tab.
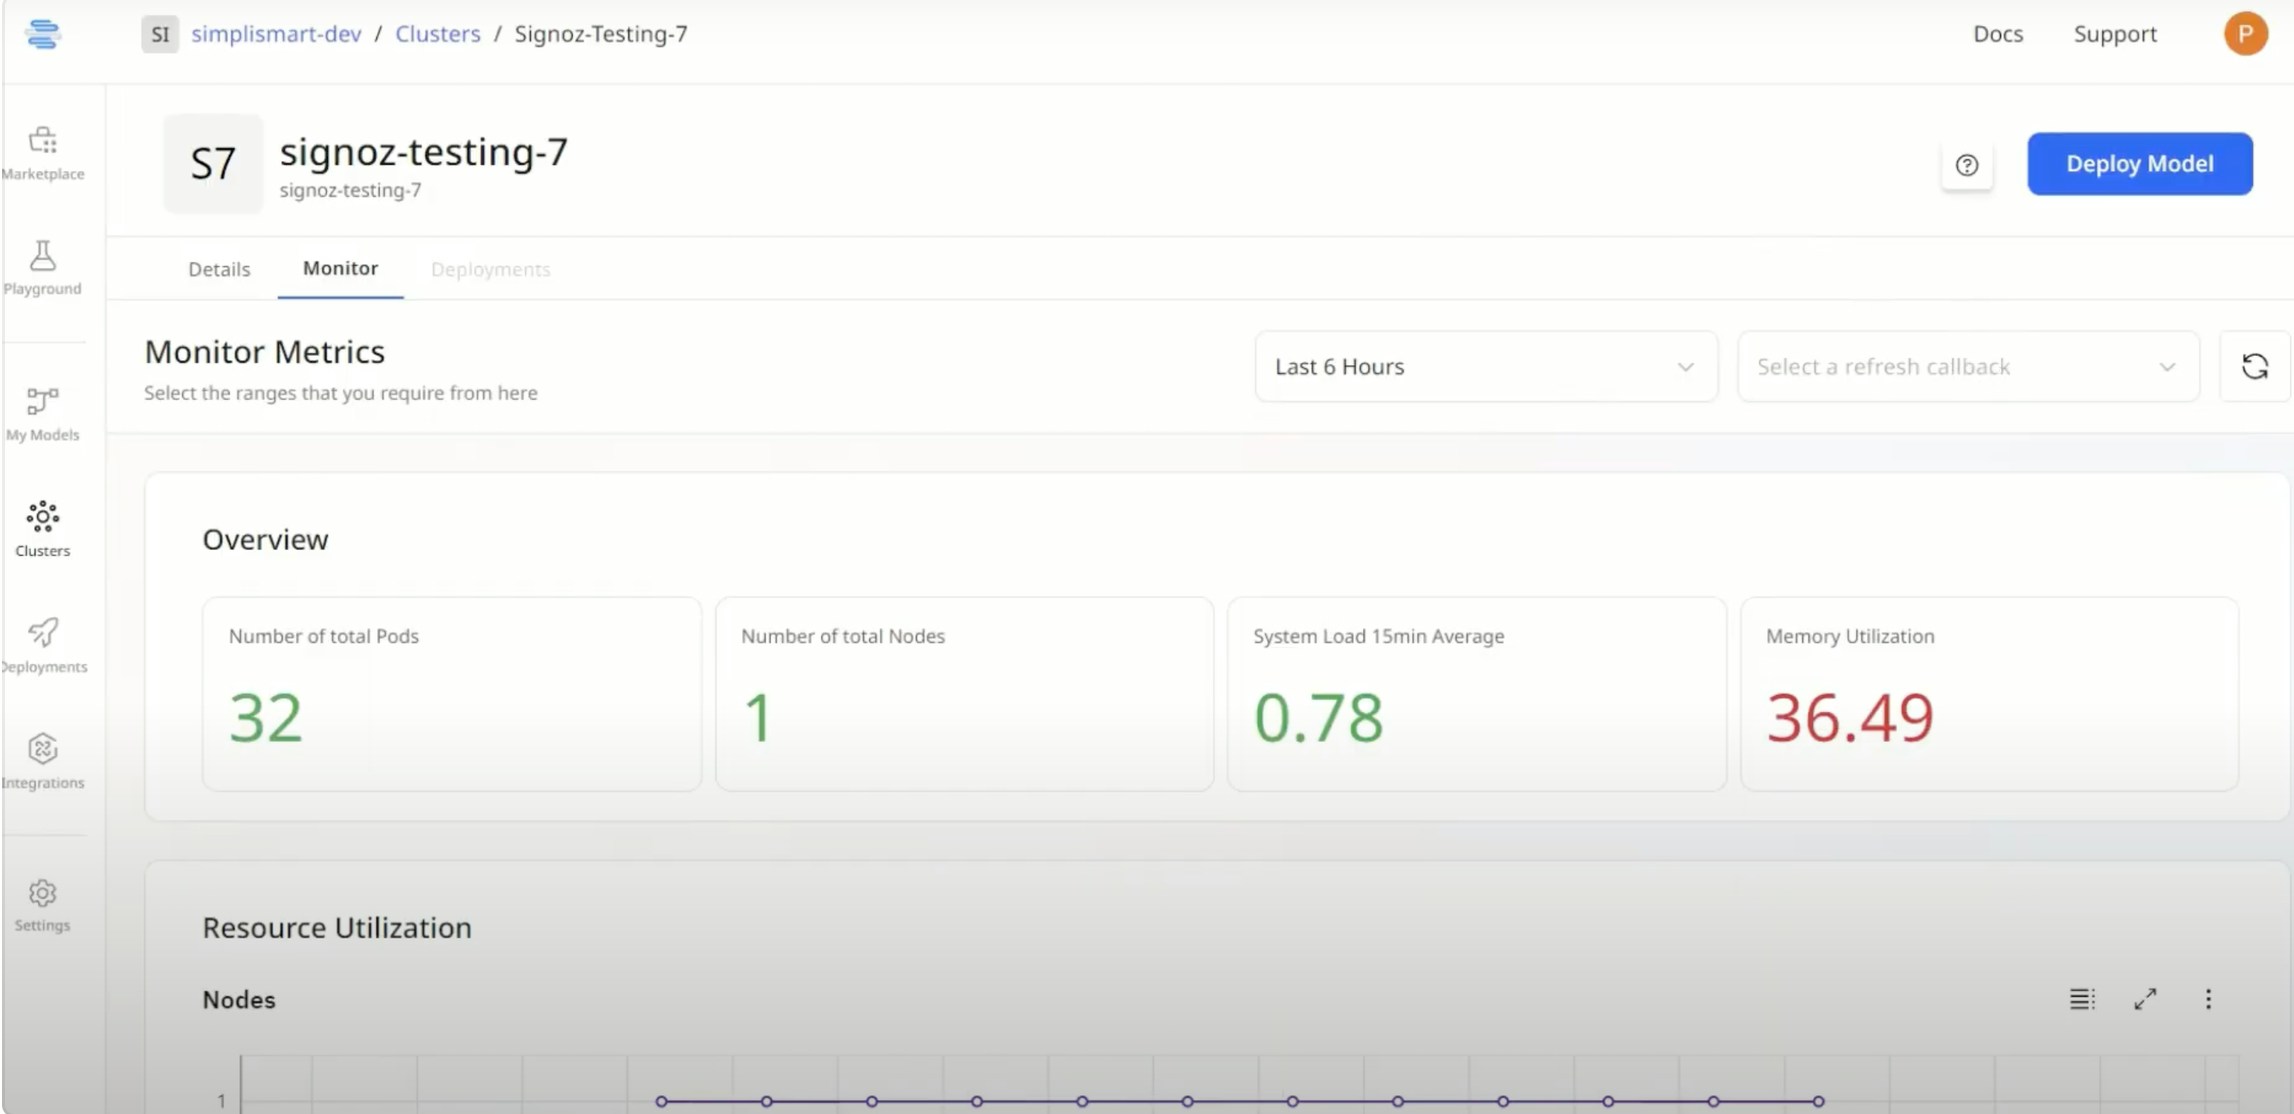 * **Date Range**: Select the date range for which you want to view monitoring metrics.
* **Pod Info**: View detailed information about the pods in your cluster.
* **GPU and GRAM Utilization**: Monitor the usage and performance of GPUs and GRAM.
* **Date Range**: Select the date range for which you want to view monitoring metrics.
* **Pod Info**: View detailed information about the pods in your cluster.
* **GPU and GRAM Utilization**: Monitor the usage and performance of GPUs and GRAM.